My sister is renovating her house and I have been traveling up to NC to help out when I can. This weekend I decided I wanted to do something big to help her see her hard work is worth the sore back and headaches so we went to Lowes and found this great product…. Cherry Vinyl Plank Flooring – it is a stick-on vinyl tile that looks and feels like real wood at $1.18/sq ft. and it super simple to install. I convinced her it would look great with the real wood floors that she restained in the rest of the house that are similar in color to the planks. The kitchen is separated from the real wood floors by a dining room so the new planks will not be directly beside the old floors. We make the purchase along with some glass tiles and grout to do the backsplash (another post is imminent). Time to get to work!!
Shop Style Selections 6″W x 48″L Cherry Luxury Vinyl Plank at Lowes.com.


I measured the room and drew a line to indicate the middle from the center of the sink. This was the logical place to start since the doorway was directly across from the sink. I began laying the planks at an angle with the short end placed on the marked line with the ends at a 90 degree angle to each other…

It already is beginning to look great. Each piece is placed tightly against each other and with my sister’s help we started making a chevron pattern with the planks. This stuff was really sticky which is great because it should stay put but it got all over our hands, I just used the stuff that takes stickers off of surfaces to wash my hands every 5 planks or so.

About 3/4 of the way through the project. Time to start measuring the planks that need to be cut to fit against the wall, this part was time consuming but fairly easy after making a template to help cut the angle. After a few mistakes I figured out that going ahead and placing a plank first then cutting against the wall worked better than cutting first because I usually had it too long and had to cut again anyway. After that it went down much quicker.

The zig zag pattern looks great, cannot wait to see the finished kitchen!
- This looks even better in person, the tiles fit together perfectly, such a quality product. I want to try this in my own basement, it looks like real wood at a fraction of the cost and labor!

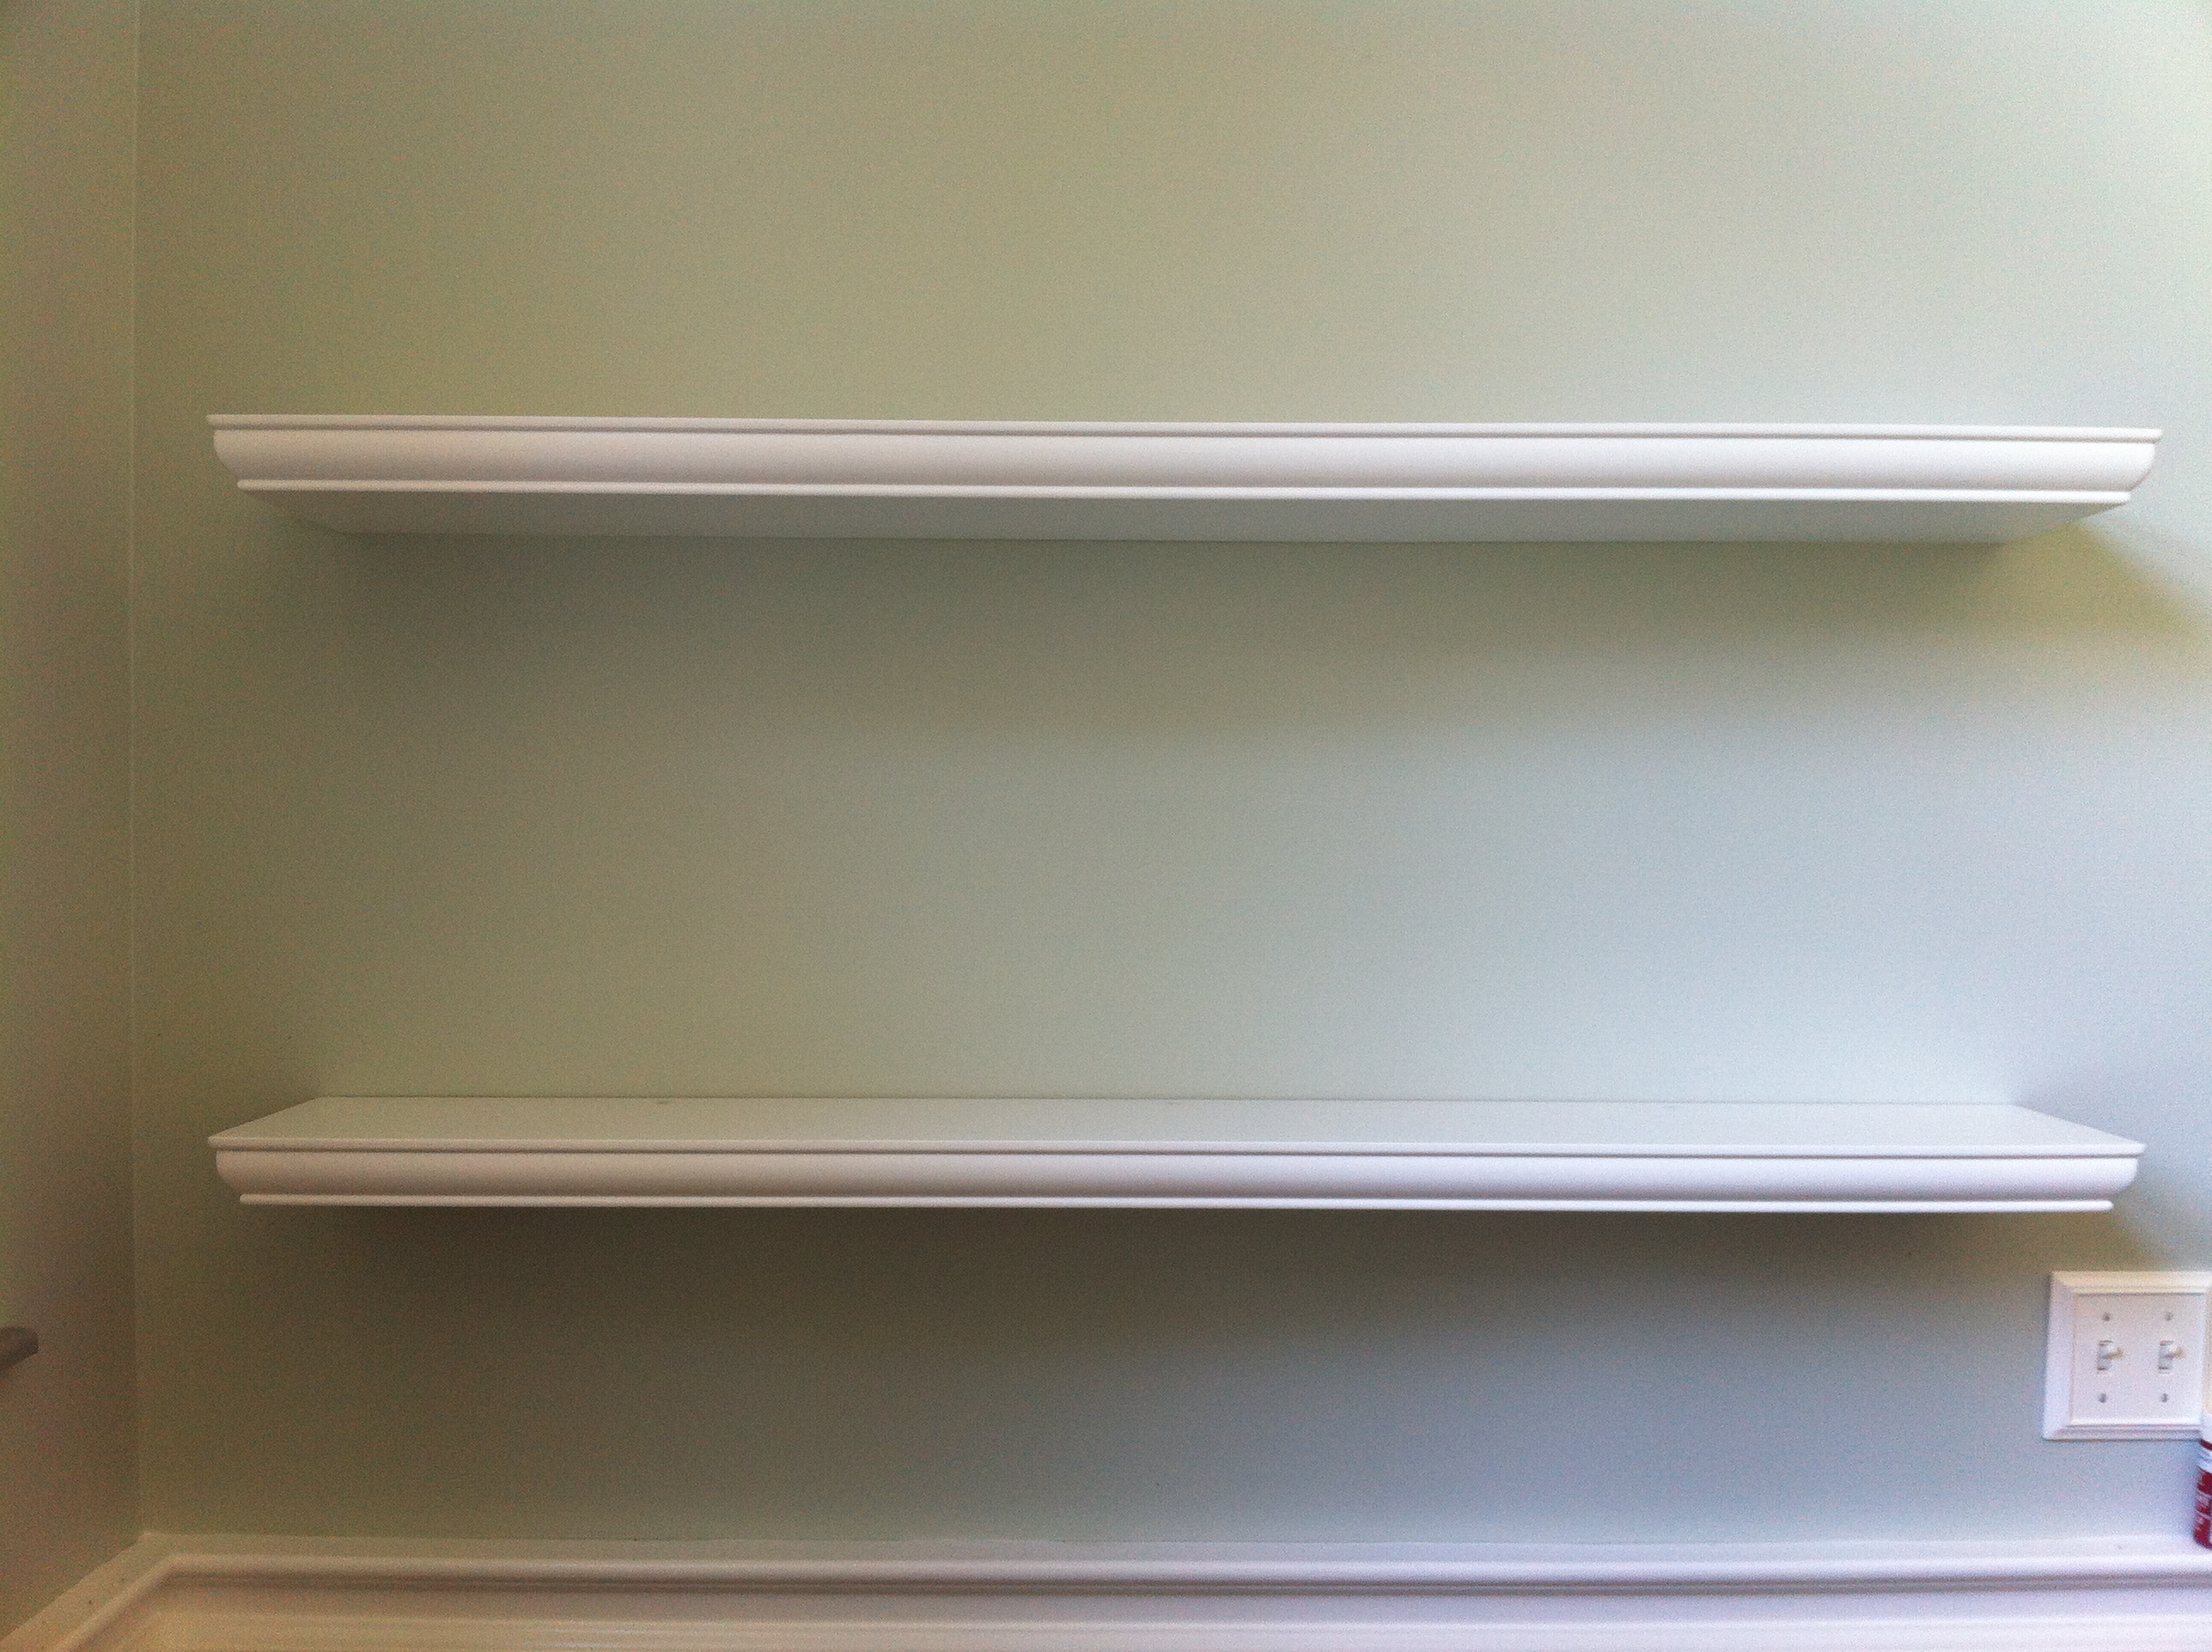
I bought these 48″ floating shelves from Lowes and they will definitely help me get my desk organized and give me a lot more space to spread out. They were very easy to install and everything fits perfectly.

I arranged a few things on the shelves, looking pretty good, I love that my brushes fit between the top and bottom shelves and the pottery that my good friend Alice made looks beautiful holding them!
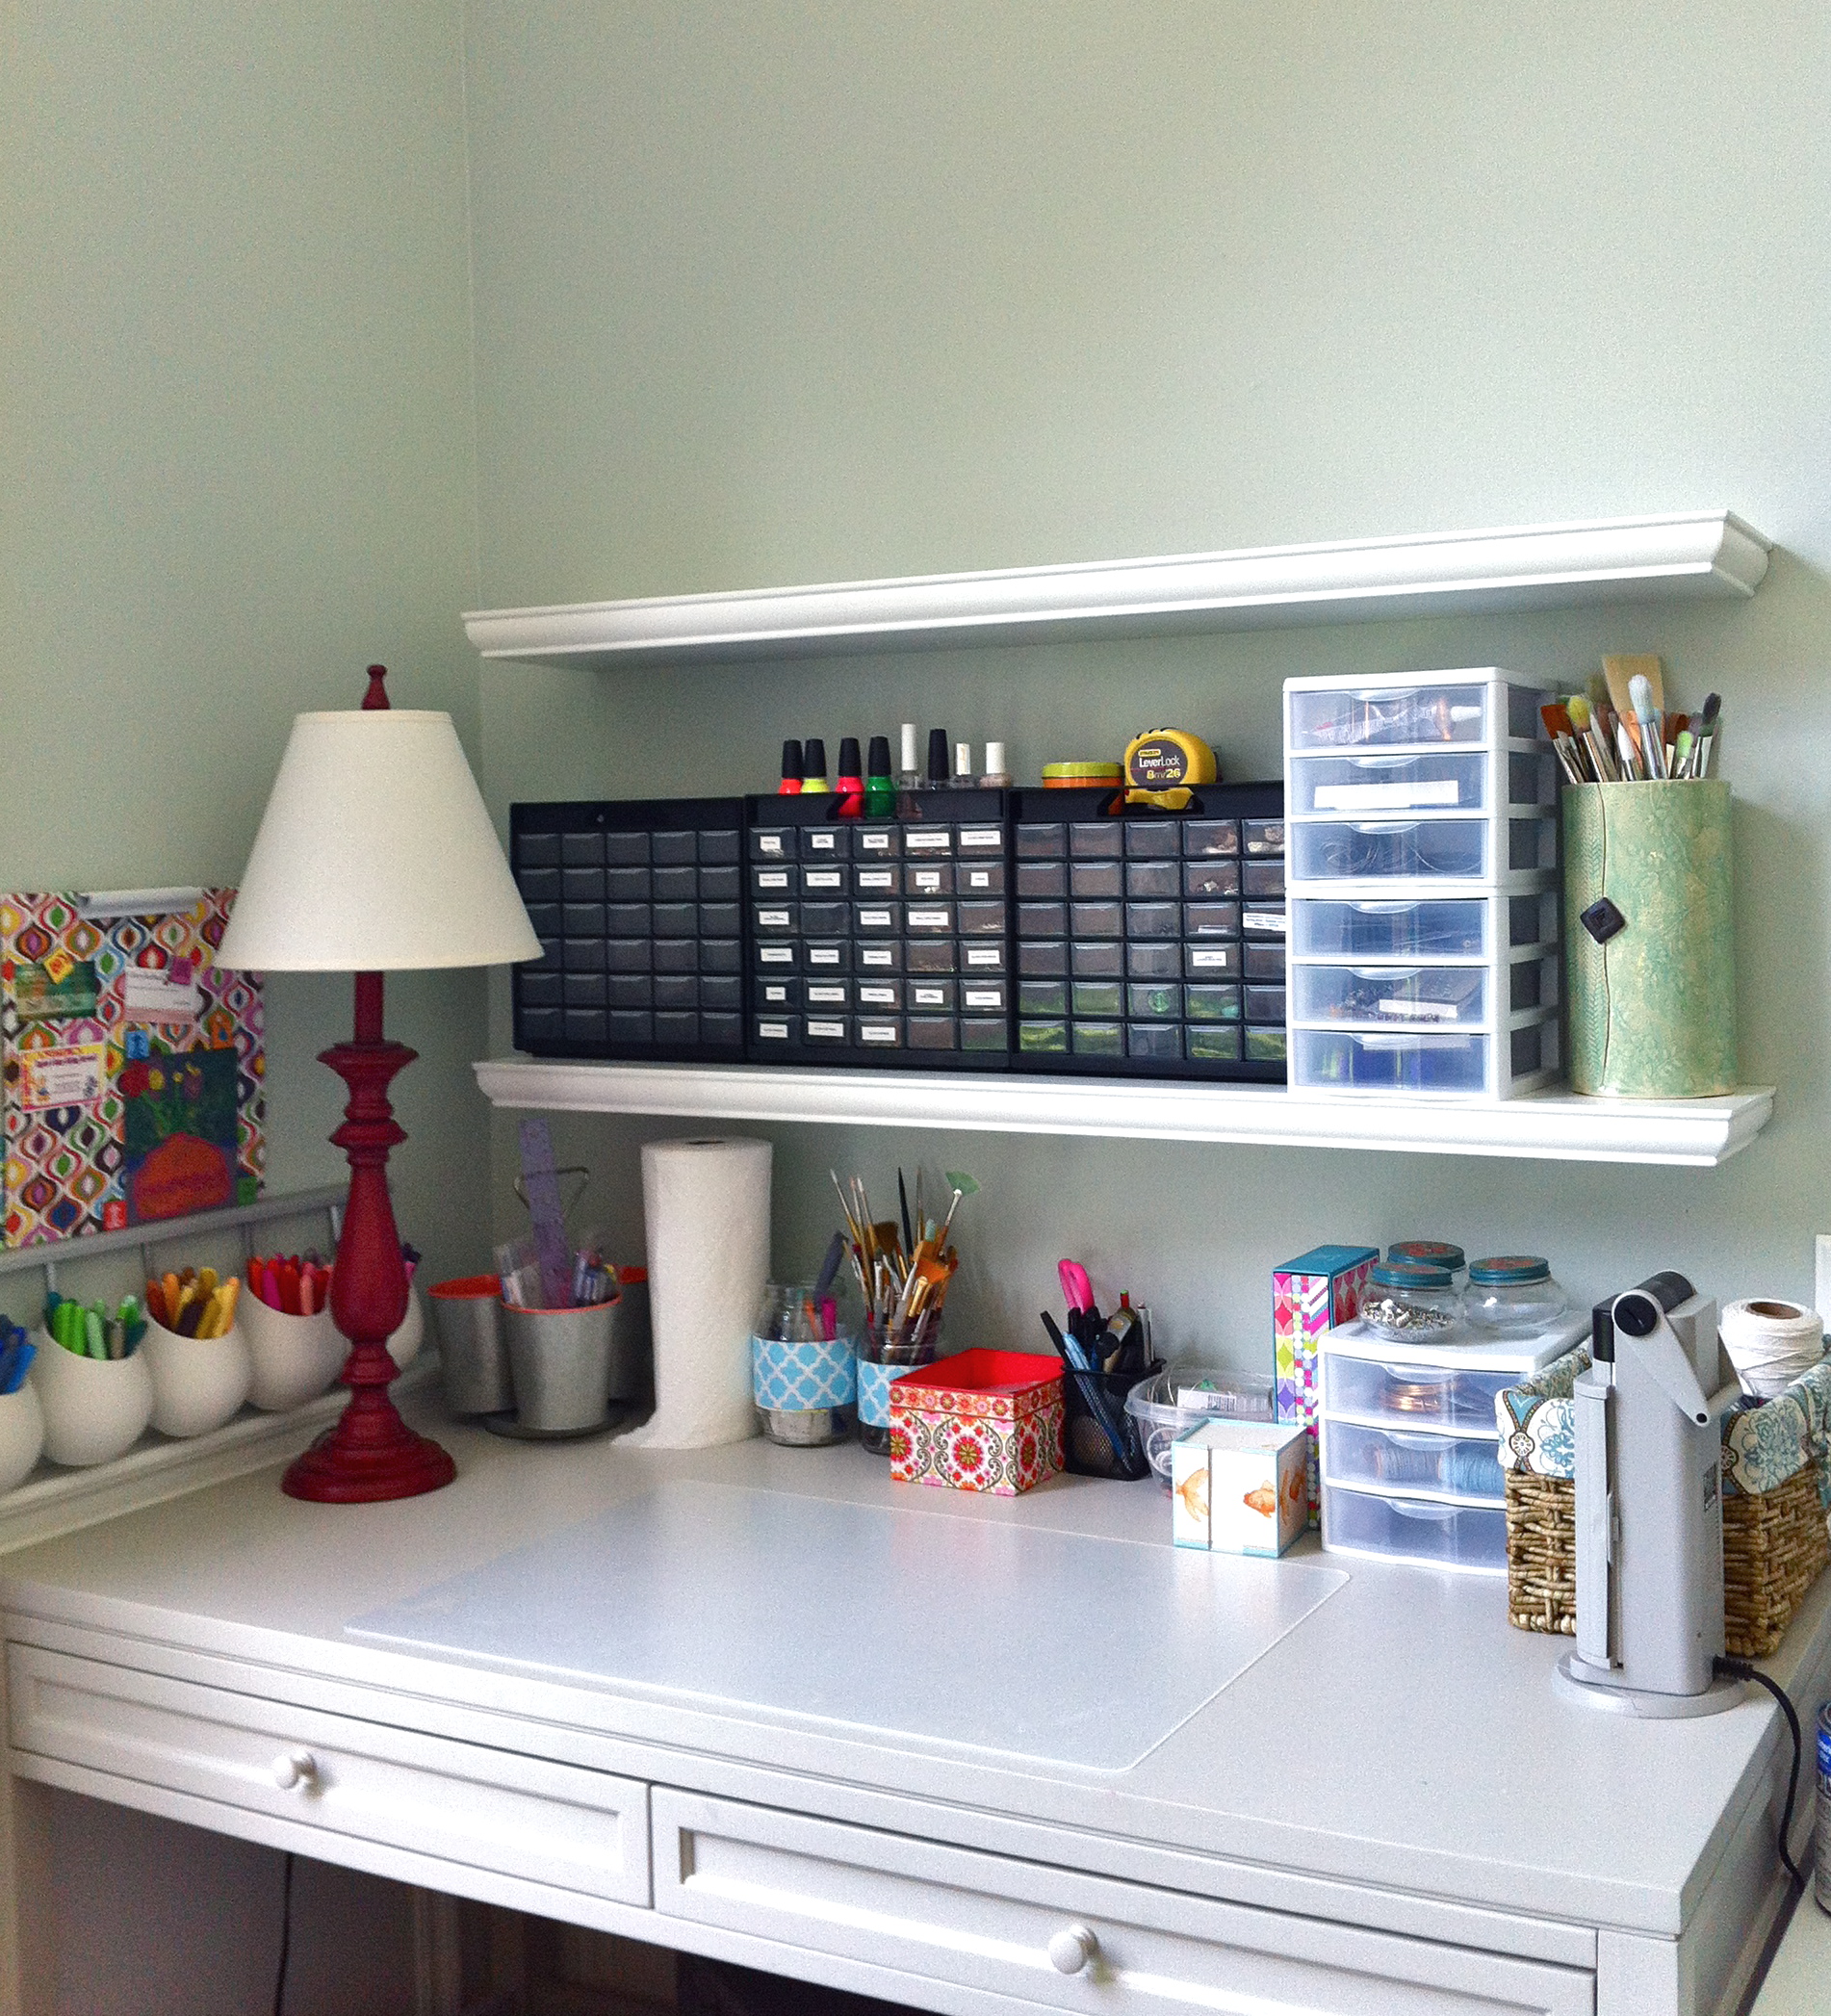
My mom recently gave me an old tool box that belonged to my “Papaw Sellers” and I love it on my desk, it holds my pens and pencils without showing the containers that are not very attractive. I could not ask for a better spot for it!


The replacement windows are going to be a little darker than the paint we have now so I painted the door frame to see how it will look with the brick, I think I like it better than the lighter beige…

Before trim color – light beige

The “Then and Now” Lake Murray map drawn by Ed Fetner that I got framed at Carolina Pottery. I talked with the framer at 3:00 and told her what I wanted and by the time I got home at 4:30 she called me and was finished with it! When I picked it up I was so impressed with the great job she did and especially since she did it in about an hour!
After hanging my newly beaded chandelier I decided to paint the room a pale gray color and I am very happy with the results!


I added the rug to the dining room and I am really liking the contrast between the colors of the rug and the wall color! I have to get rid of the dining table because I have an old quarter-sawn table that I bought a few years ago that I want to put in the room… after I clean off the dust and spider webs!
chandelier, beaded chandelier, beaded lighting, dining room, gray walls, grey, grey dining room, gray dining room, turquoise, blue and gray, green and turquoise, blue and green, dining room makeover, makeover, painting walls, teal dining room
