Noticed that this will be my 100th post, so exciting! Well not really, but it’s a pretty cool milestone at the very least.
I’ve been working on so many projects lately but I want to share one that I’m struggling with. This huge buffet/dresser has been a bit time consuming .
Now that most of the prep work is done and she is ready to paint I’m frozen with indecision on the color. I want to put it in my own house because all of the hard work has caused some attachment. I’m thinking gray or some shade of blue or even yellow.
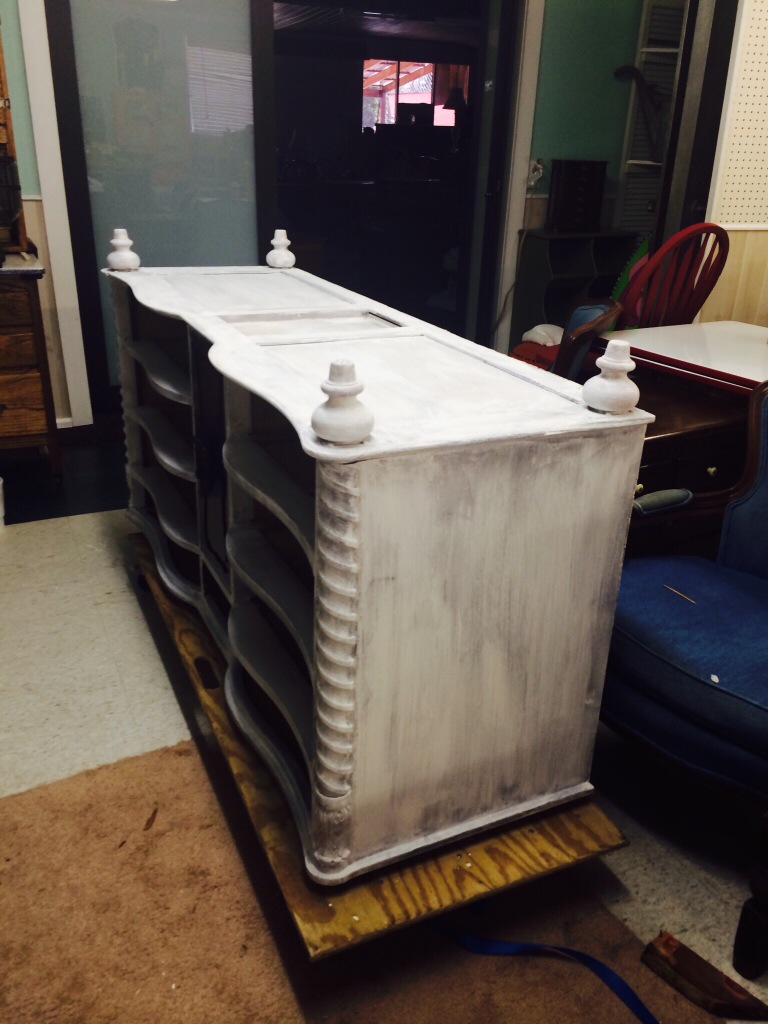


I took the base and legs off and added new feet, it makes it look less formal than it did before, the finish was just awful and chipping off and half the veneer on the top was gone so I had to take the rest off. That was not easy, my friend Alice stopped by and helped. Without her I may have given up. The huge square “knobs” are fantastic and I’m going to keep these. They are very unique and add tons of character. I can’t wait to finally decide on a color and get her home!
My sister Susie and I went on another shopping excursion looking for flooring that met all her requirements…
1. Had to be flexible to accomodate the uneven subfloor
2. Had to be a light color
3. Had to be fairly easy to install
We found some great vinyl, groutable, stick-on tiles at Lowes that fit the bill.

12″ x 24″ Oyster Travertine Travertine Finish Luxury Vinyl Tile
12″ x 24″ Oyster Travertine Travertine Finish Luxury Vinyl Tile
First we rolled on some Kilz primer and then let that dry a couple of hours.
Then I began laying the tiles starting on the wall that will be most visible so that it would be straight in case the walls were not plumb, which since it is an old house they are definitely not plumb!
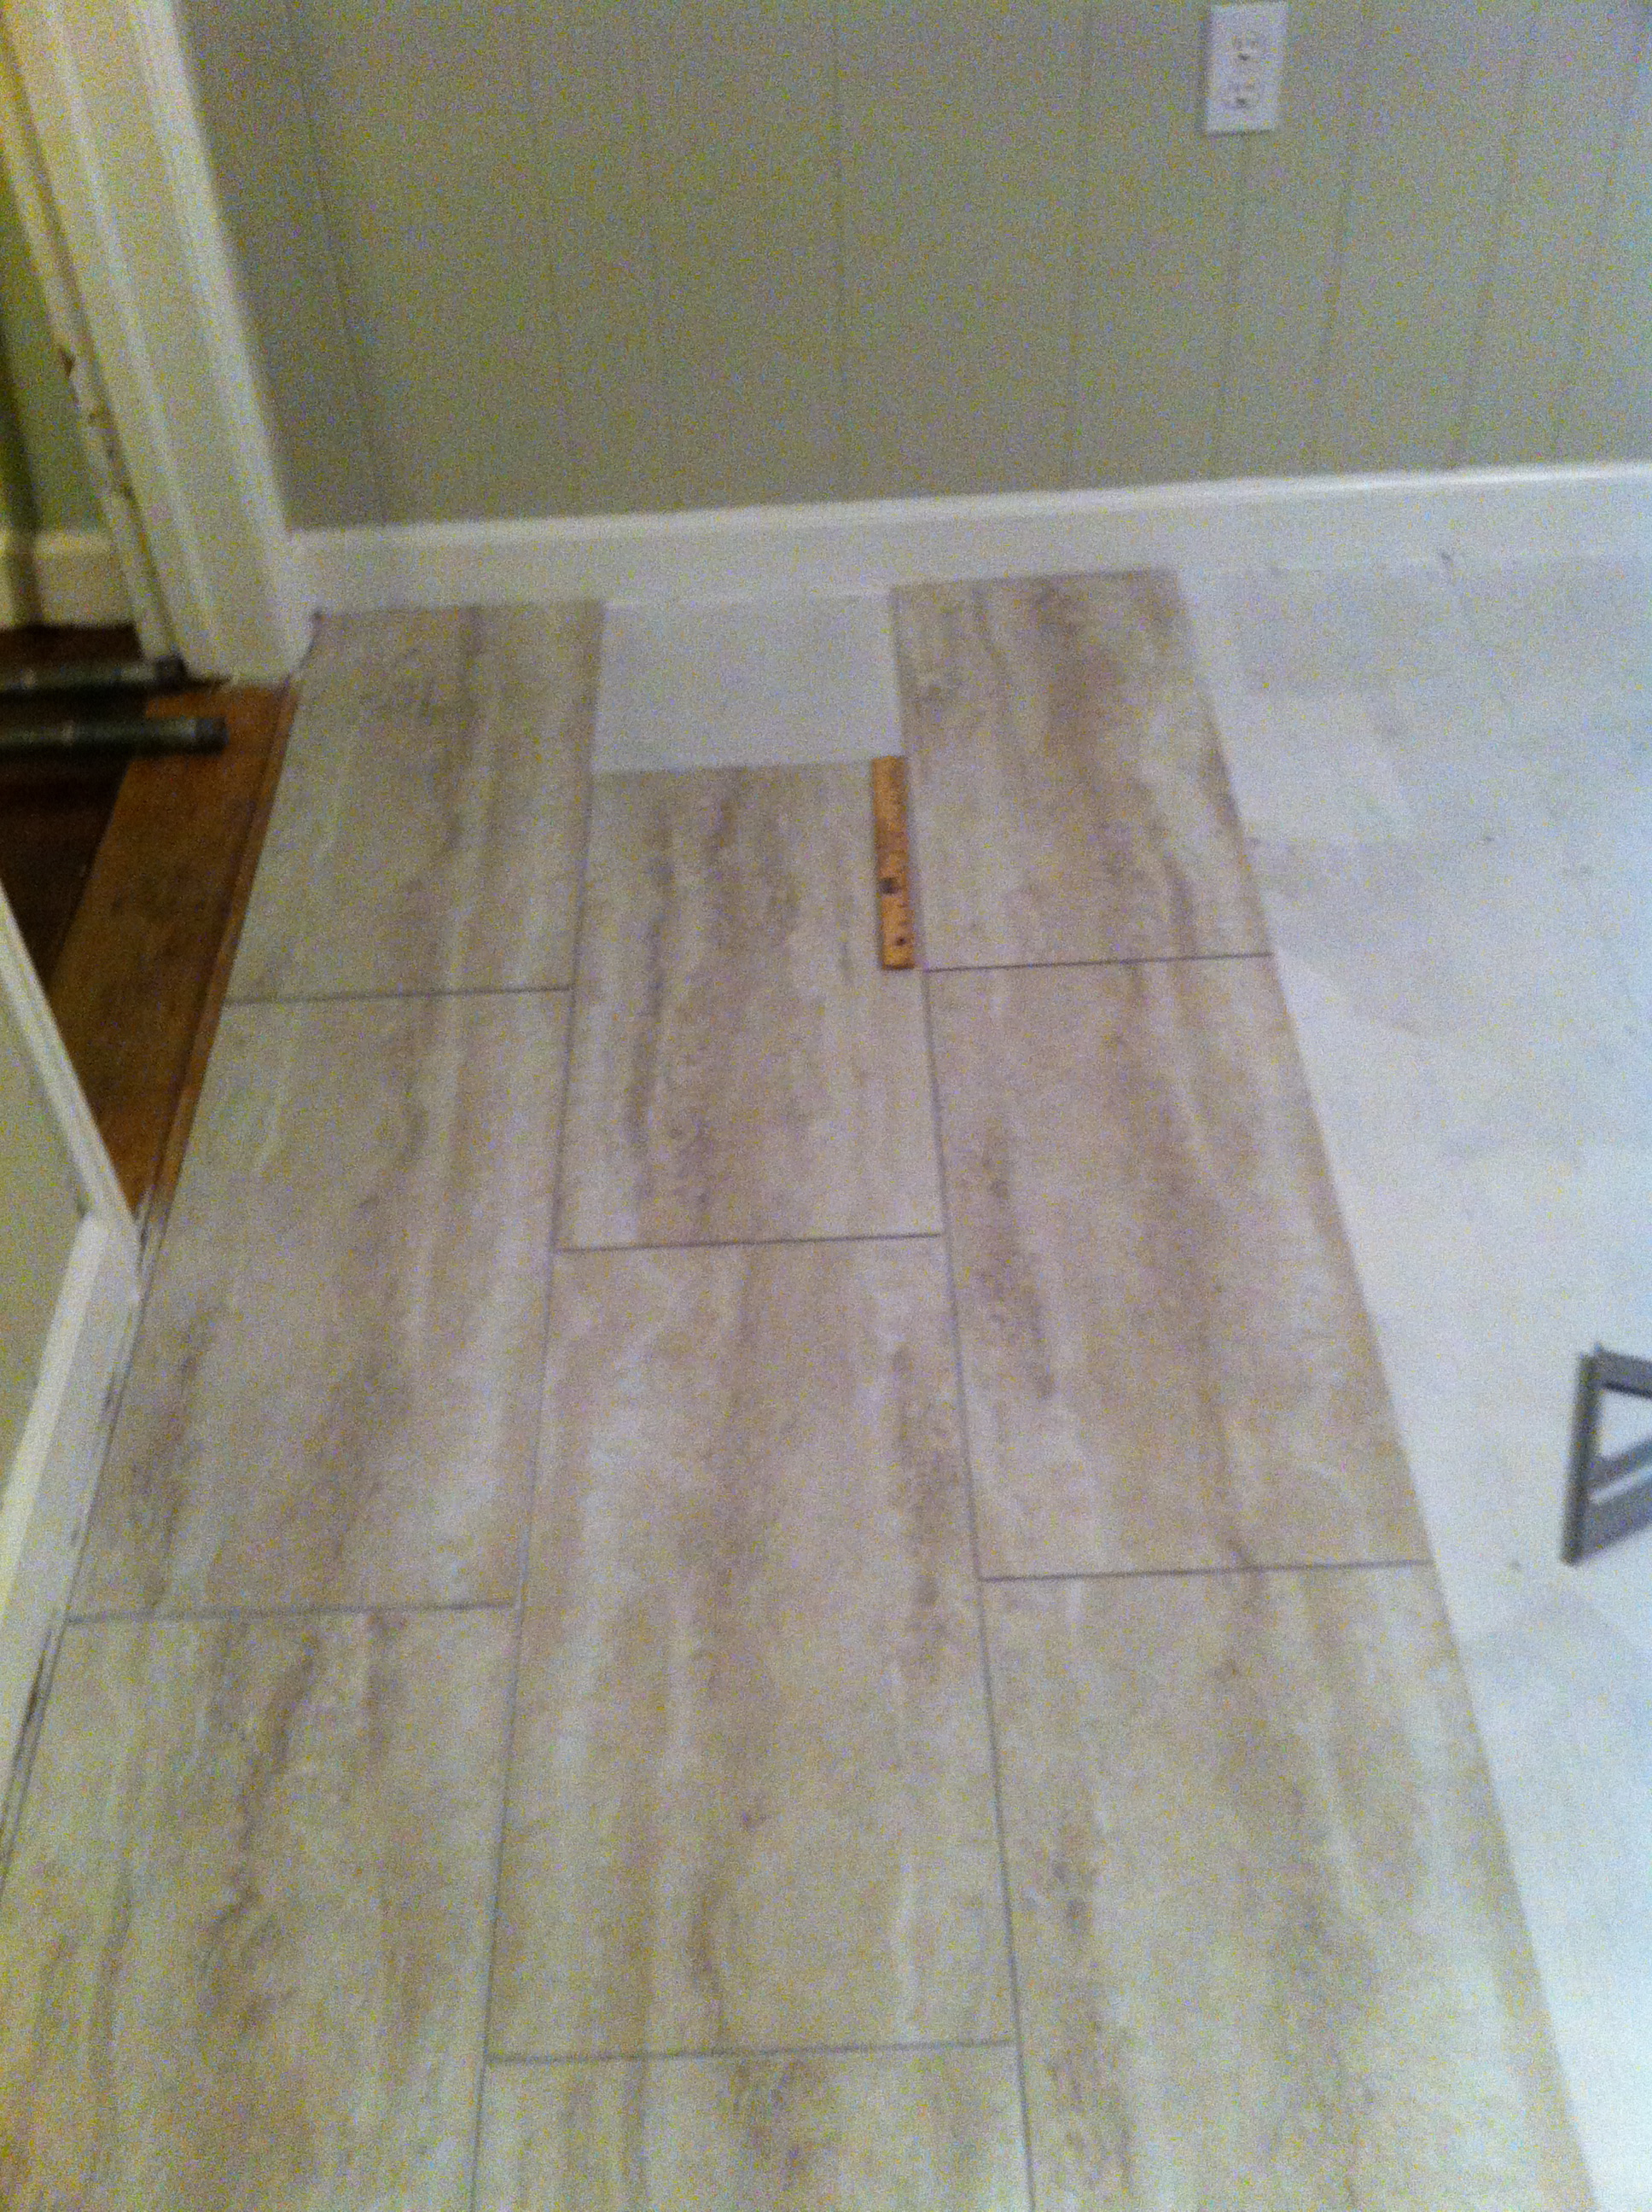
I was able to lay the tiles out without using spacers because I have a pretty good eye but they would help if you don’t feel comfortable not using them. The process went smoothly and I didn’t have to do too much cutting because its a square room. A utility knife cuts it very well.
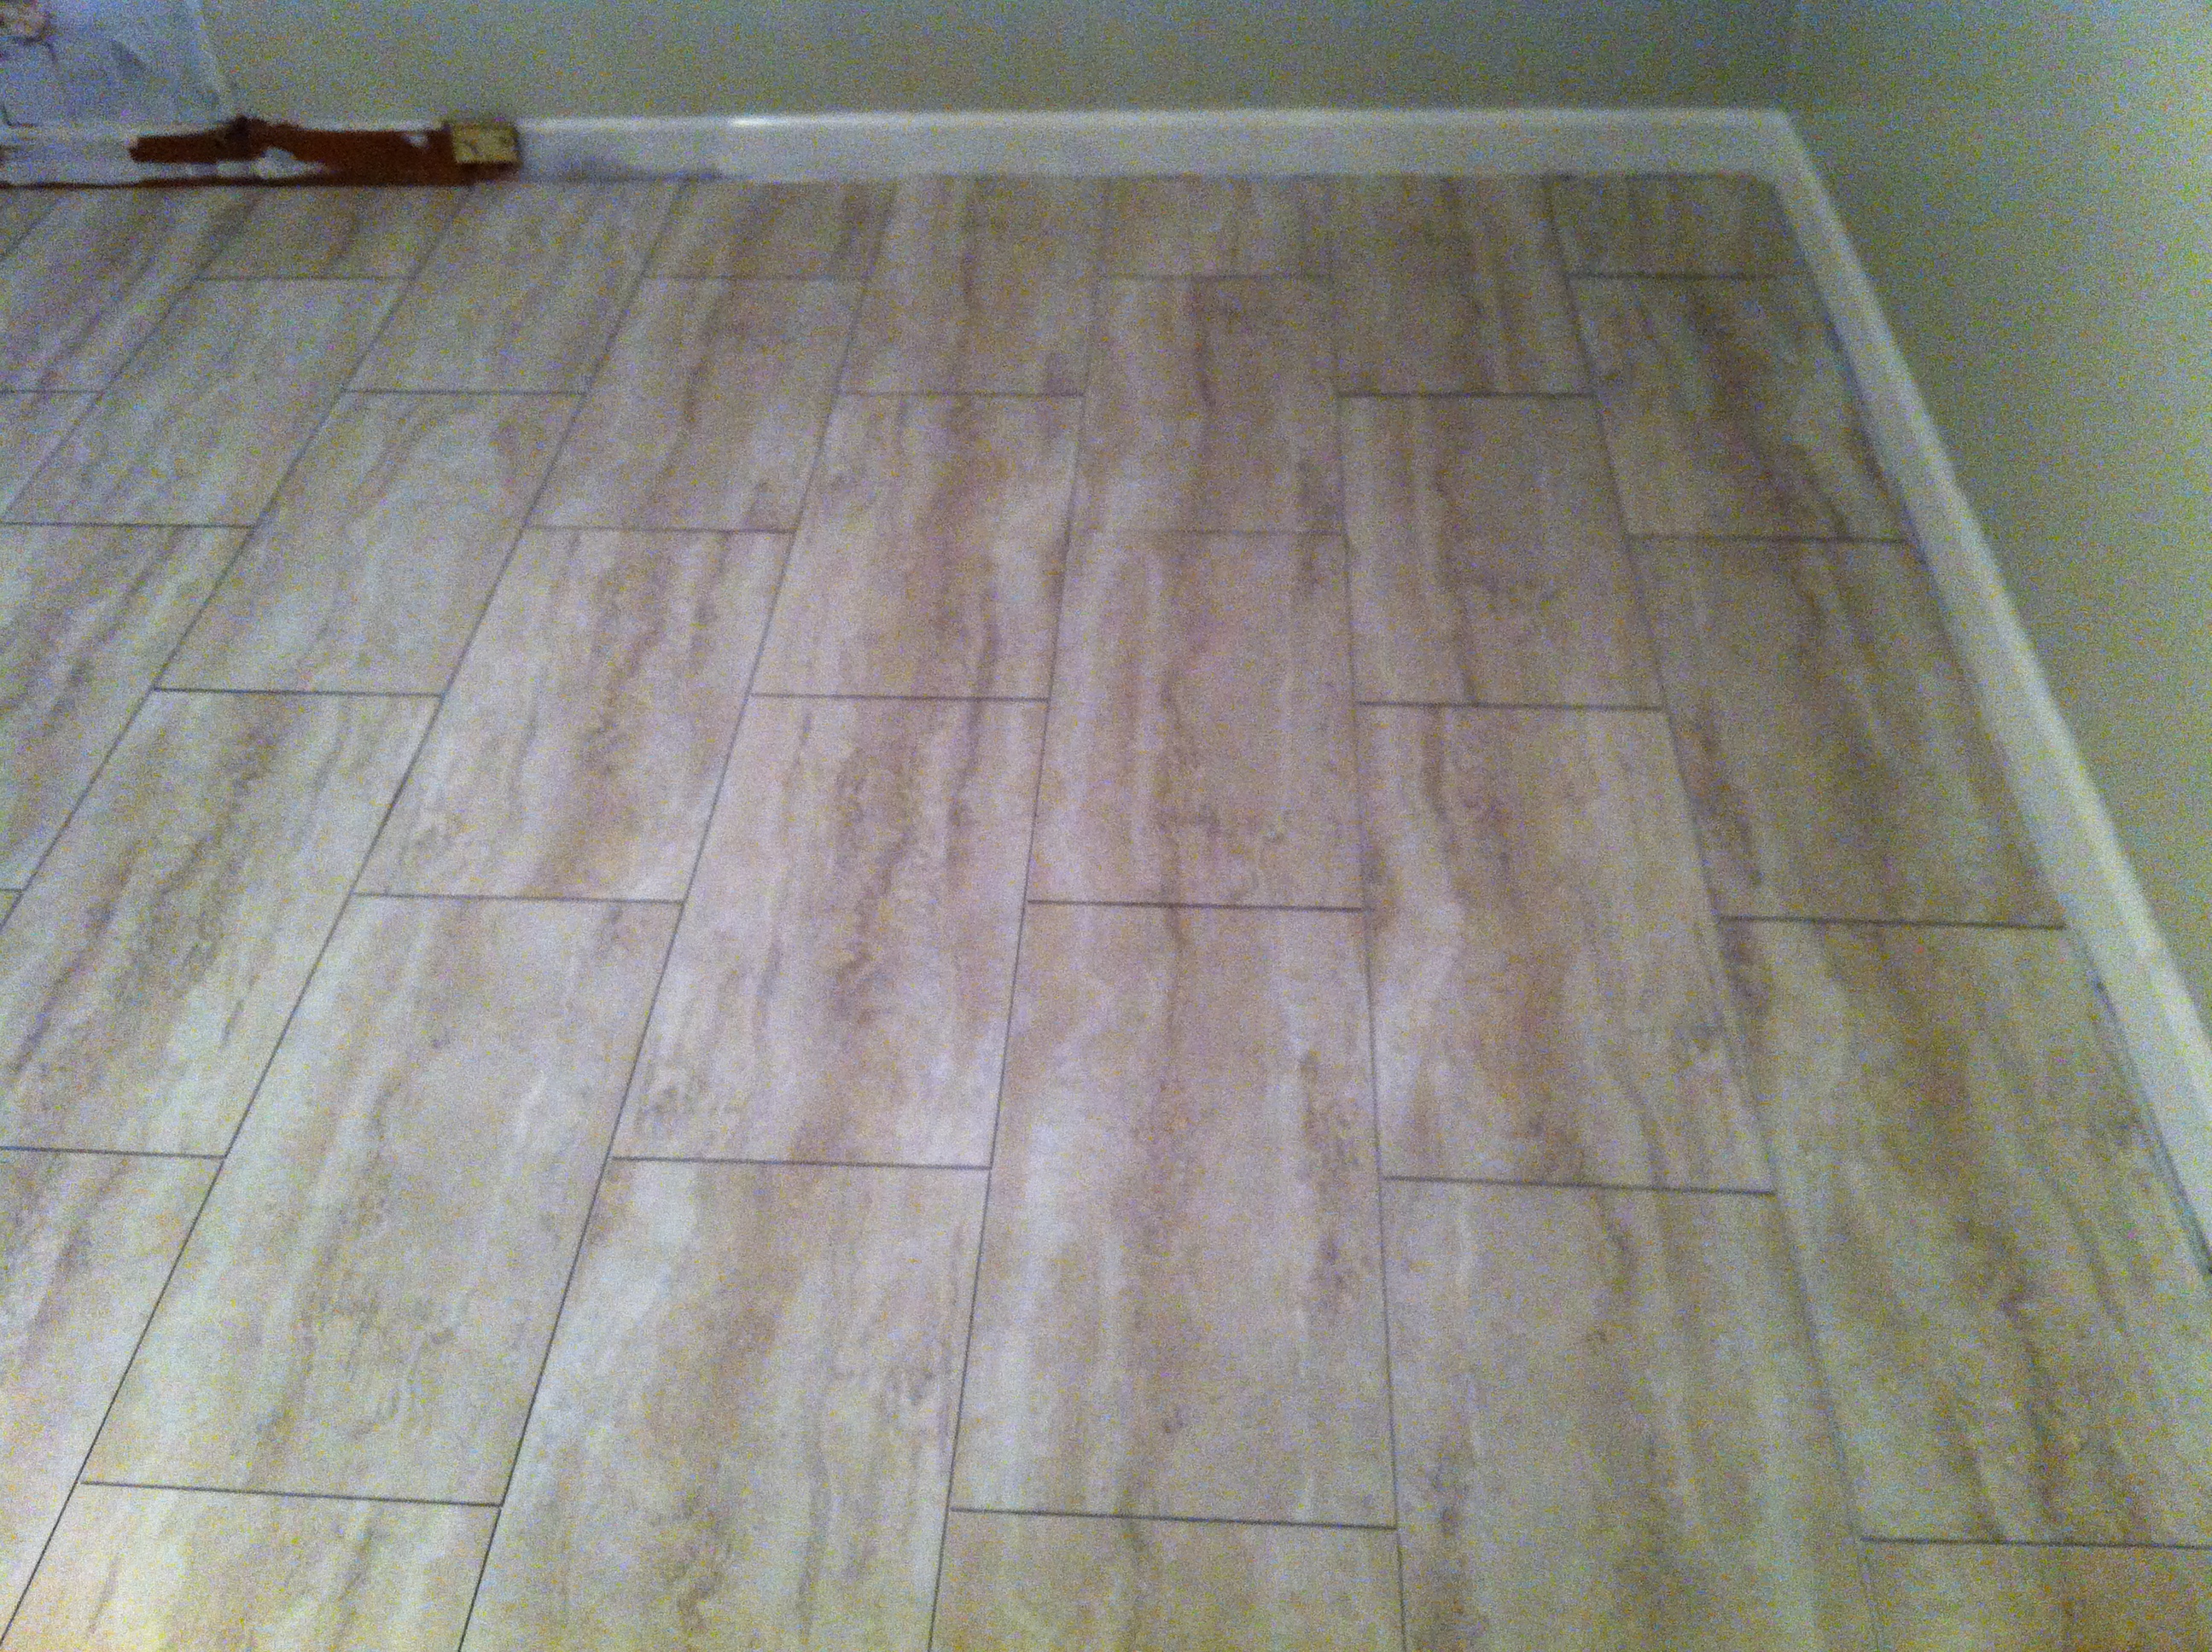
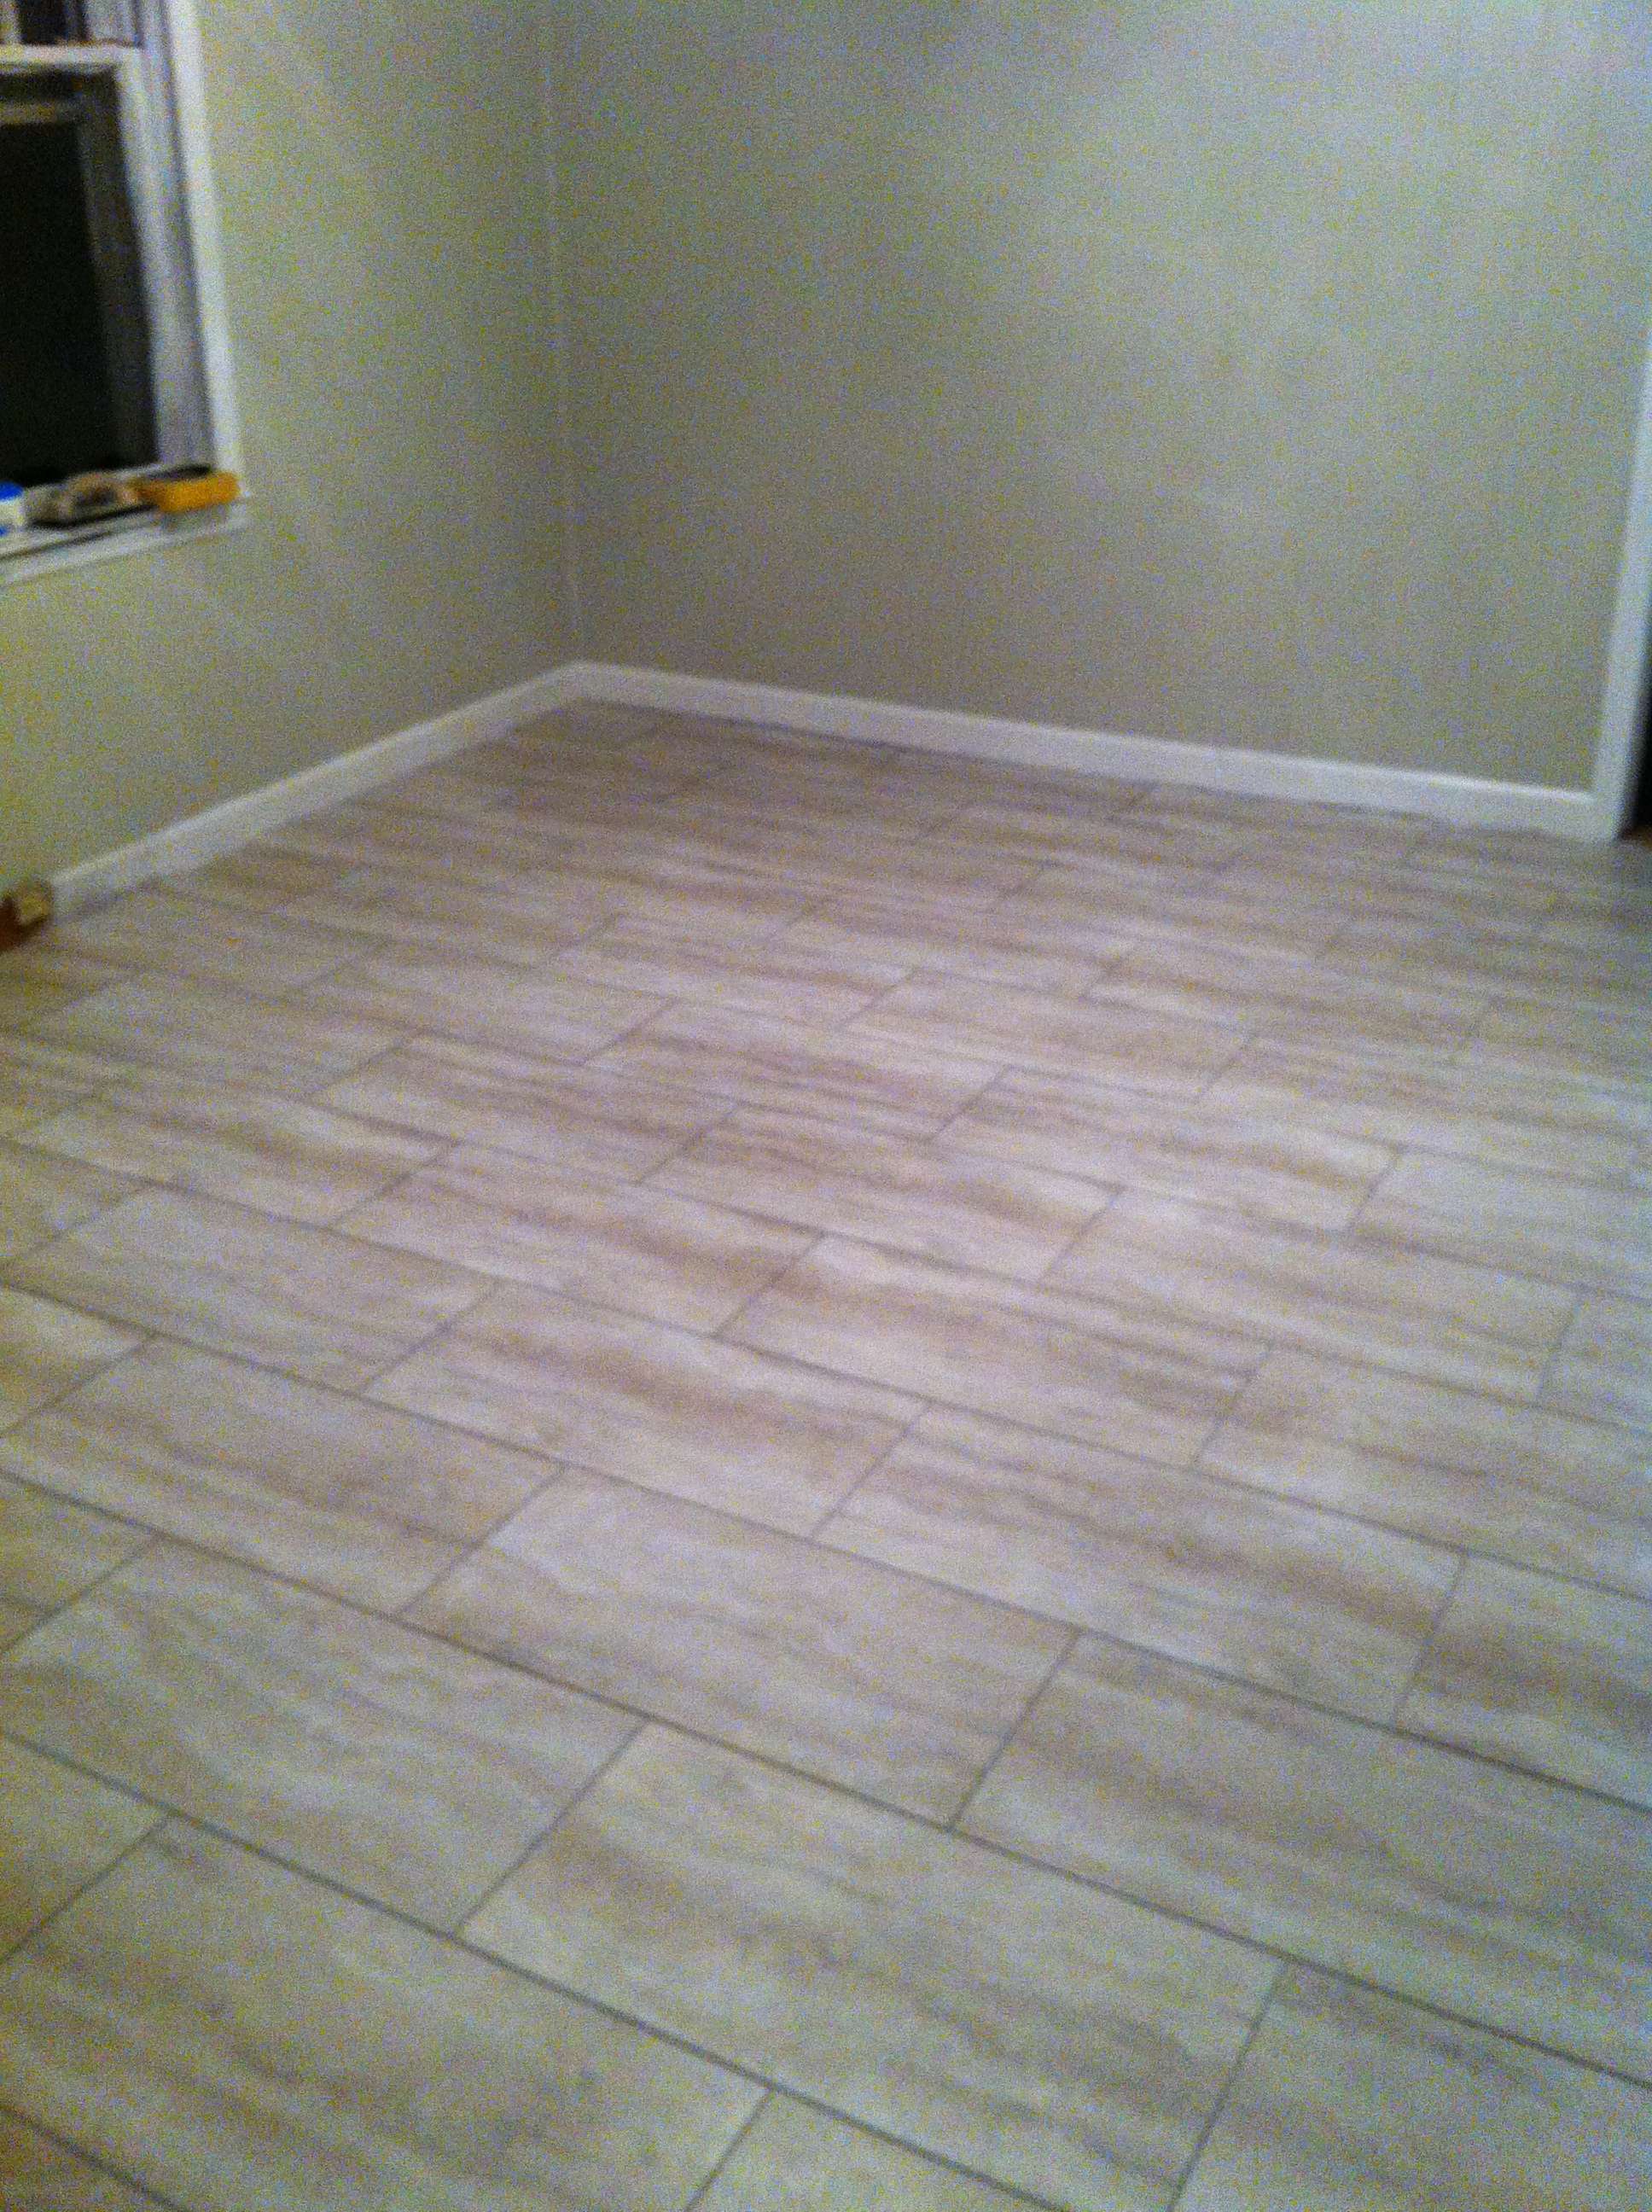 After all the tiles were laid I came back the next morning and started grouting with a special vinyl grout that is more flexible than regular grout. The tiles look and feel like travertine marble, especially since it is grouted which makes it very hard to tell the difference! This project was a huge success and I would recommend this product to anyone because of the ease of installation and at about $1.00 per square foot, you cannot beat the cost!

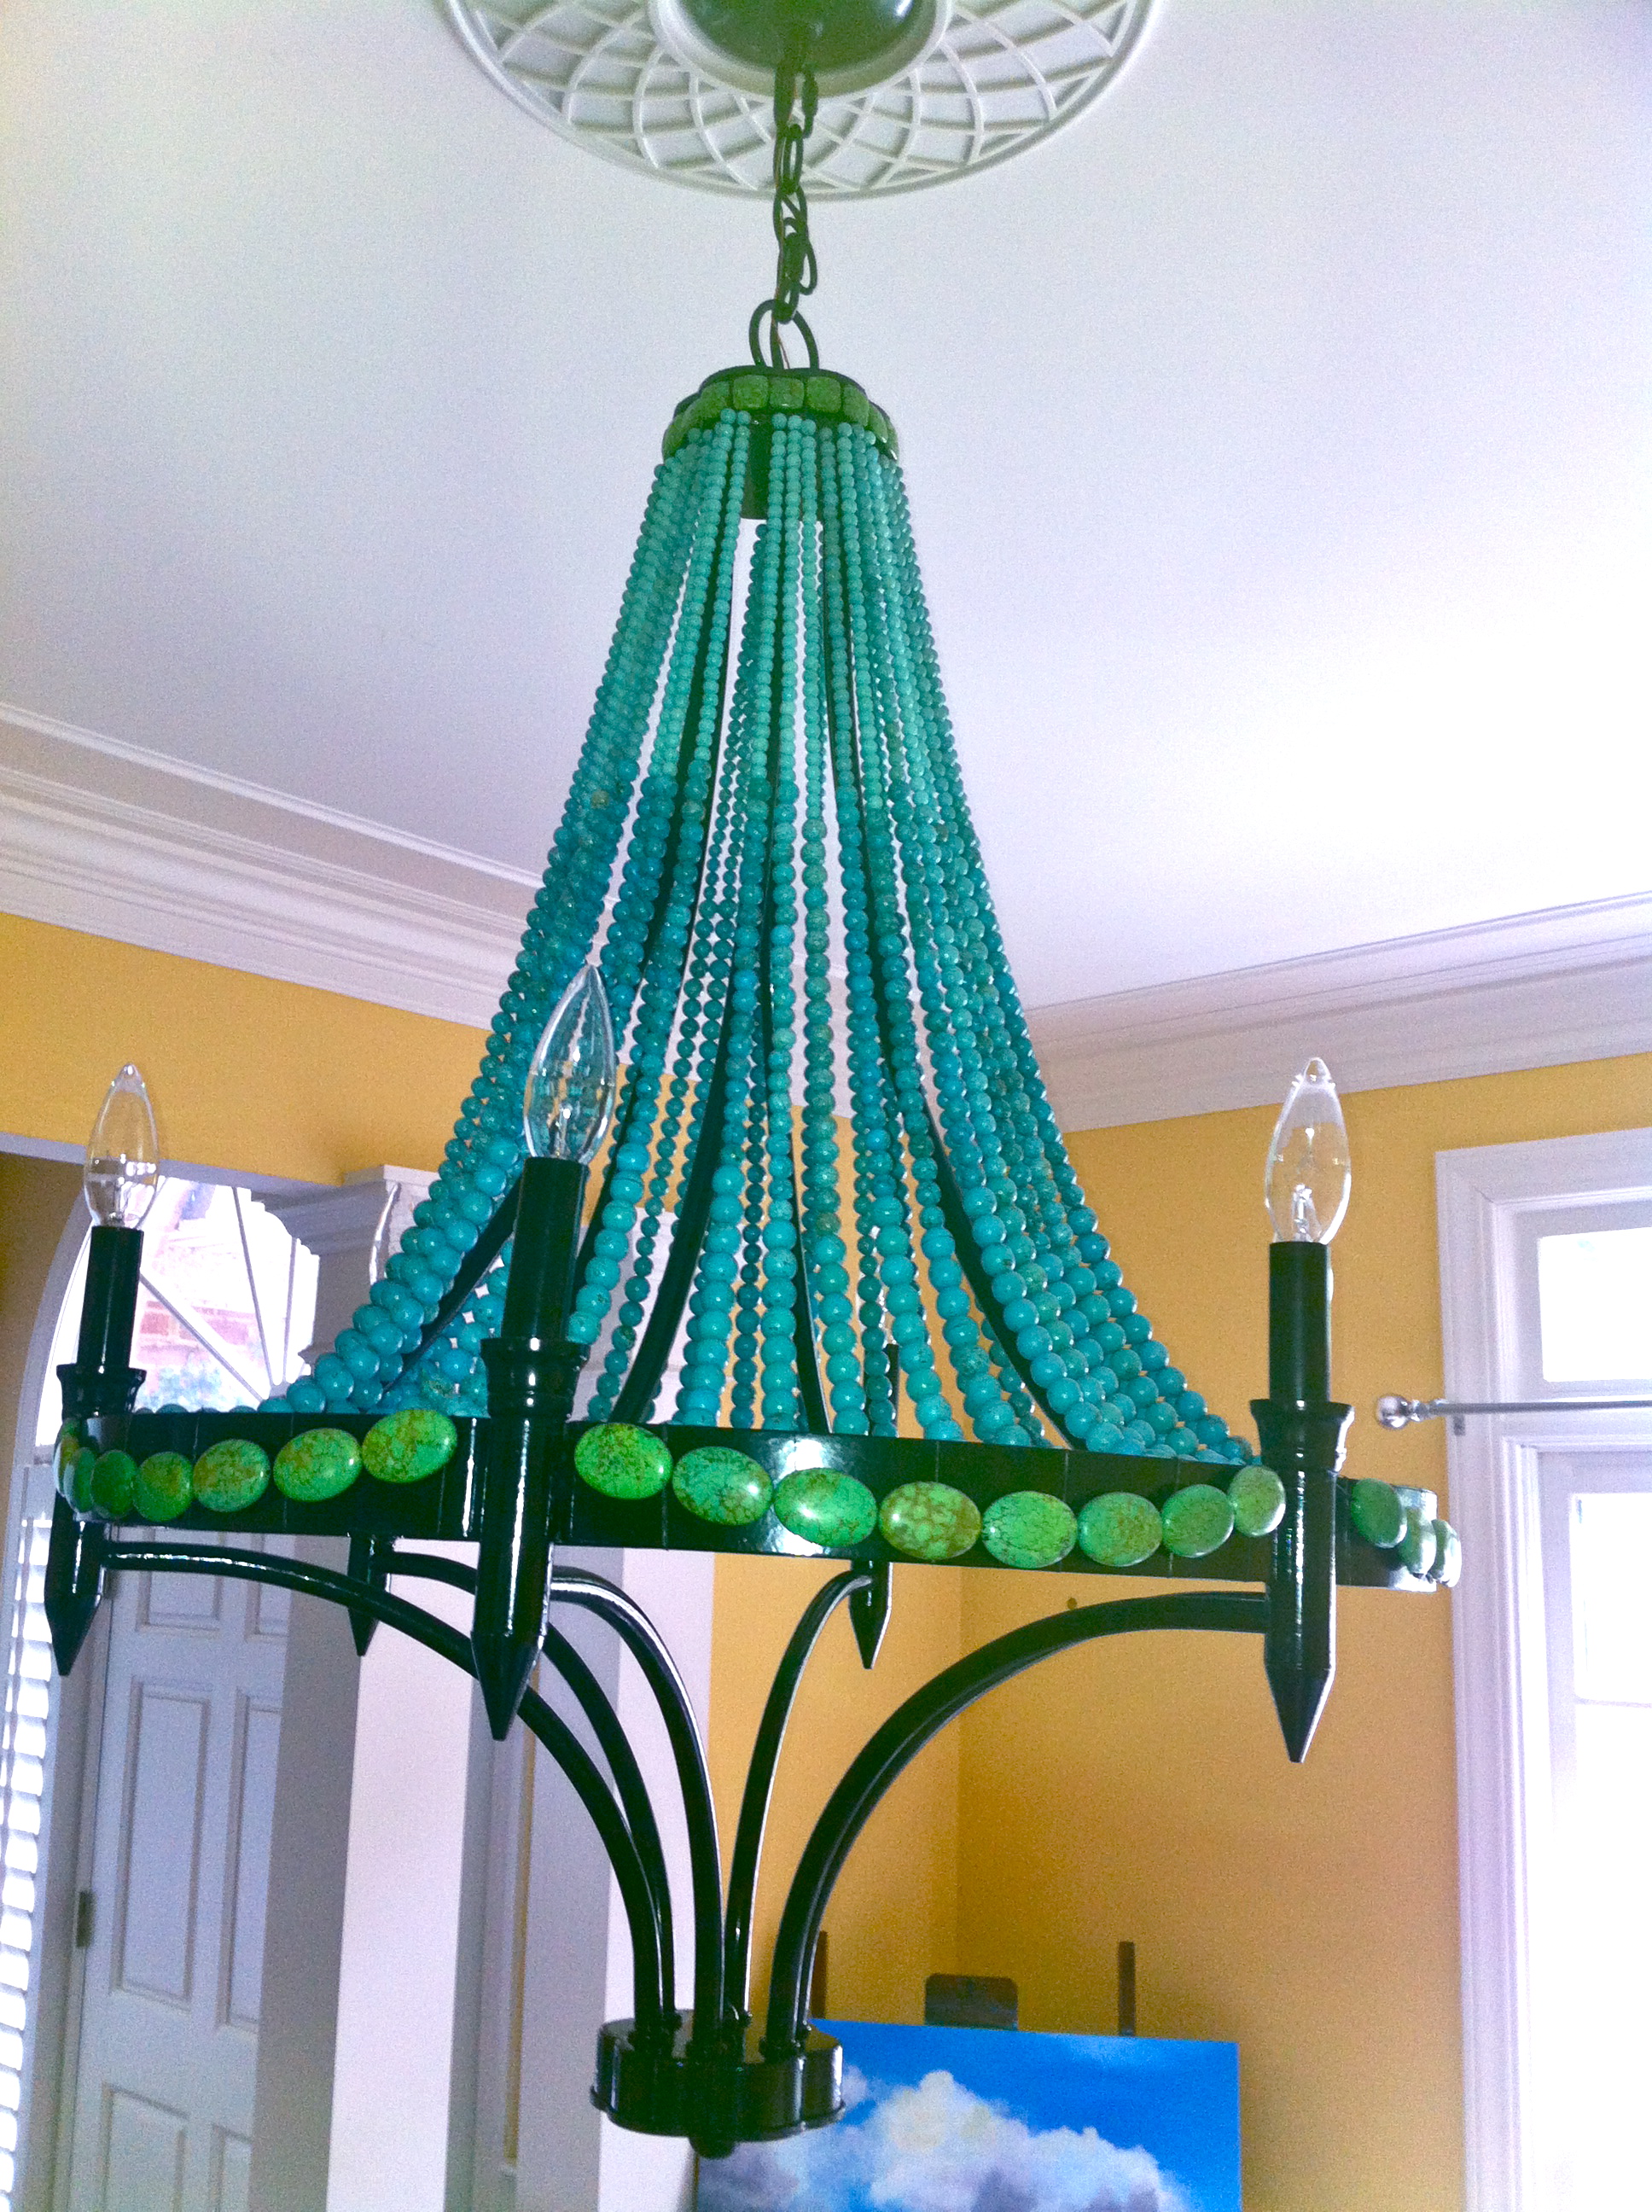
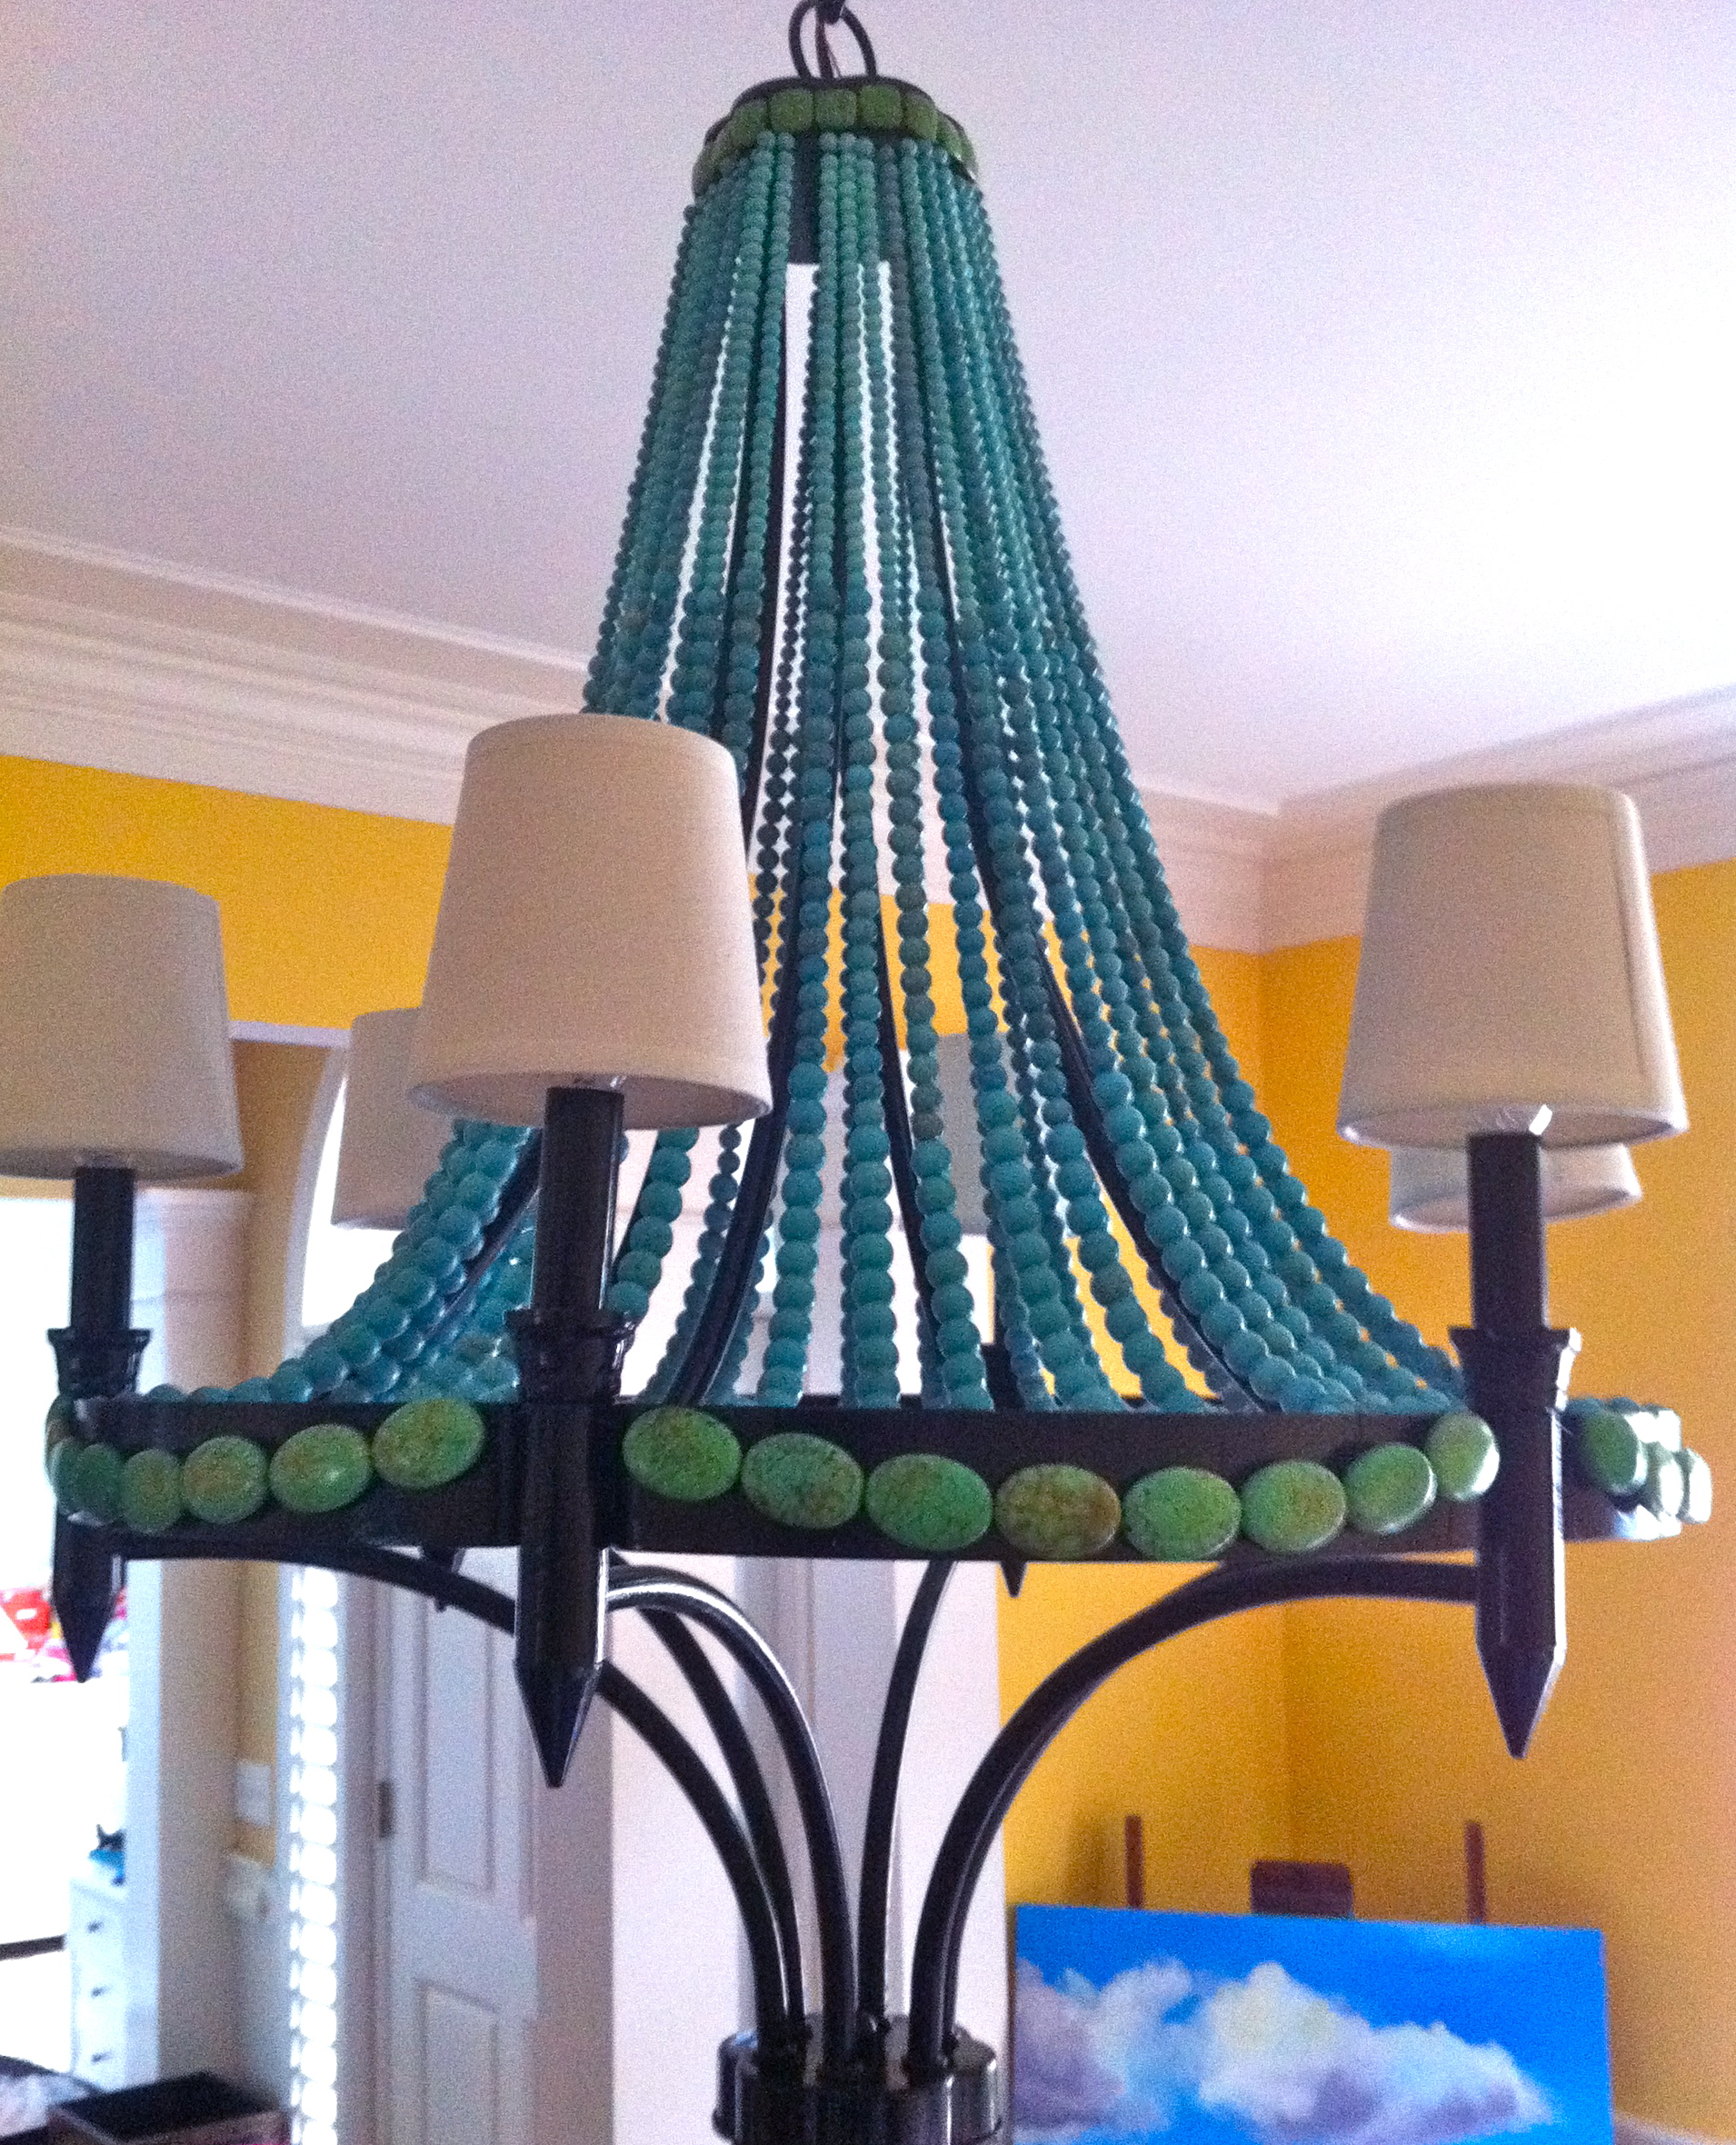
I recently saw this beautiful chandelier on a website and began to think about making a similar one myself, it was approximately $3,500 and that is way over my budget!

So I began looking online for a lighting that would be appropriate for me to bead but I was looking for something that had the lights on the outside of the frame so the beads wouldn’t cover the lightbulbs.
I found this one at Lowes.com and one of the local stores had it in stock so I purchased it so I could measure it to decide the number of beads I needed. That took a lot of measuring because I wanted to make the strands graduated (smaller to larger) and after calculating numerous times I bought the beads from FireMountainGems.com.


Then I waited impatiently for my 27 lb. box of beads to arrive in the mail, they could have arrived the next day and that would have been excruciating because I was so anxious to get started! But of course it took about a week for the beads to arrive and I was so happy to see that box arrive on my doorstep…
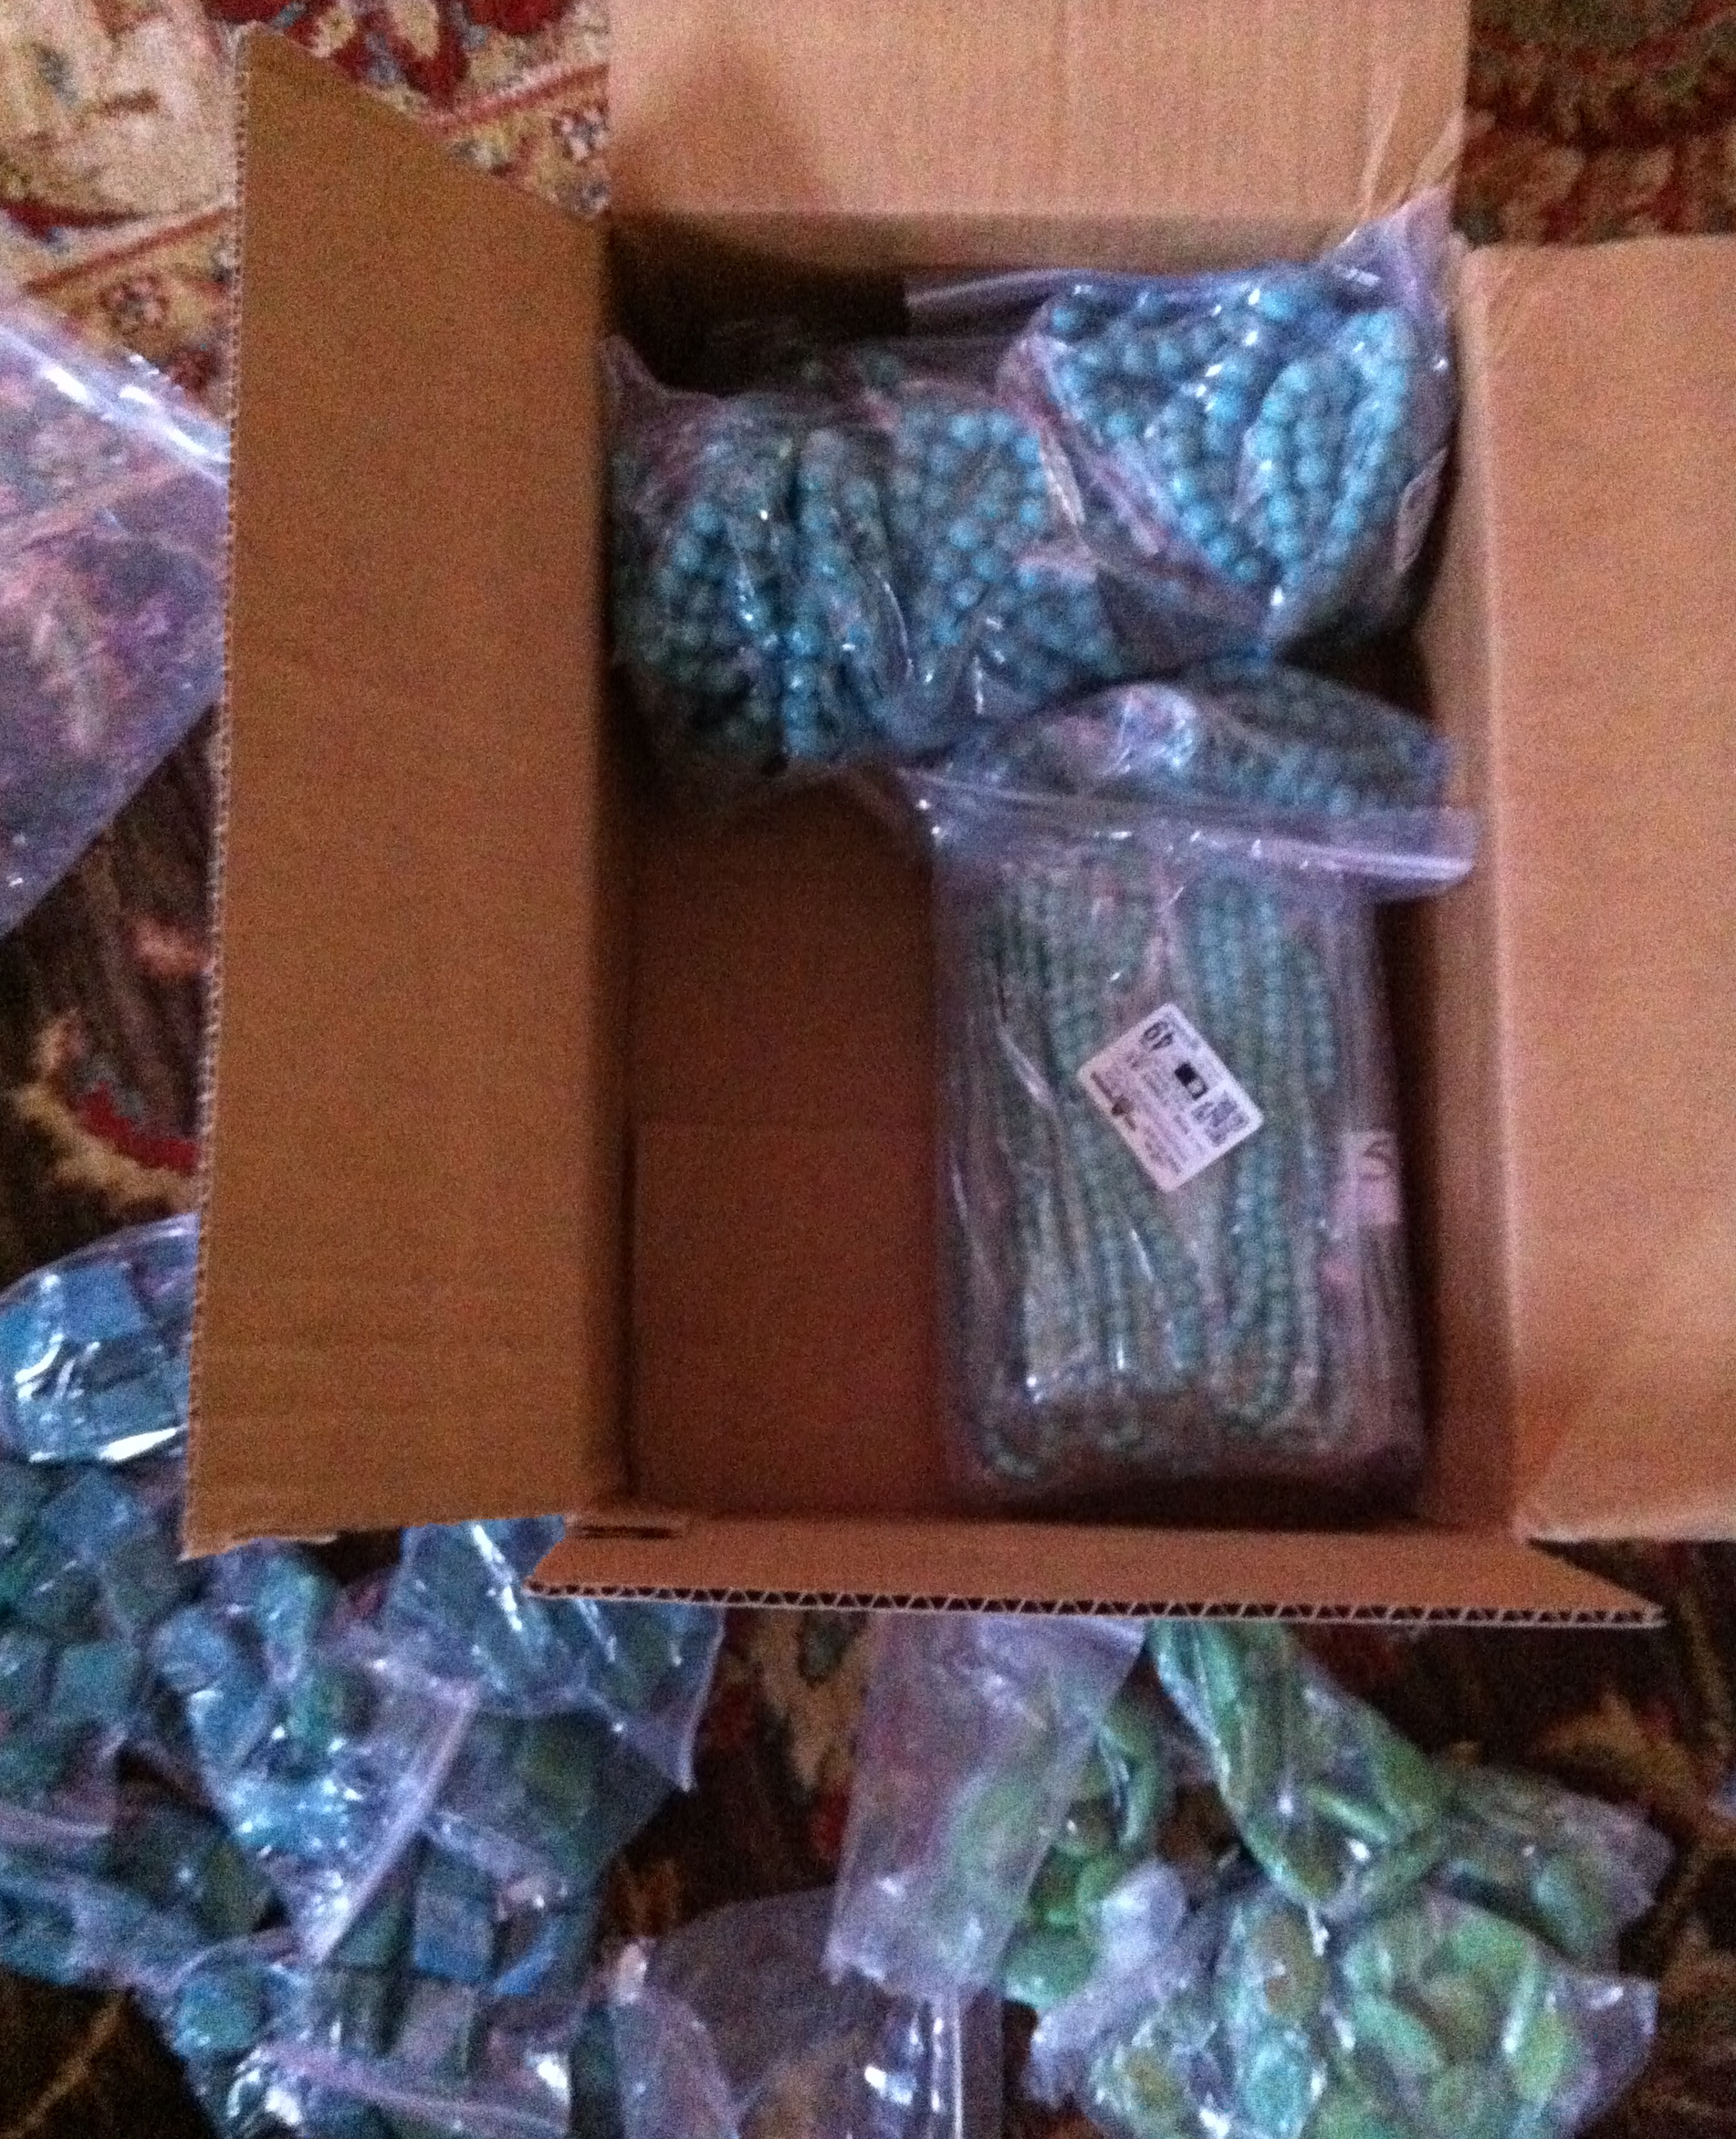
The beads are beautiful shades of turquoise and apple green and I began to experiment with placement…
I liked this but I ended up with something a little different, more on that later. Then the tedious stringing of the beads began. I soon learned why that chandelier I liked costs so much, it is a lot of work!

After about 20+ hours of stringing and some really sore fingers…

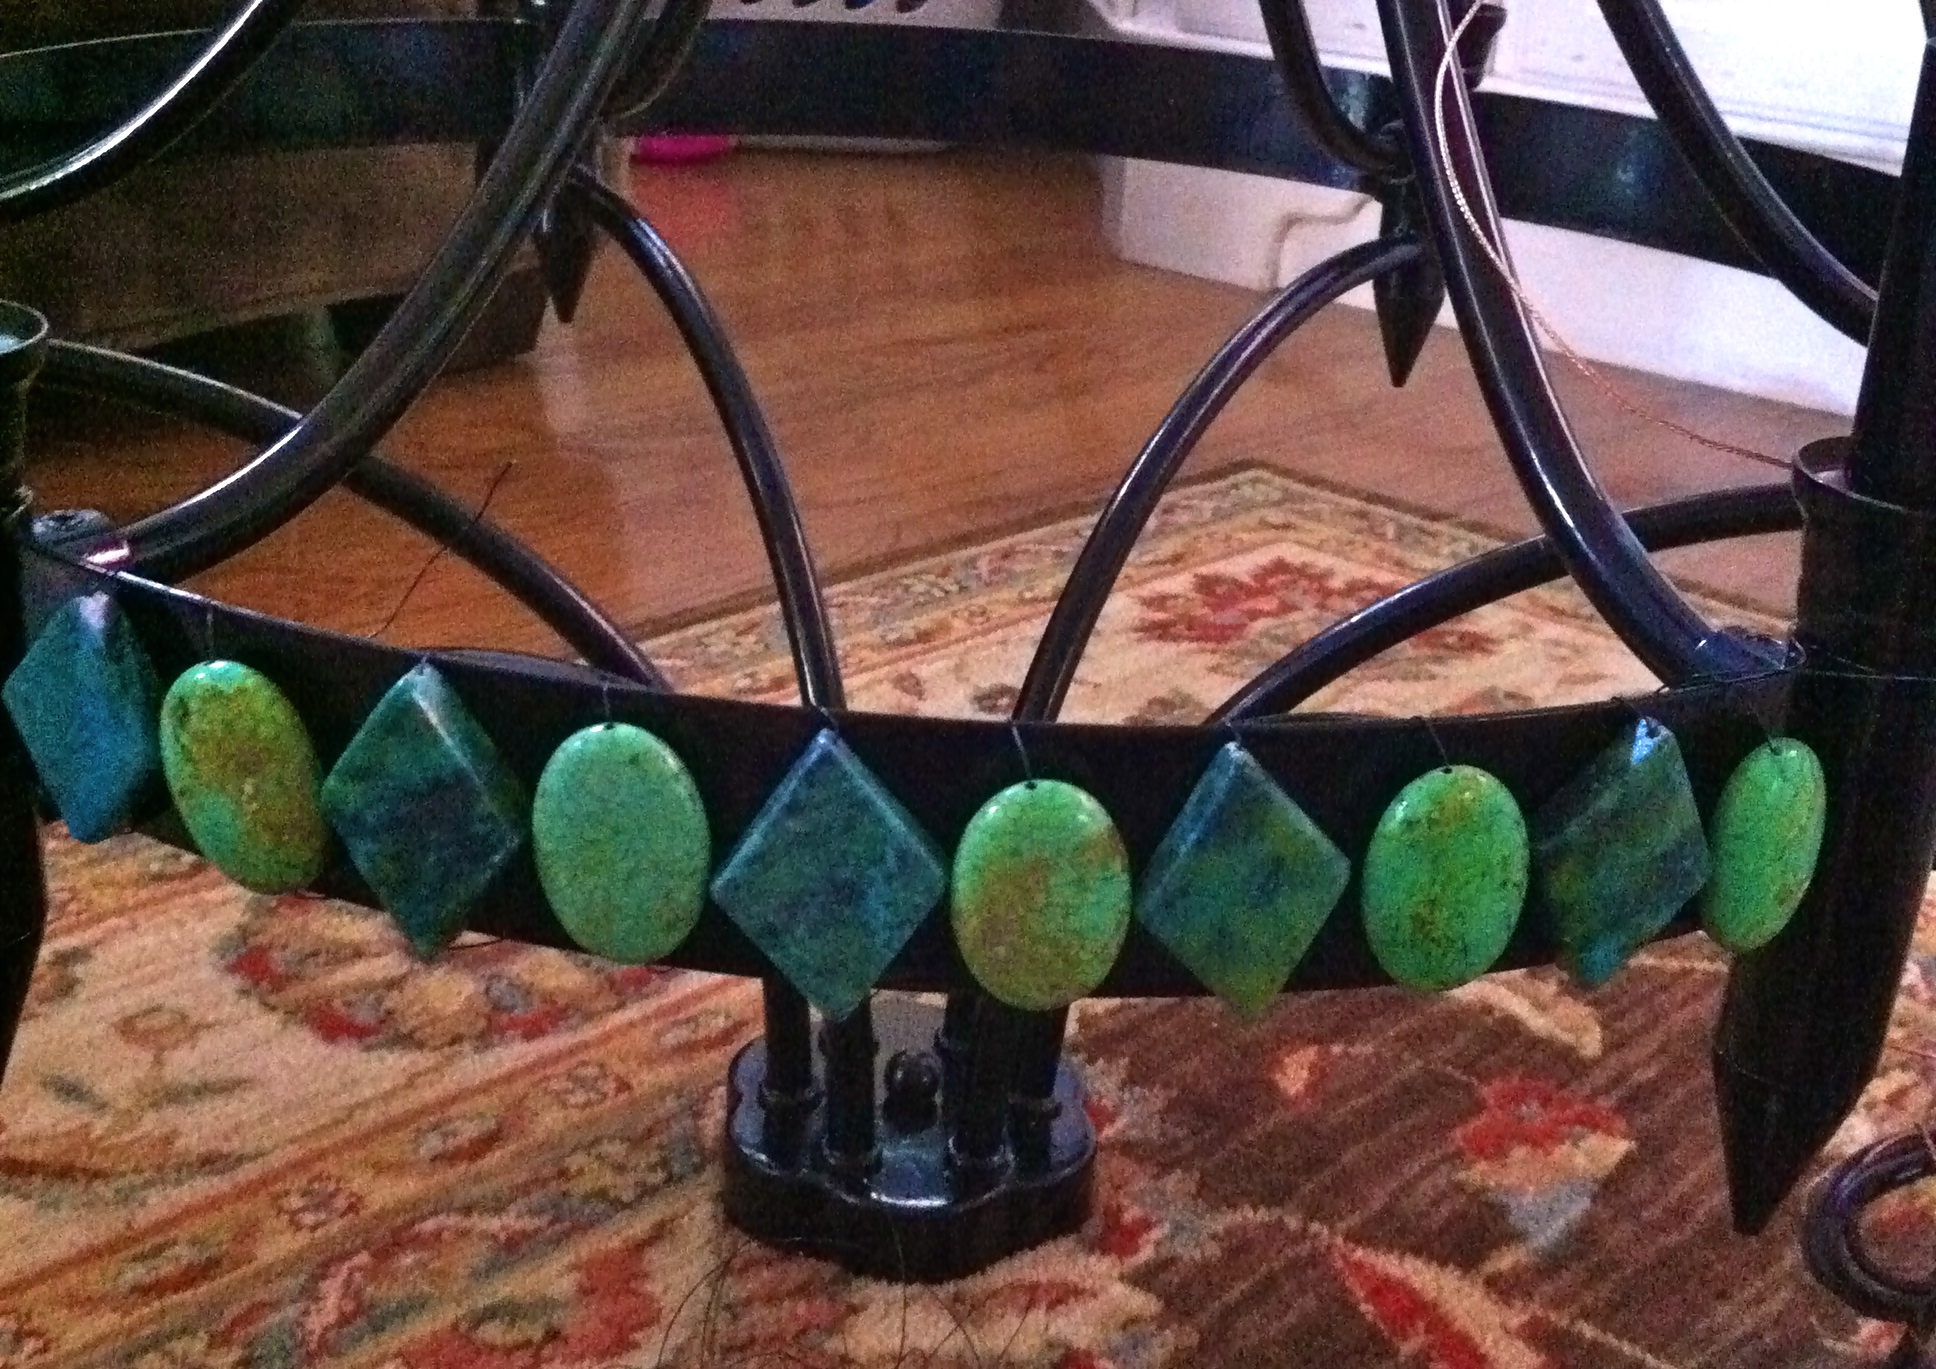
I added the apple green beads to the metal bands at the top and the bottom and I realized I liked the chandelier without the beads at the bottom but I wanted to hang it up to make sure. My wonderful husband said he could wire it …

He did a great job! It looks great without the beads at the bottom, I can always add them later but I don’t think it would add to it’s charm. Could be my sore fingers talking.
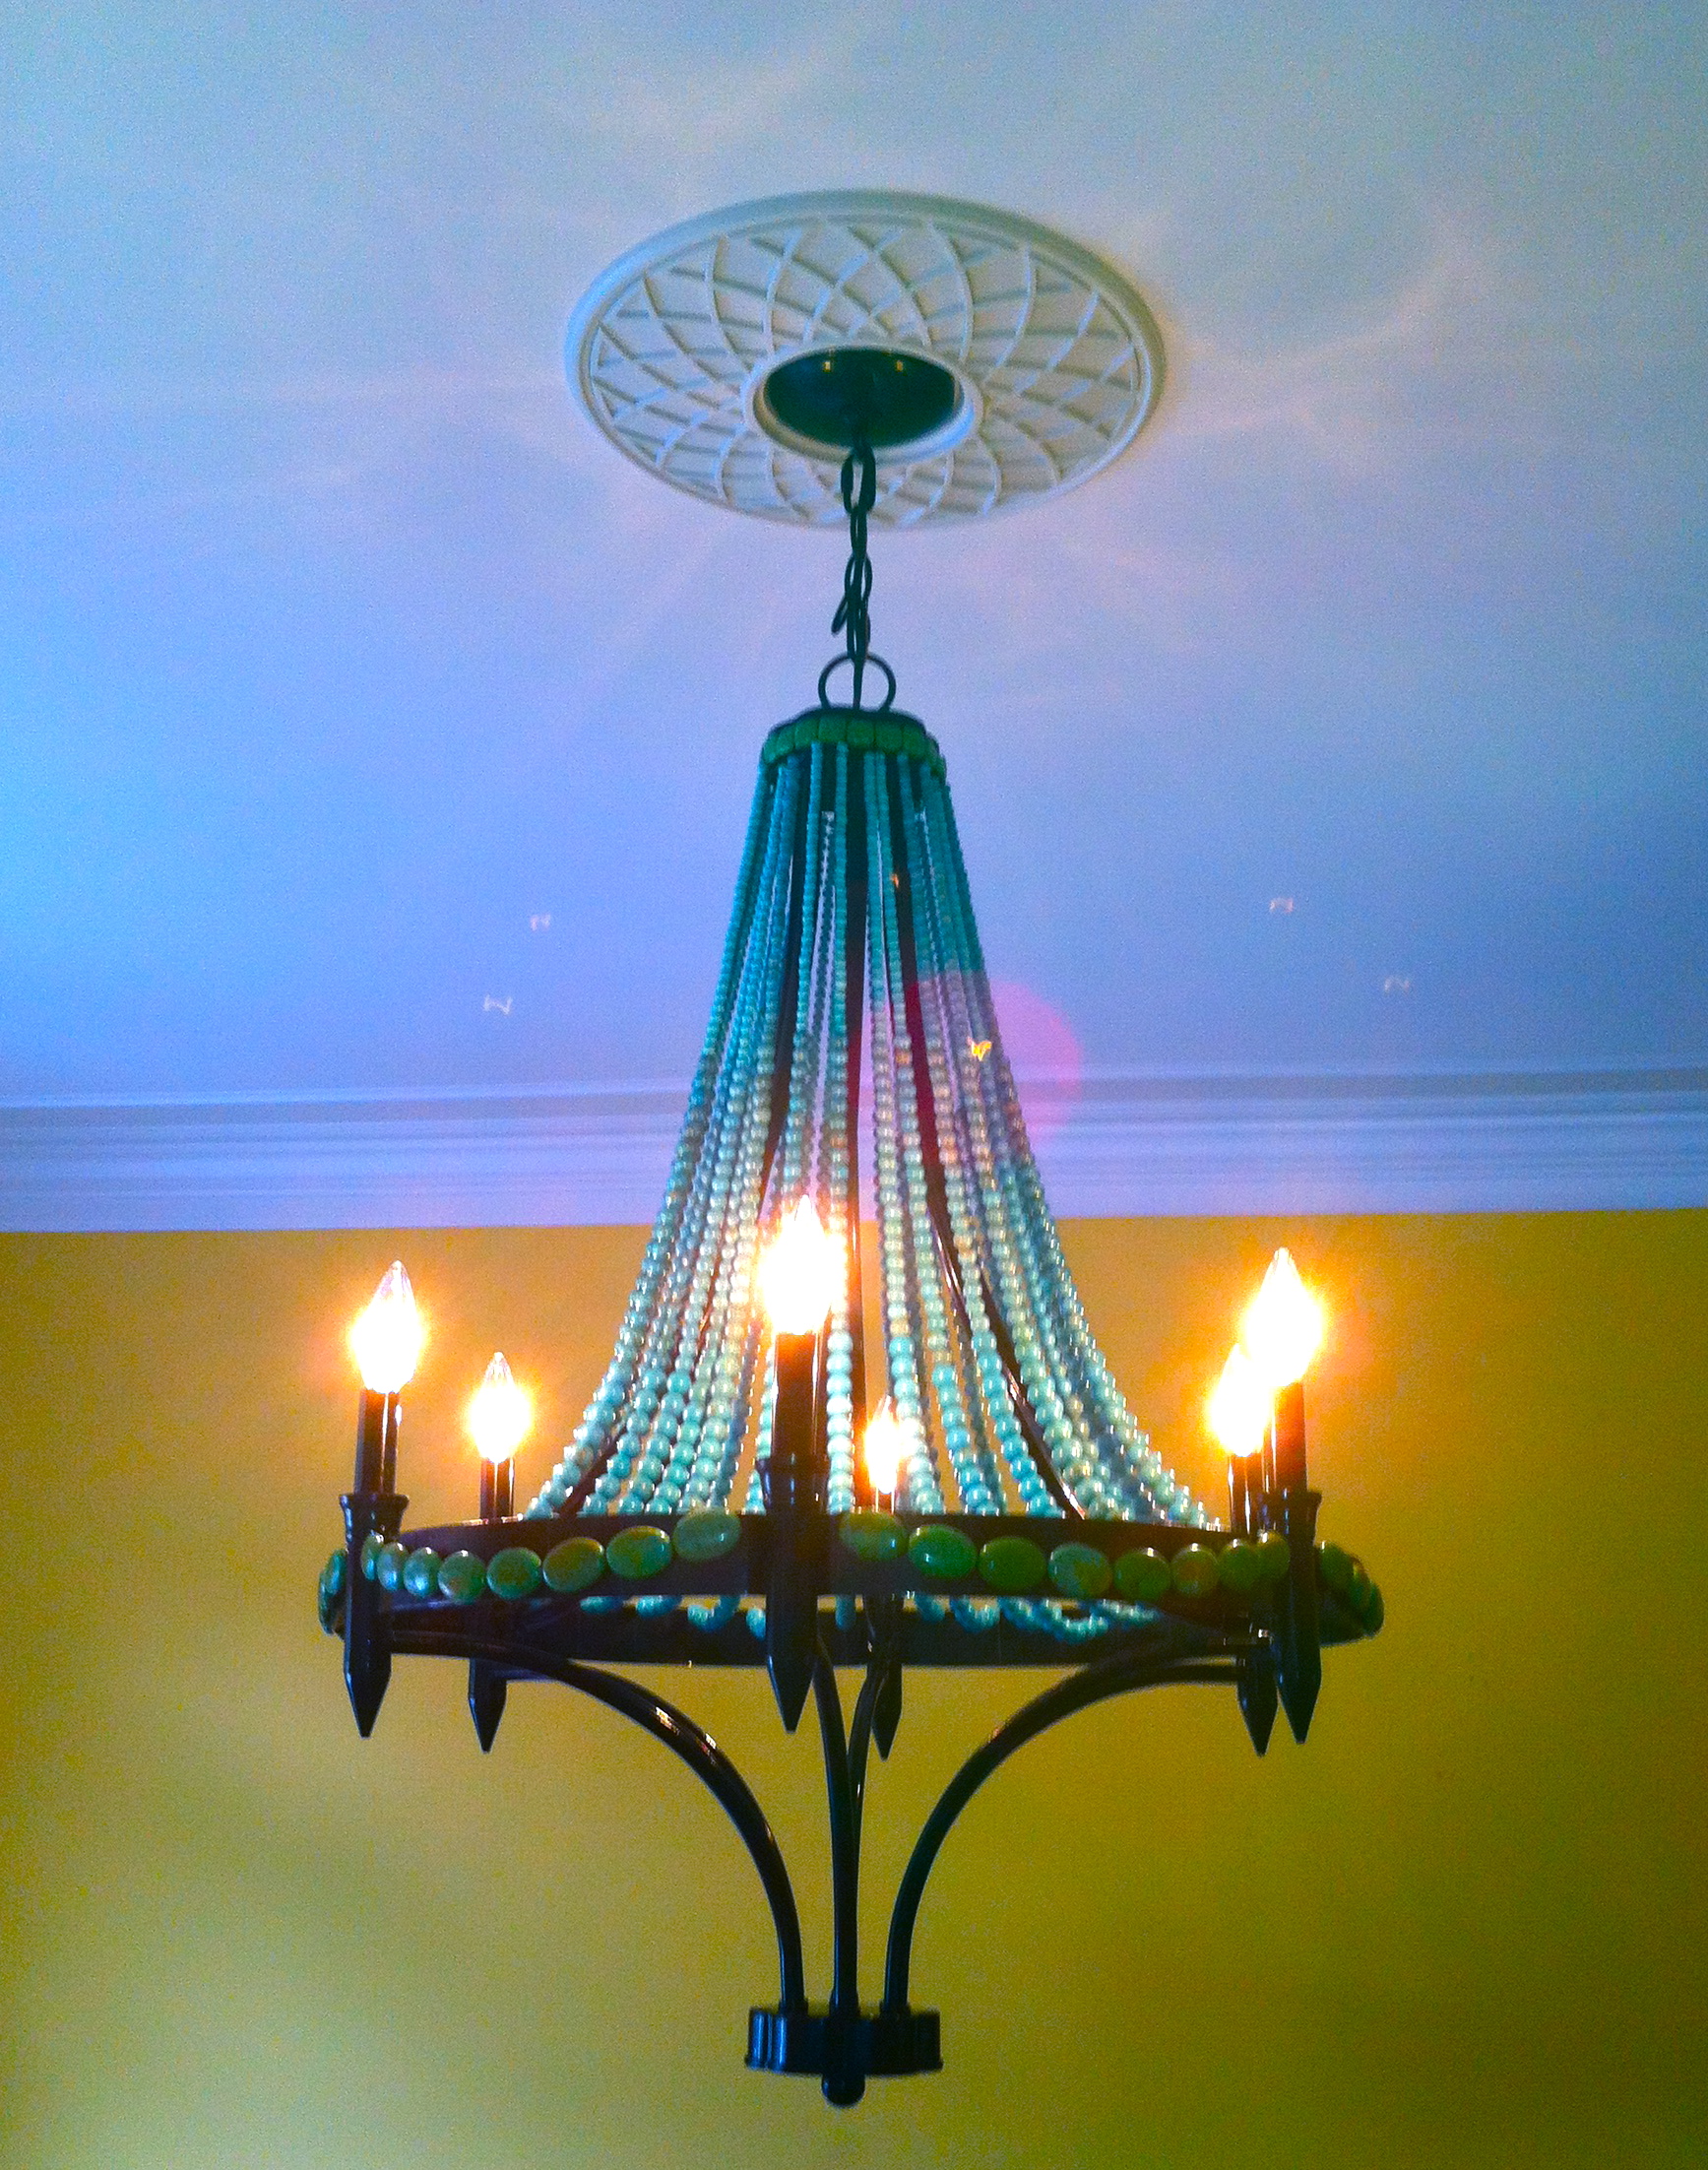
Can’t decide if I like it with or without the shades…

Now to choose paint color for the dining room now that the focal point is up! I bought an antique table a few years ago that I want to dig out and dust off, I think it will look great underneath the light.

That picture was taken before I cut all the strings : )
