This is so fabulous!!! You can order these panels to dress up furniture, doors, cabinets, etc. The possibilities are mind-boggling!
Decorative, lightweight, fretwork panels by O’verlays – IKEA compatible!.


I decided I need this 16 gauge finish nailer from Craftsman in order to make a few simple pieces of furniture that I need and can’t seem to find anywhere. After looking online and comparing models I decided on this one sold at Sears.com. Actually I bought a kit that contained three pneumatic tools including the finish nailer, a pin nailer, and a brad nailer. It was only about $20 more to buy the whole kit, what a deal!
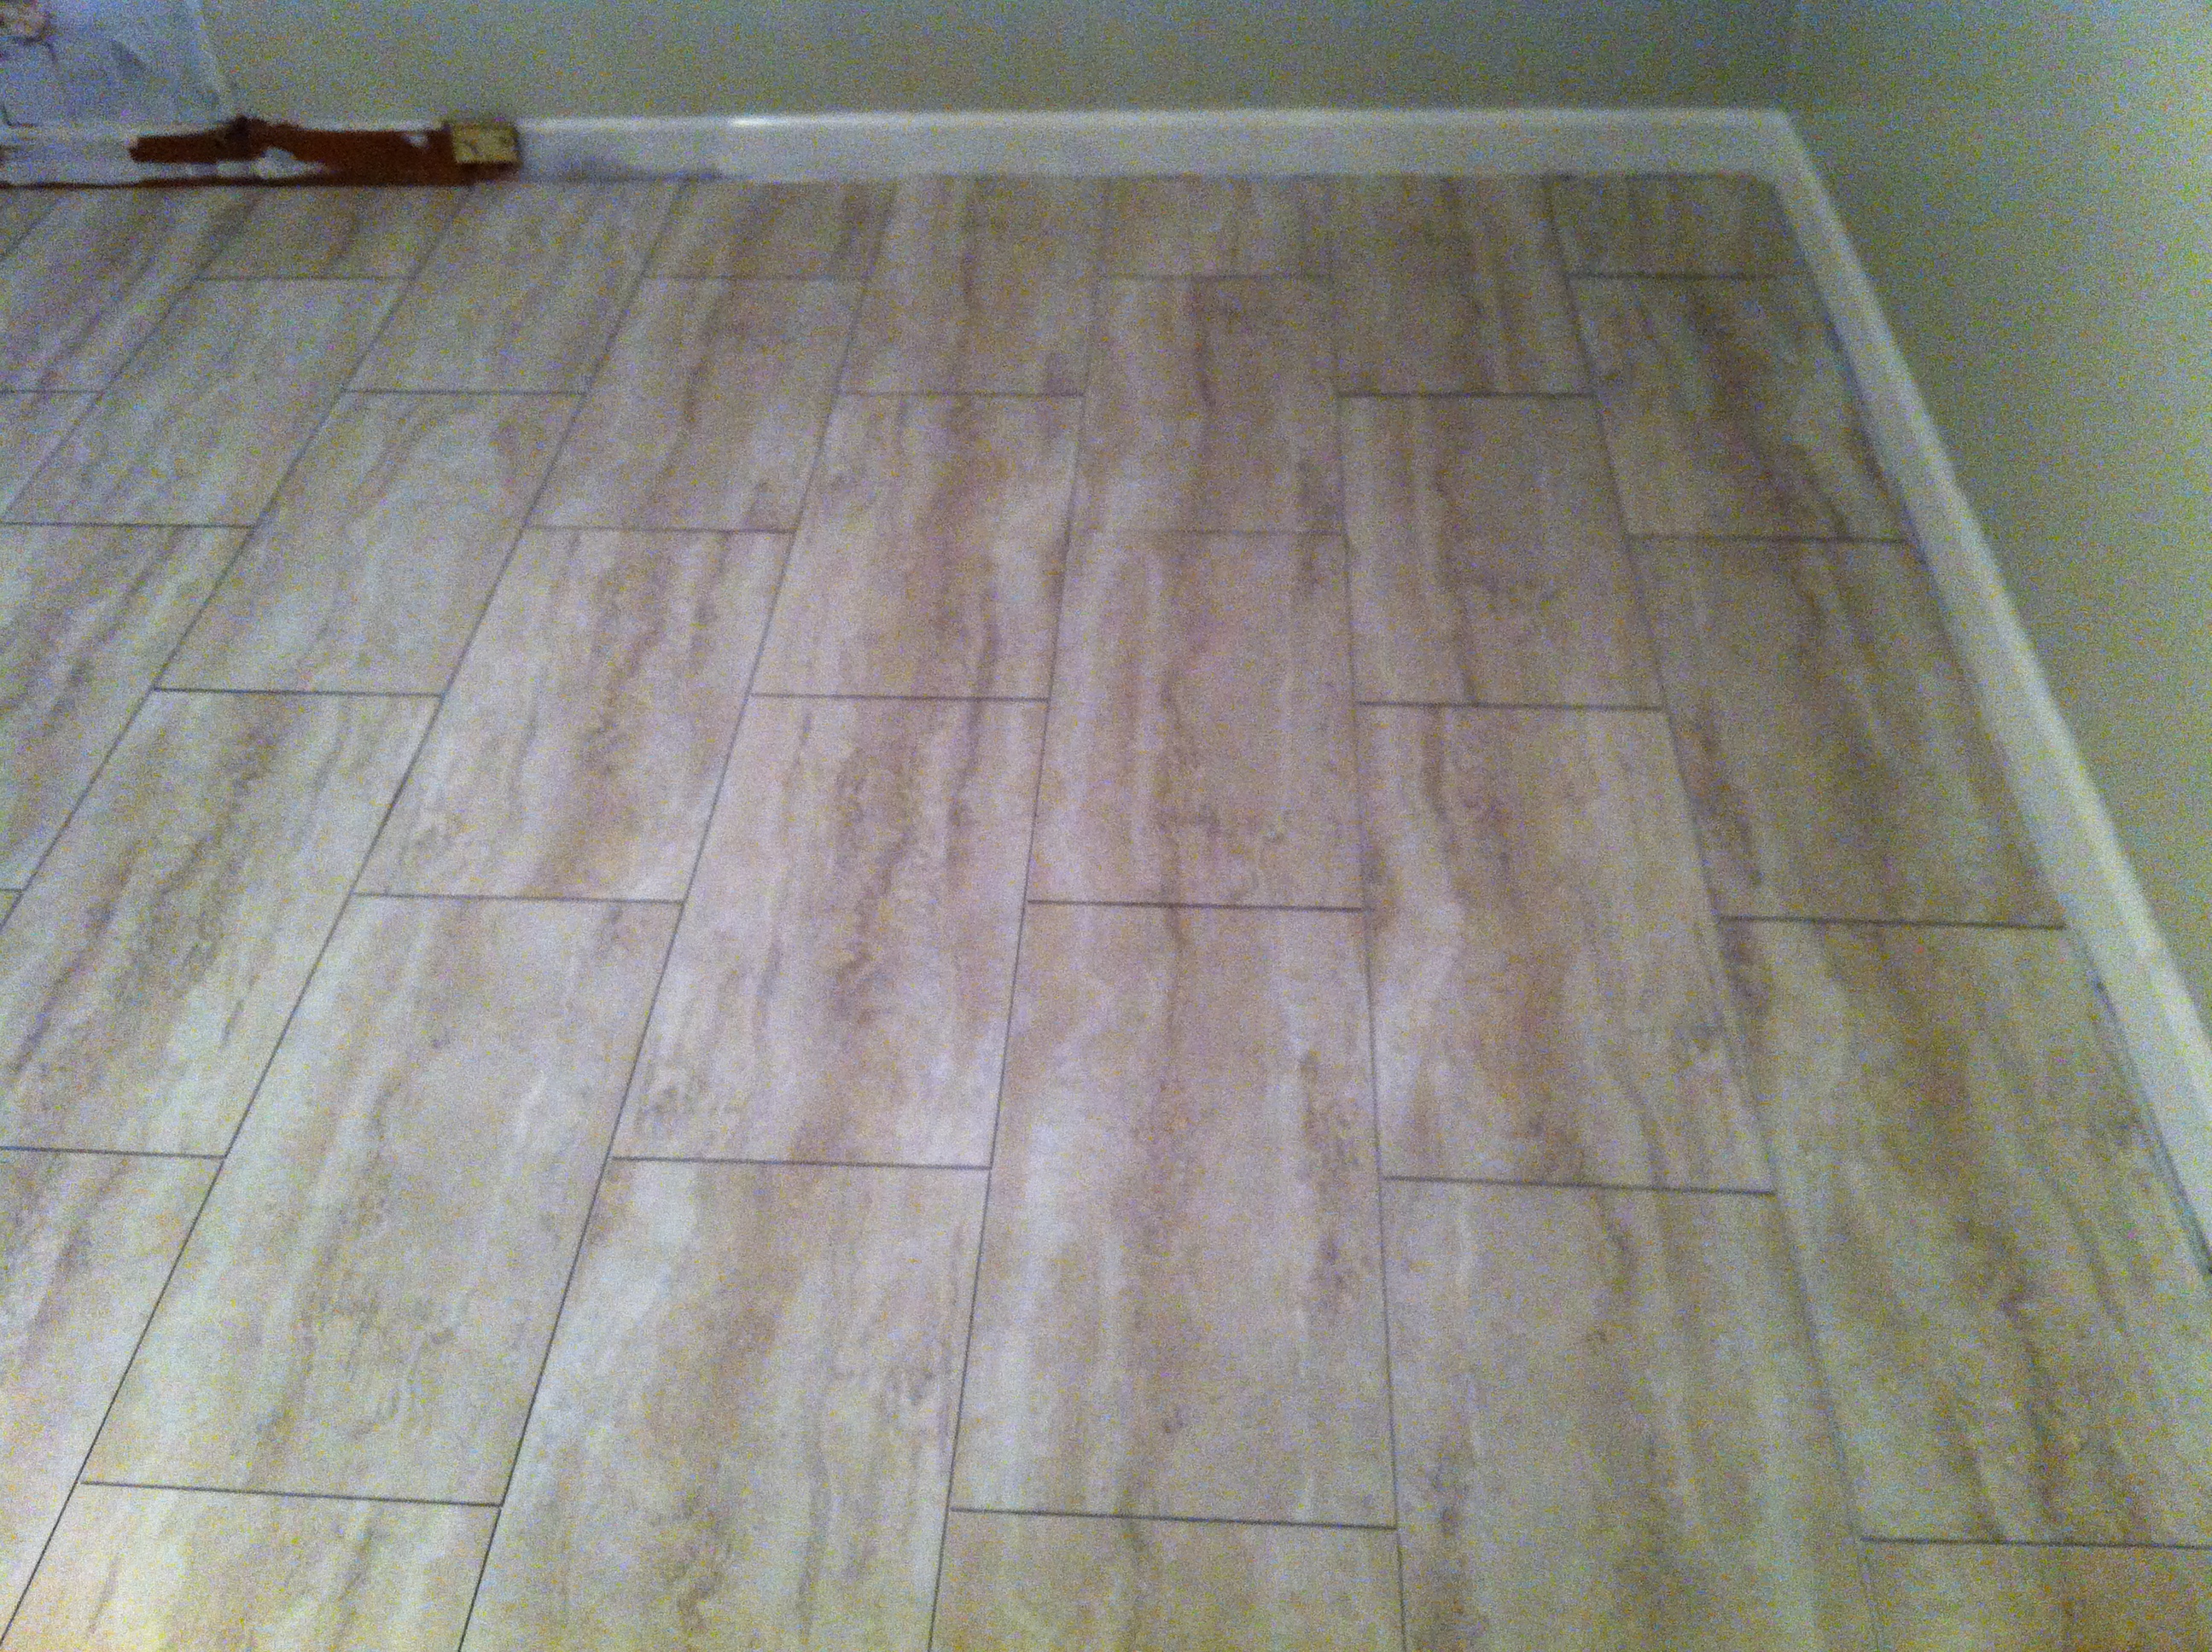
My sister Susie and I went on another shopping excursion looking for flooring that met all her requirements…
1. Had to be flexible to accomodate the uneven subfloor
2. Had to be a light color
3. Had to be fairly easy to install
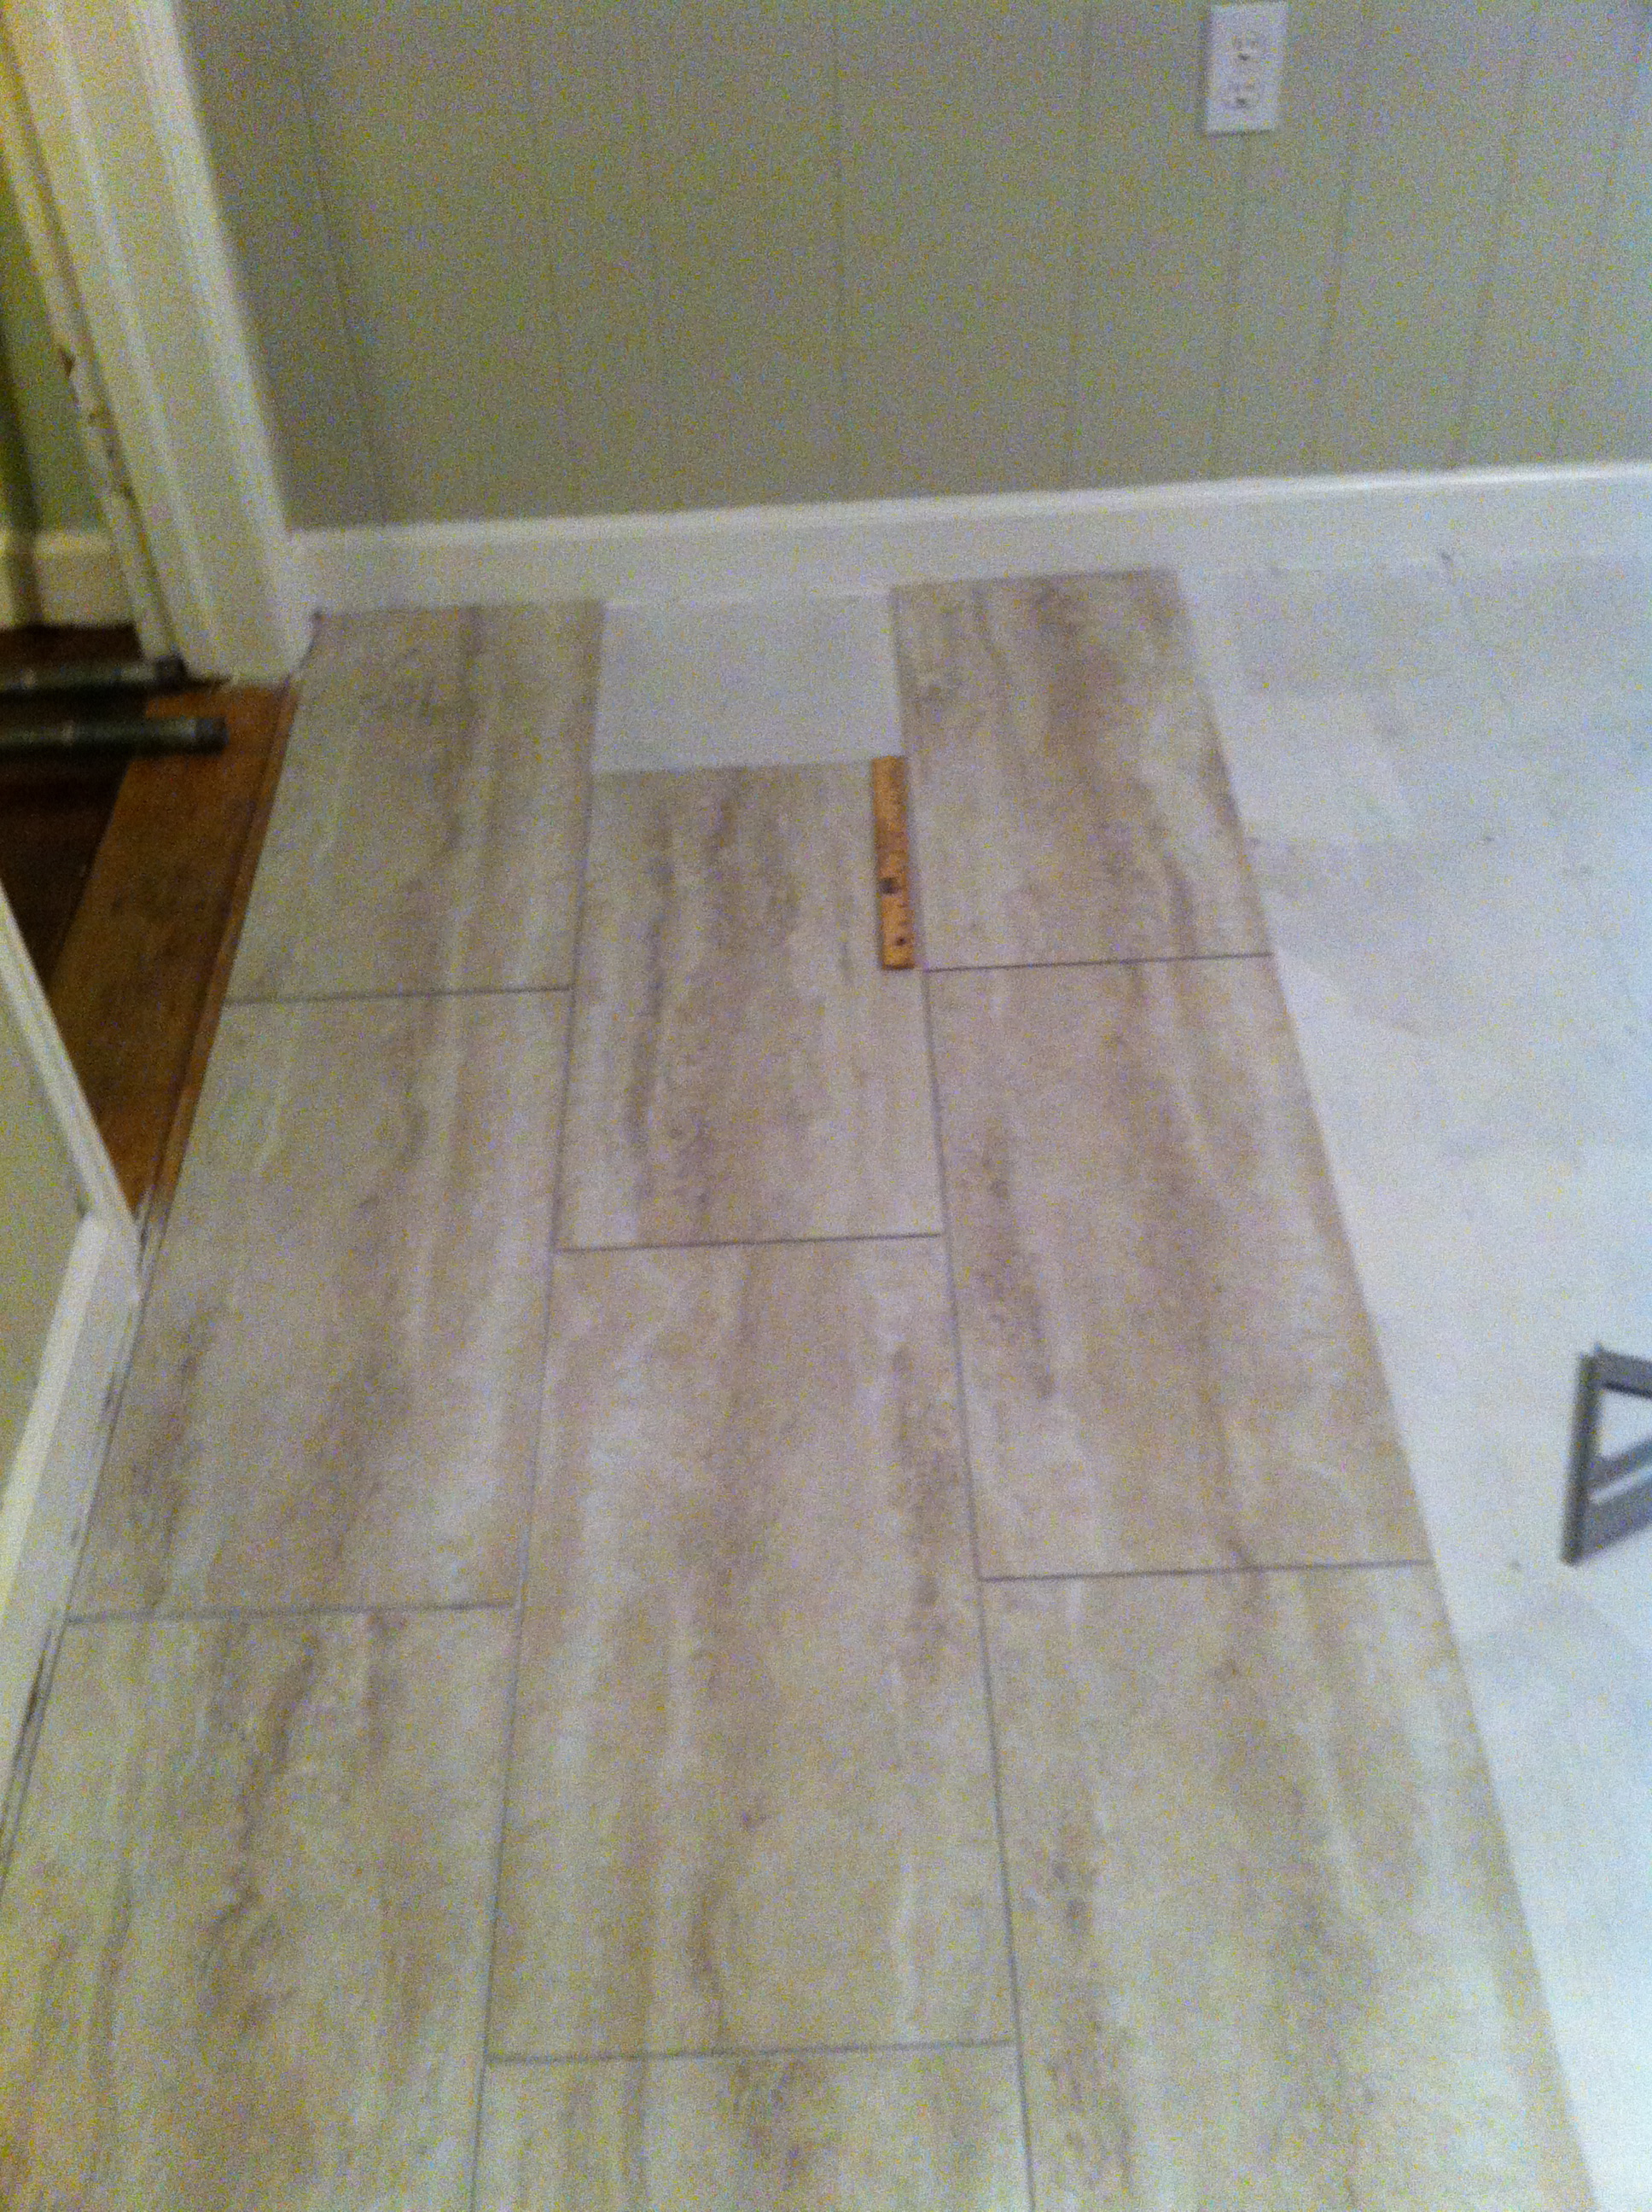
We found some great vinyl, groutable, stick-on tiles at Lowes that fit the bill.

12″ x 24″ Oyster Travertine Travertine Finish Luxury Vinyl Tile
12″ x 24″ Oyster Travertine Travertine Finish Luxury Vinyl Tile
First we rolled on some Kilz primer and then let that dry a couple of hours.
Then I began laying the tiles starting on the wall that will be most visible so that it would be straight in case the walls were not plumb, which since it is an old house they are definitely not plumb!
I was able to lay the tiles out without using spacers because I have a pretty good eye but they would help if you don’t feel comfortable not using them. The process went smoothly and I didn’t have to do too much cutting because its a square room. A utility knife cuts it very well.
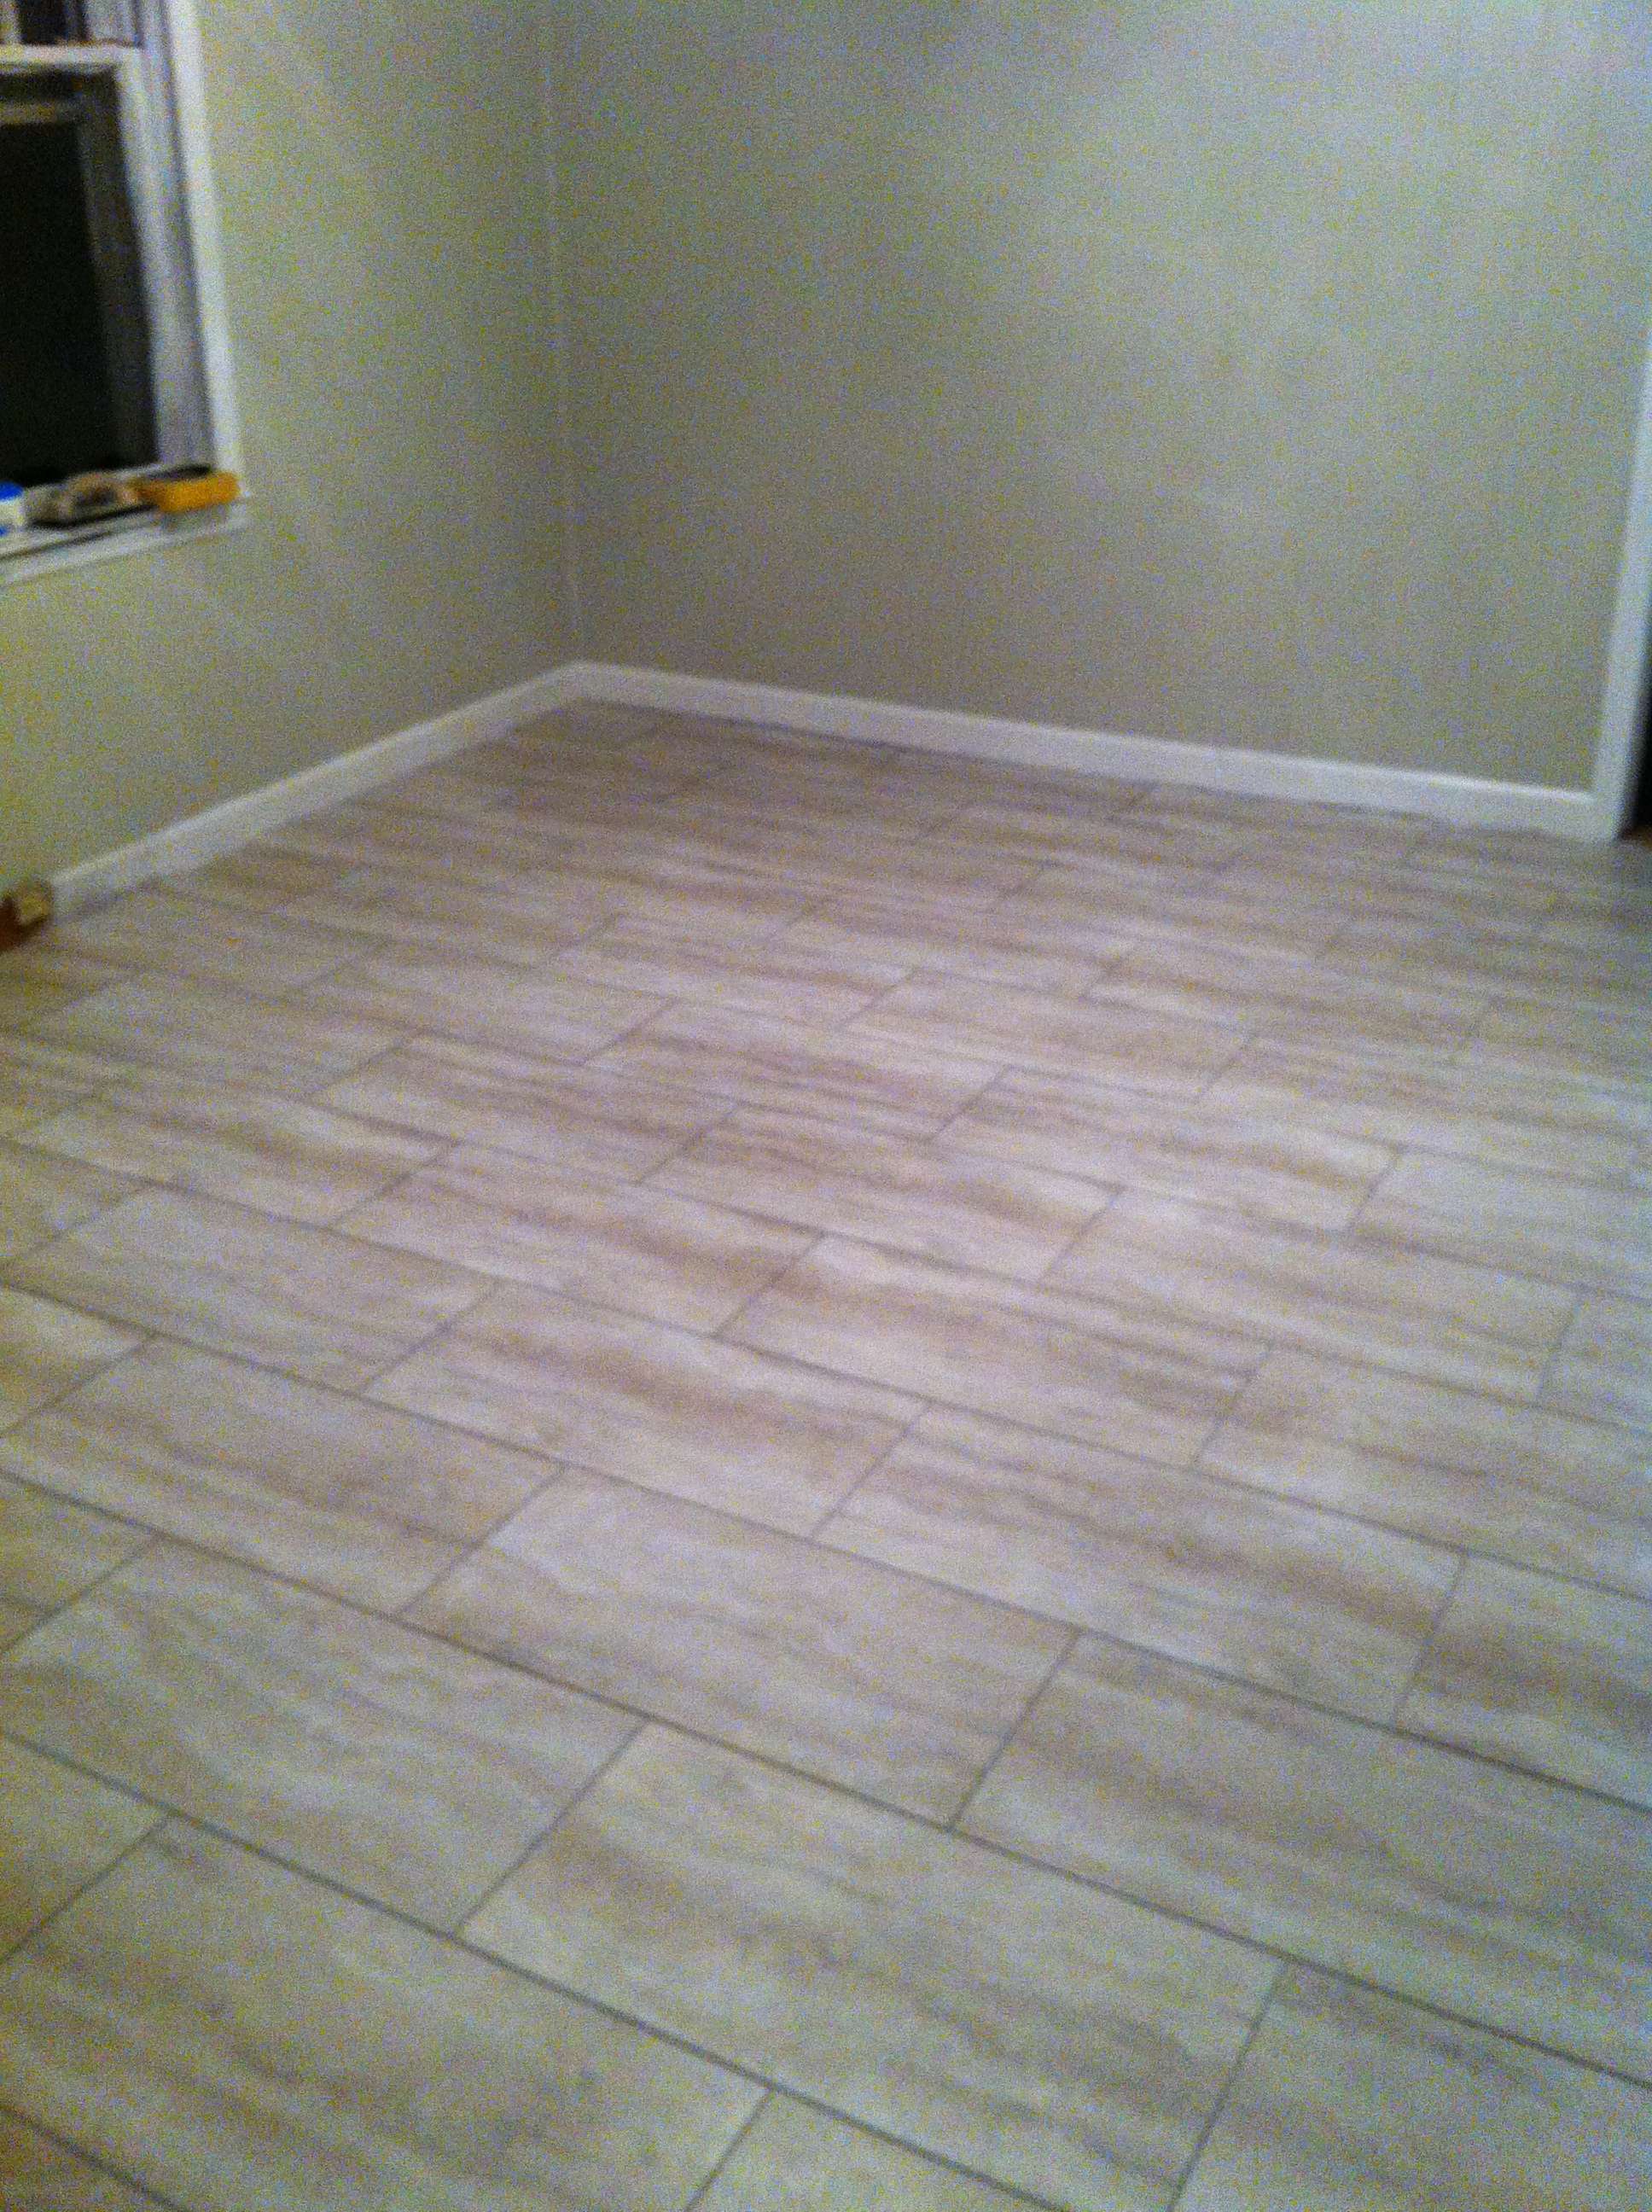 After all the tiles were laid I came back the next morning and started grouting with a special vinyl grout that is more flexible than regular grout. The tiles look and feel like travertine marble, especially since it is grouted which makes it very hard to tell the difference! This project was a huge success and I would recommend this product to anyone because of the ease of installation and at about $1.00 per square foot, you cannot beat the cost!

My sister is renovating her house and I have been traveling up to NC to help out when I can. This weekend I decided I wanted to do something big to help her see her hard work is worth the sore back and headaches so we went to Lowes and found this great product…. Cherry Vinyl Plank Flooring – it is a stick-on vinyl tile that looks and feels like real wood at $1.18/sq ft. and it super simple to install. I convinced her it would look great with the real wood floors that she restained in the rest of the house that are similar in color to the planks. The kitchen is separated from the real wood floors by a dining room so the new planks will not be directly beside the old floors. We make the purchase along with some glass tiles and grout to do the backsplash (another post is imminent). Time to get to work!!
Shop Style Selections 6″W x 48″L Cherry Luxury Vinyl Plank at Lowes.com.


I measured the room and drew a line to indicate the middle from the center of the sink. This was the logical place to start since the doorway was directly across from the sink. I began laying the planks at an angle with the short end placed on the marked line with the ends at a 90 degree angle to each other…

It already is beginning to look great. Each piece is placed tightly against each other and with my sister’s help we started making a chevron pattern with the planks. This stuff was really sticky which is great because it should stay put but it got all over our hands, I just used the stuff that takes stickers off of surfaces to wash my hands every 5 planks or so.

About 3/4 of the way through the project. Time to start measuring the planks that need to be cut to fit against the wall, this part was time consuming but fairly easy after making a template to help cut the angle. After a few mistakes I figured out that going ahead and placing a plank first then cutting against the wall worked better than cutting first because I usually had it too long and had to cut again anyway. After that it went down much quicker.

The zig zag pattern looks great, cannot wait to see the finished kitchen!
- This looks even better in person, the tiles fit together perfectly, such a quality product. I want to try this in my own basement, it looks like real wood at a fraction of the cost and labor!

The “Then and Now” Lake Murray map drawn by Ed Fetner that I got framed at Carolina Pottery. I talked with the framer at 3:00 and told her what I wanted and by the time I got home at 4:30 she called me and was finished with it! When I picked it up I was so impressed with the great job she did and especially since she did it in about an hour!
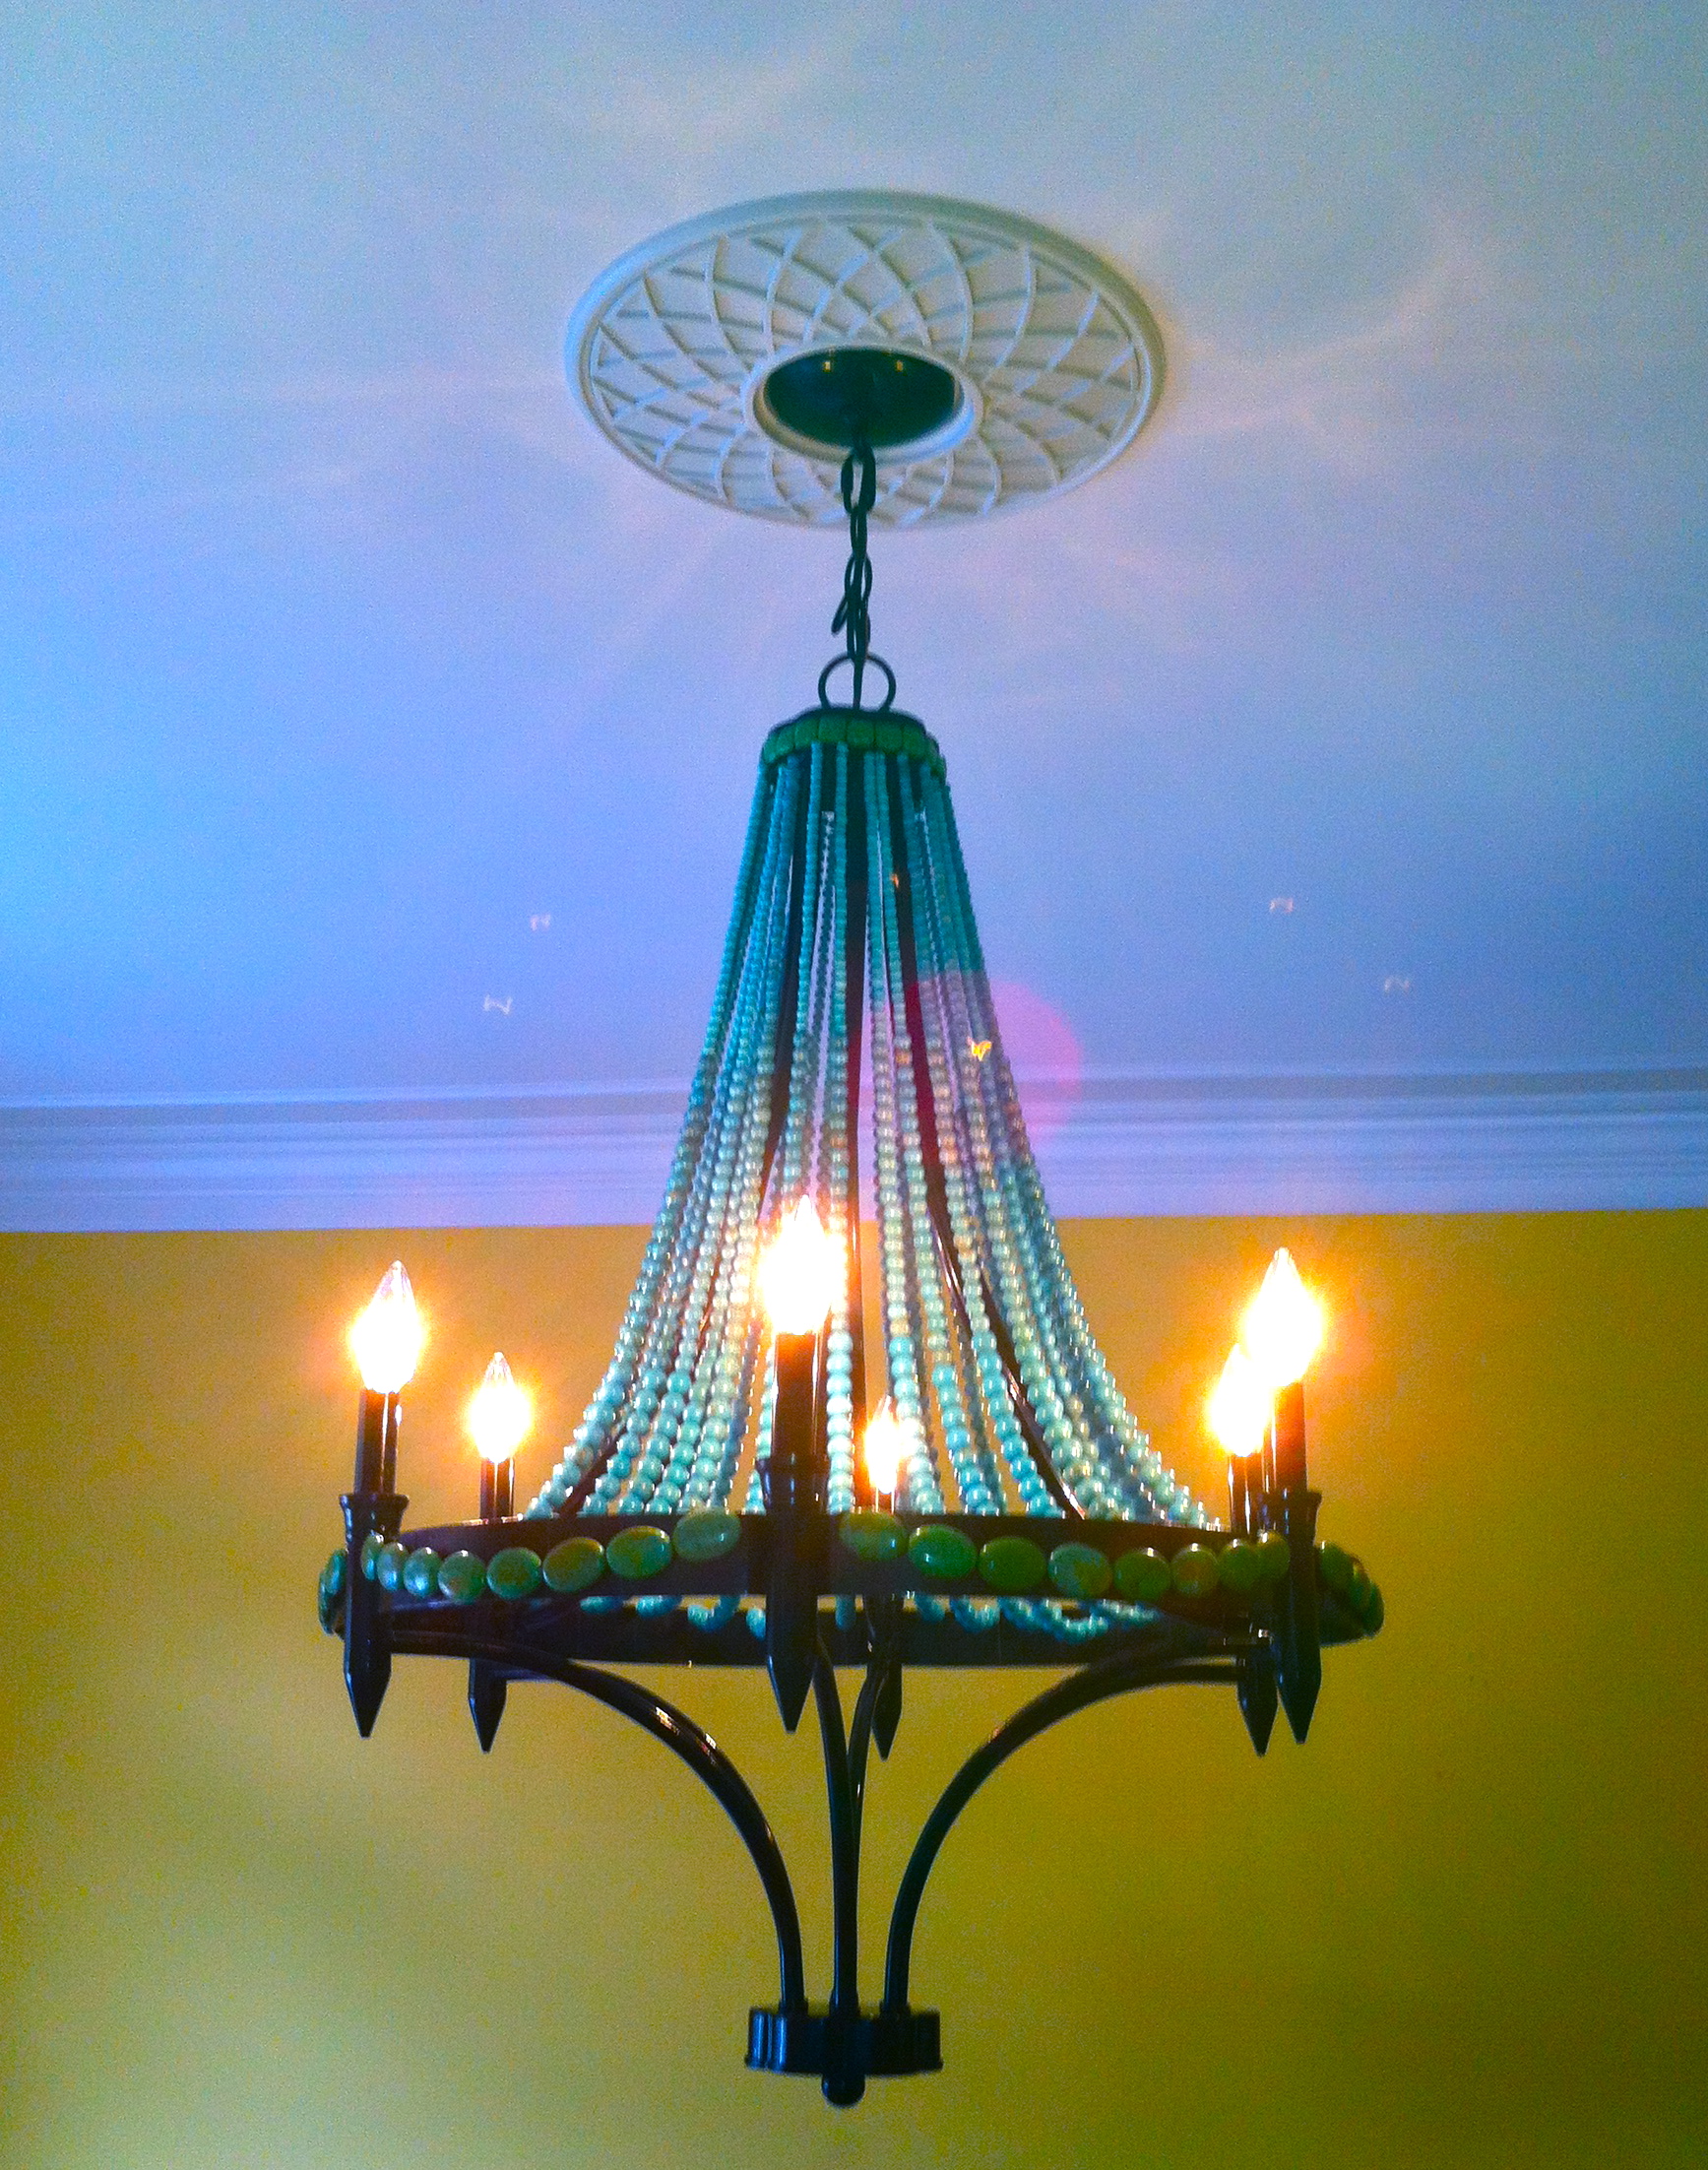
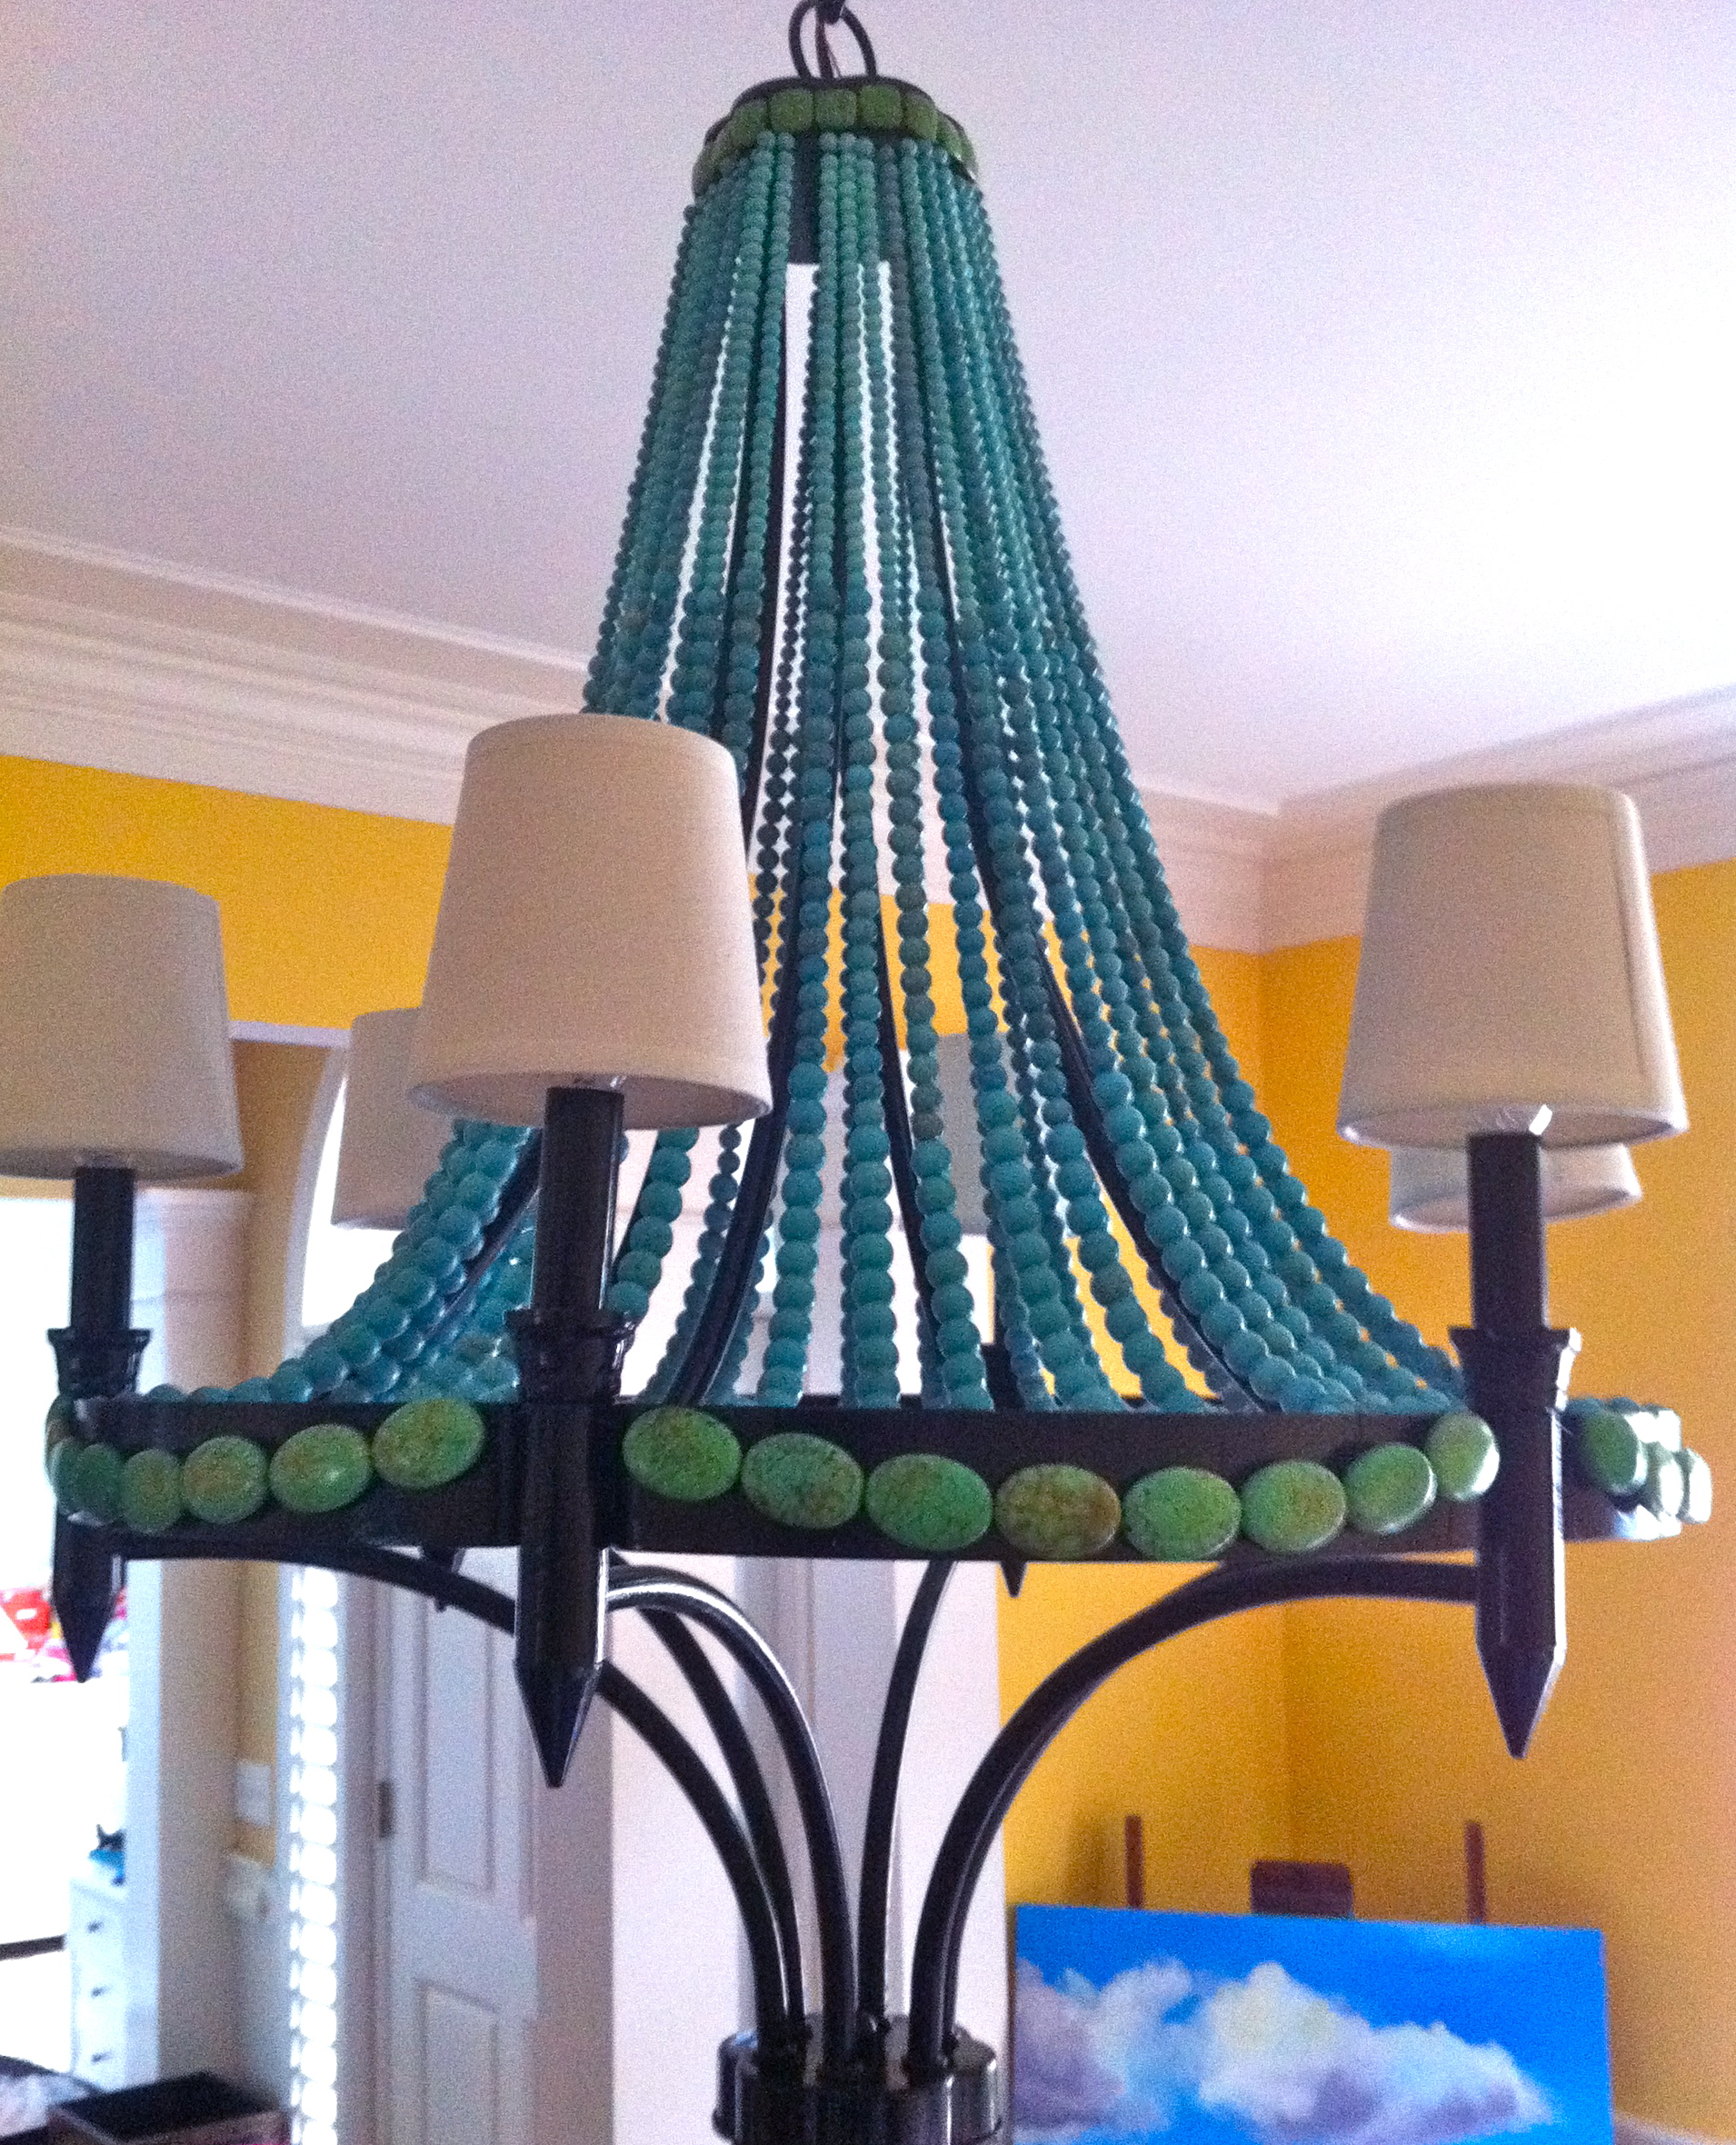
After hanging my newly beaded chandelier I decided to paint the room a pale gray color and I am very happy with the results!


I added the rug to the dining room and I am really liking the contrast between the colors of the rug and the wall color! I have to get rid of the dining table because I have an old quarter-sawn table that I bought a few years ago that I want to put in the room… after I clean off the dust and spider webs!
chandelier, beaded chandelier, beaded lighting, dining room, gray walls, grey, grey dining room, gray dining room, turquoise, blue and gray, green and turquoise, blue and green, dining room makeover, makeover, painting walls, teal dining room
I recently saw this beautiful chandelier on a website and began to think about making a similar one myself, it was approximately $3,500 and that is way over my budget!

So I began looking online for a lighting that would be appropriate for me to bead but I was looking for something that had the lights on the outside of the frame so the beads wouldn’t cover the lightbulbs.
I found this one at Lowes.com and one of the local stores had it in stock so I purchased it so I could measure it to decide the number of beads I needed. That took a lot of measuring because I wanted to make the strands graduated (smaller to larger) and after calculating numerous times I bought the beads from FireMountainGems.com.


Then I waited impatiently for my 27 lb. box of beads to arrive in the mail, they could have arrived the next day and that would have been excruciating because I was so anxious to get started! But of course it took about a week for the beads to arrive and I was so happy to see that box arrive on my doorstep…
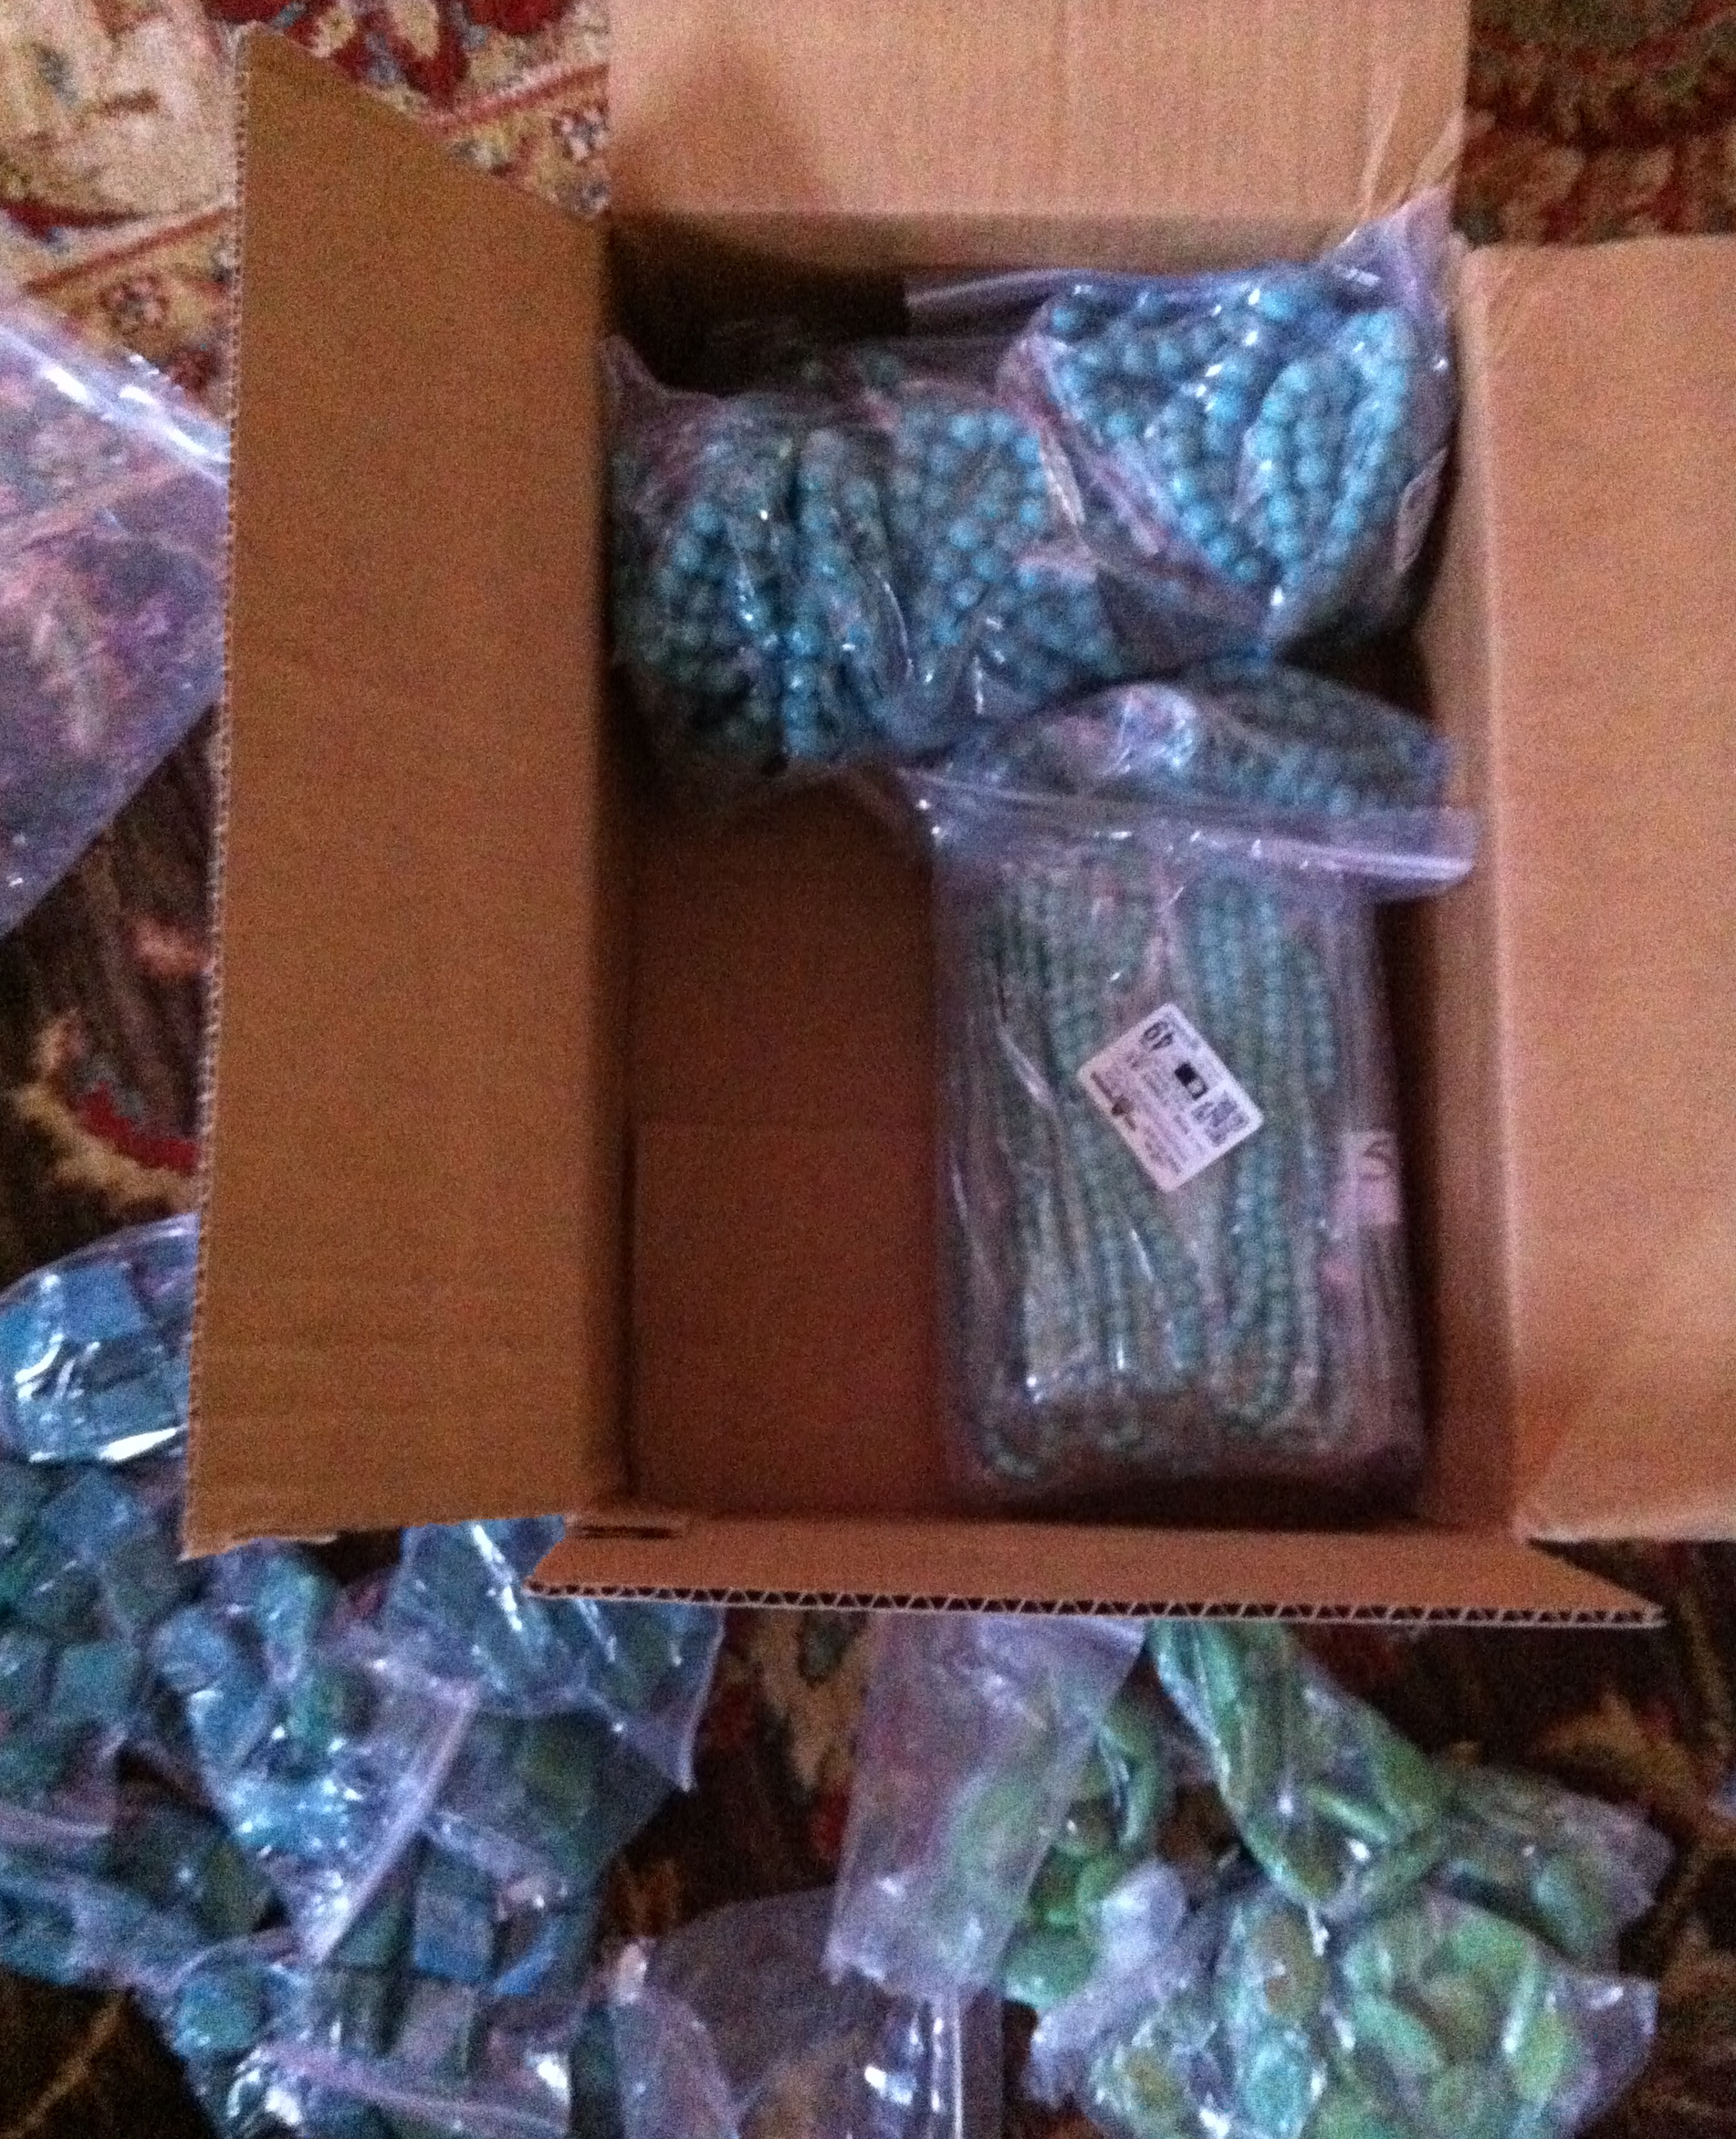
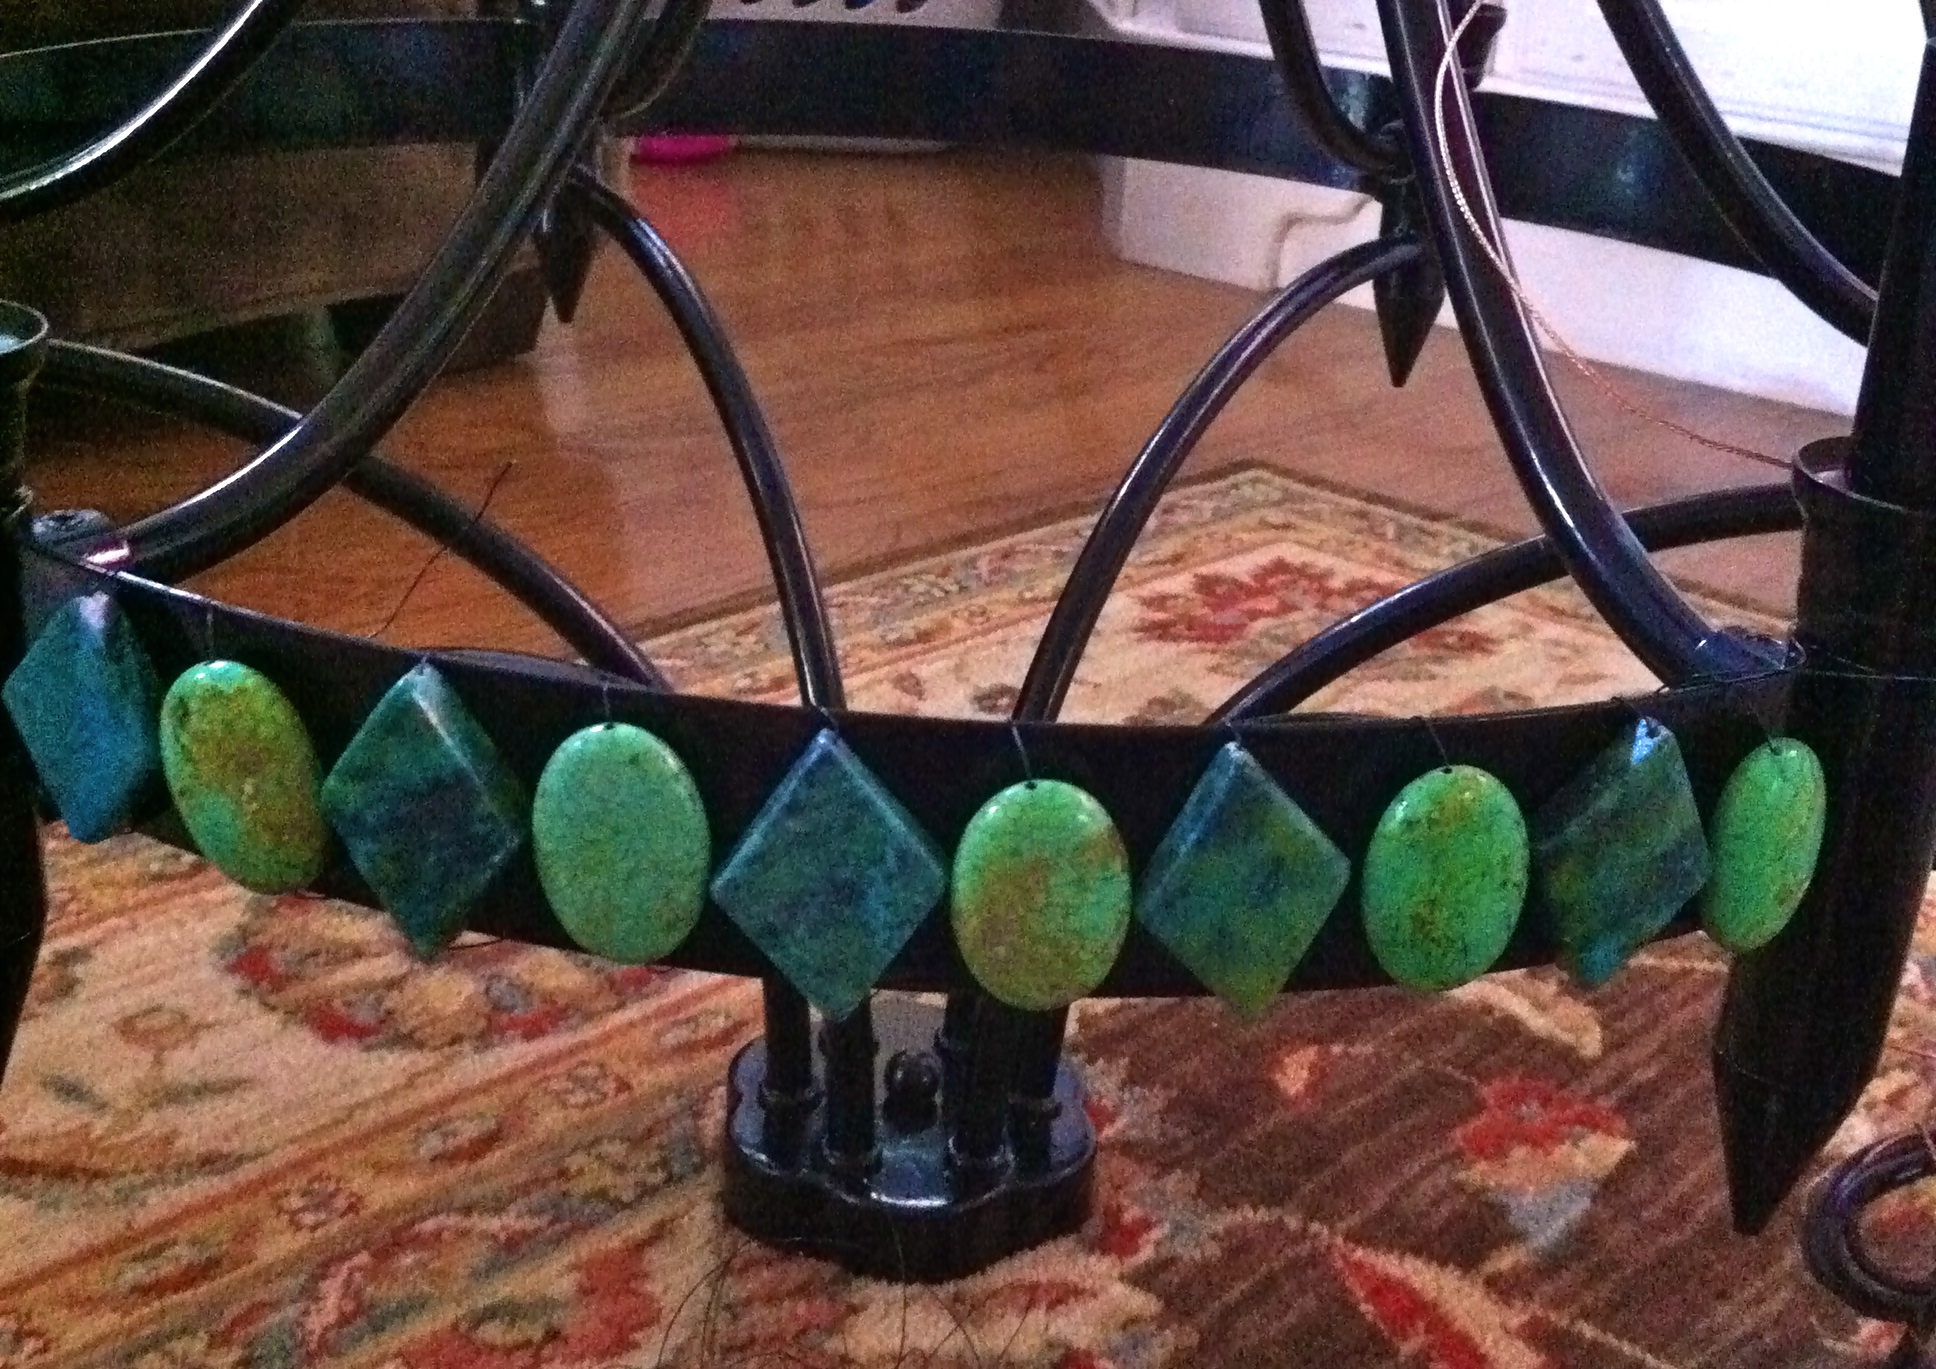
The beads are beautiful shades of turquoise and apple green and I began to experiment with placement…
I liked this but I ended up with something a little different, more on that later. Then the tedious stringing of the beads began. I soon learned why that chandelier I liked costs so much, it is a lot of work!

After about 20+ hours of stringing and some really sore fingers…

I added the apple green beads to the metal bands at the top and the bottom and I realized I liked the chandelier without the beads at the bottom but I wanted to hang it up to make sure. My wonderful husband said he could wire it …

He did a great job! It looks great without the beads at the bottom, I can always add them later but I don’t think it would add to it’s charm. Could be my sore fingers talking.
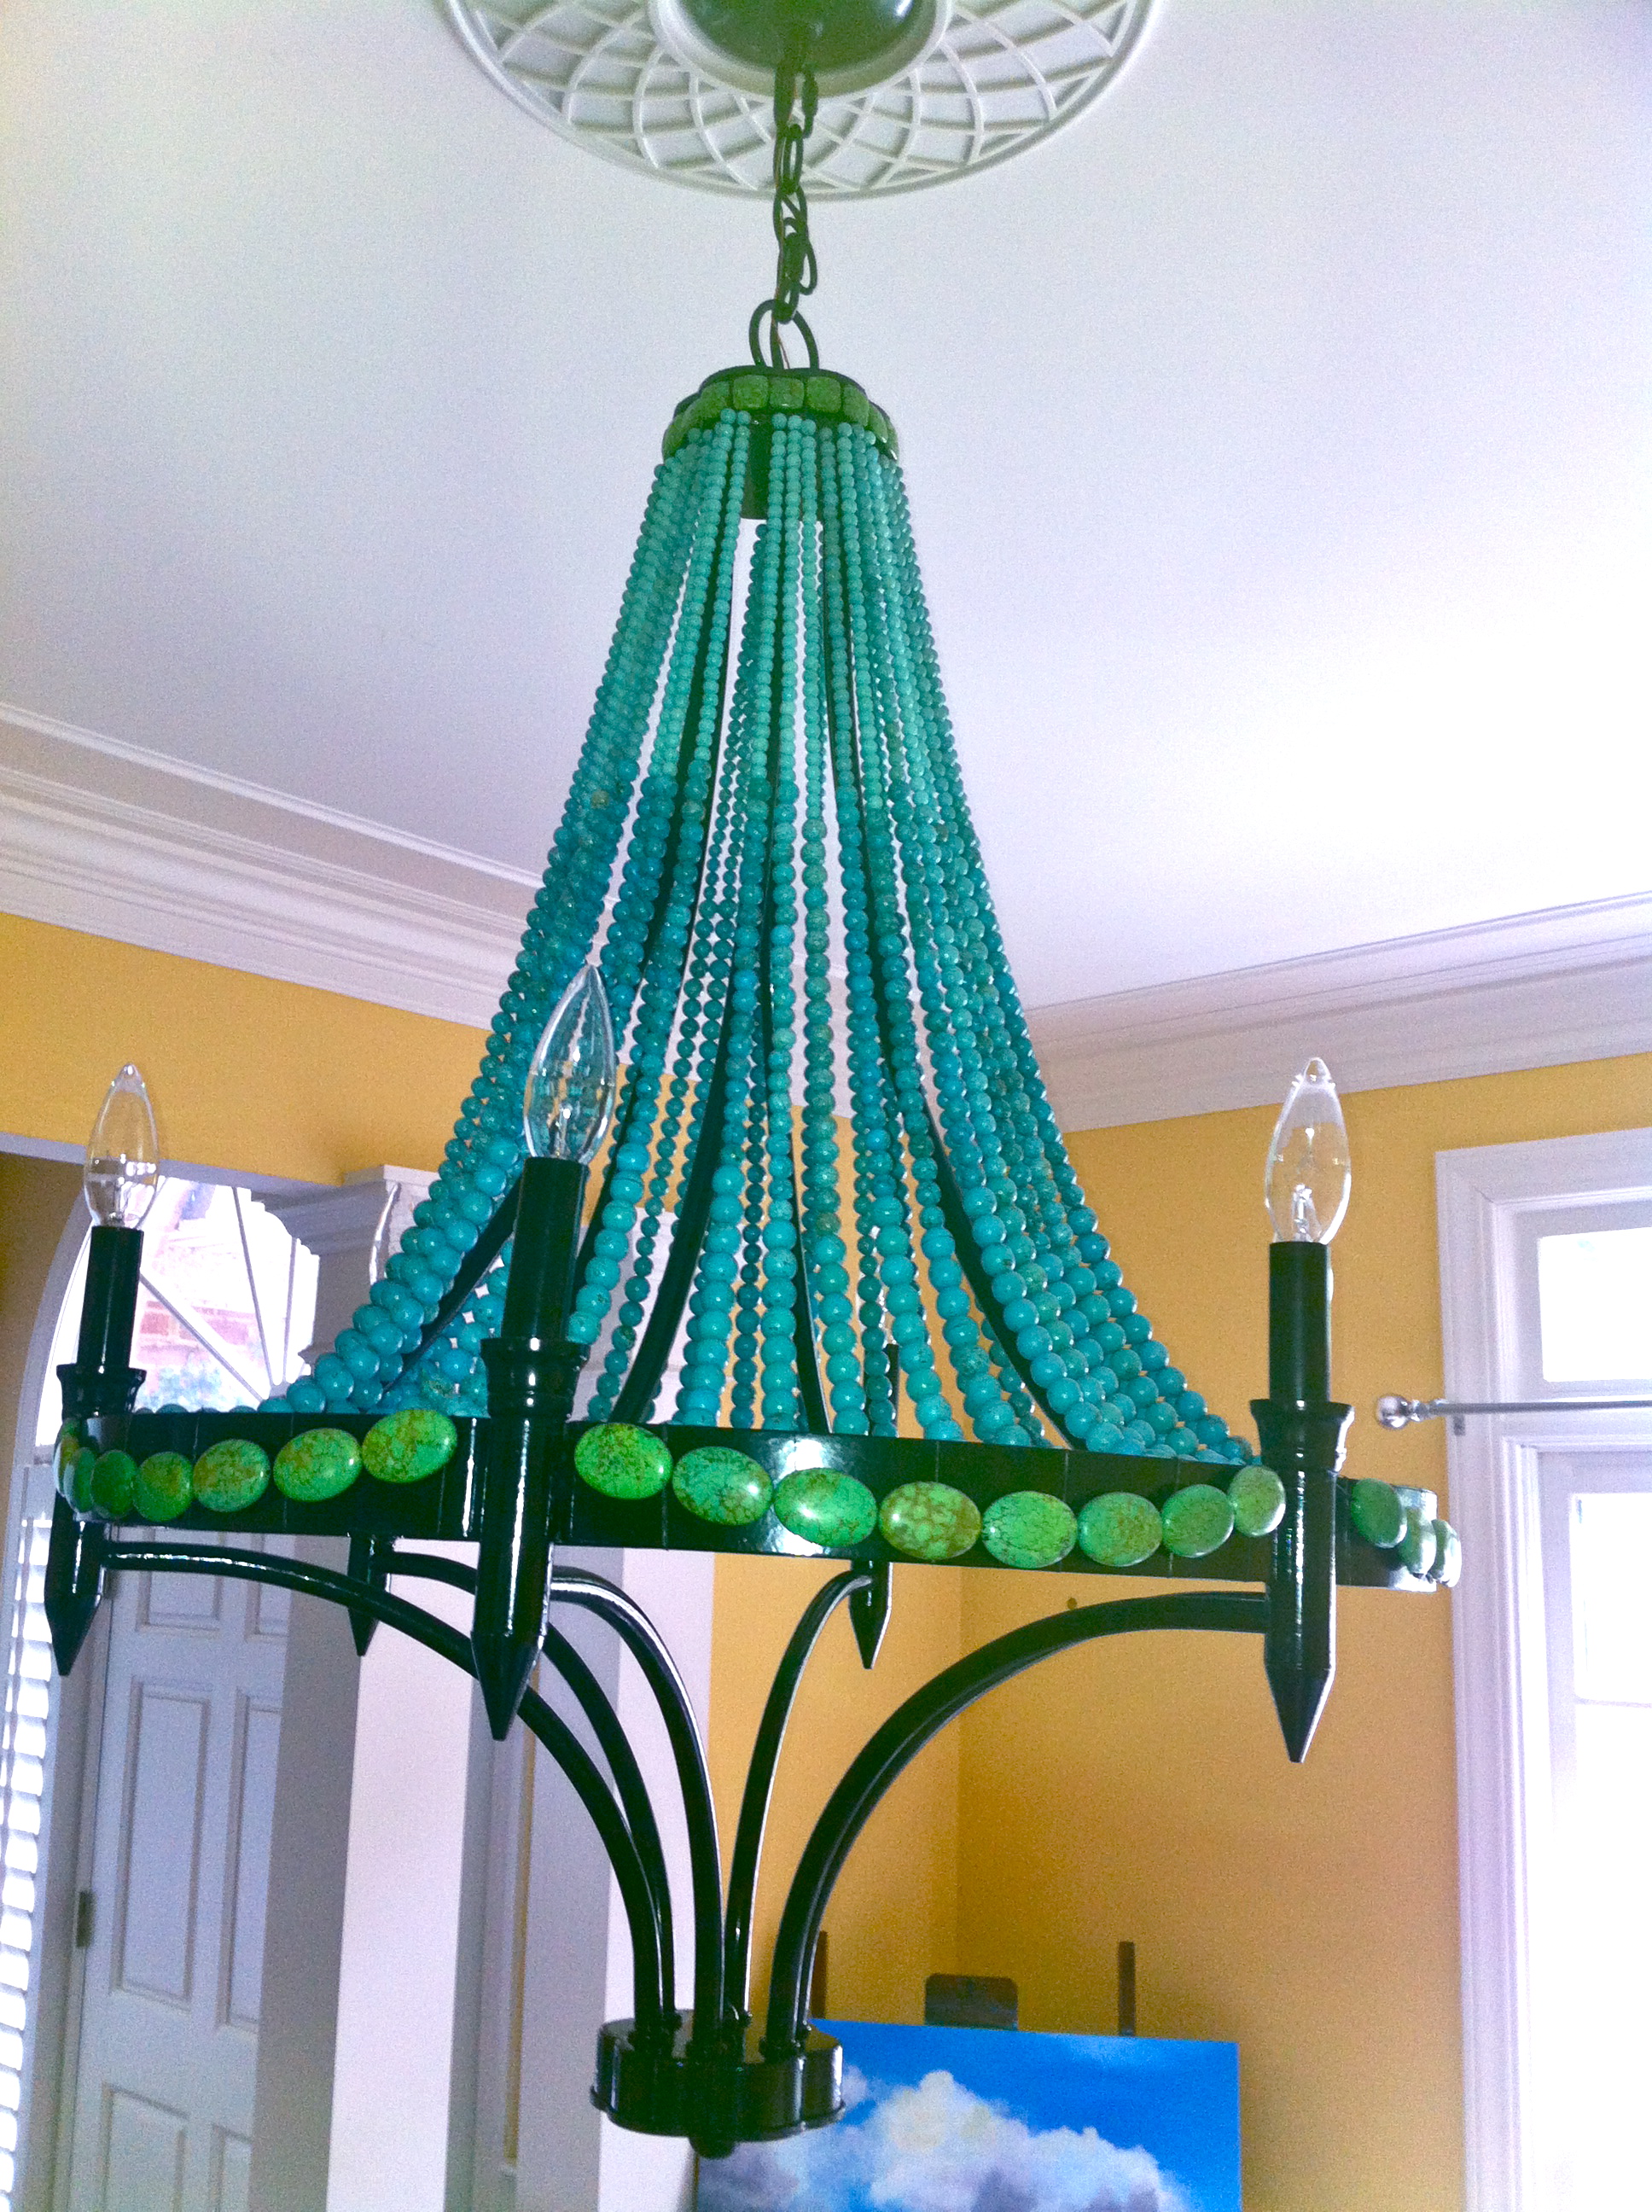
Can’t decide if I like it with or without the shades…

Now to choose paint color for the dining room now that the focal point is up! I bought an antique table a few years ago that I want to dig out and dust off, I think it will look great underneath the light.

That picture was taken before I cut all the strings : )

Create your own design and have it printed on fabric!

Spoonflower: Print custom fabric on-demand.
This is the first coat of Caribbean Splash from Olympic paint. First I removed the door handle, the deadbolt lock, and the kickplate. It kind of looks good with the old red color showing through! I considered leaving it this way but decided to put on a second coat.


This picture (above) is closer to the actual color of the paint, blue is hard to photograph. The second coat makes the door look brighter, maybe a little too bright. I decide to buy some flowers and pots and decorate before I decide if I like it or not. My neighbors George and Ken are obviously dubious about the color but they are more the traditional type : ) My husband Steve is on the fence about it and so am I.
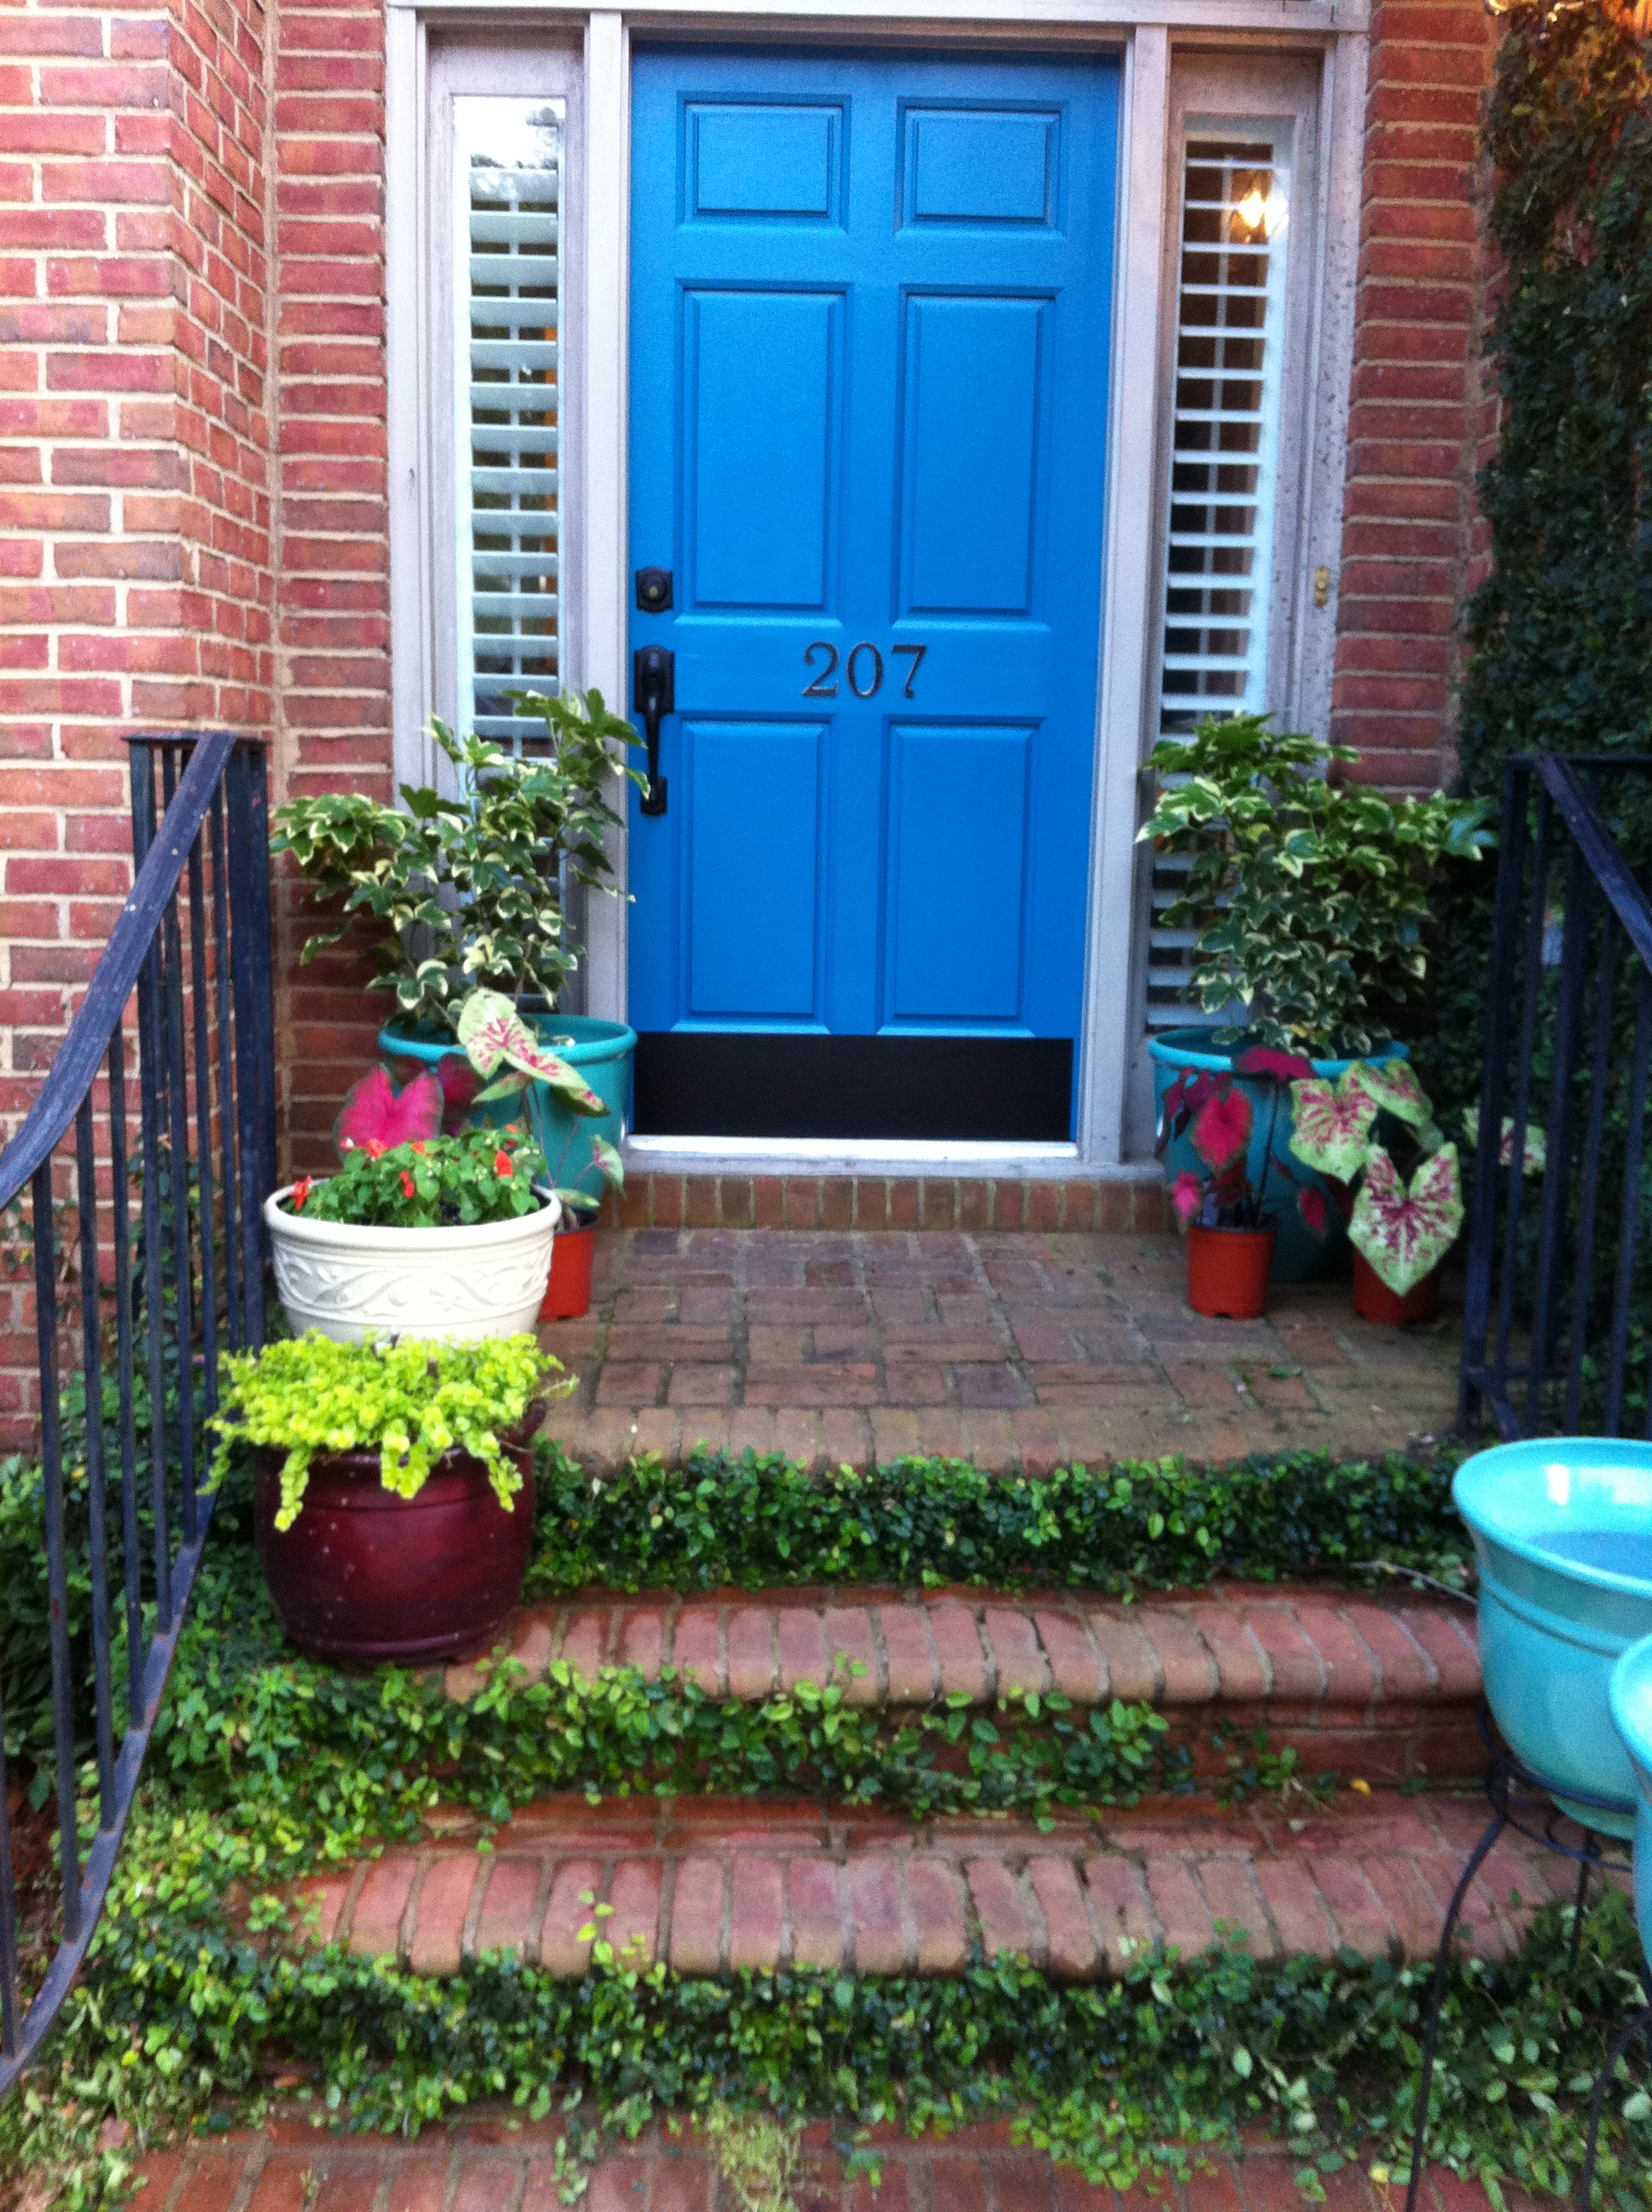
I am going to put a glaze over the door today to darken it up a bit, I wish the photo would show the true color!

I am going to paint my front door today! I finished all the prep work yesterday and bought the paint, which is a dark turquoise color, and I am removing the hardware right now. It has been red for about 10 years now and I saw some beautiful aqua blue pots at Lowe’s and it inspired me to go ahead and paint the door to match the pots. I told you I have ADD!
This great tutorial from the DIY network is very helpful, I have always left the door on the hinges while painting but it is so easy to take it down. That makes it a lot easier to paint and keeps it from hitting the door frame before the paint dries.
How to Paint a Front Door : How-To : DIY Network.
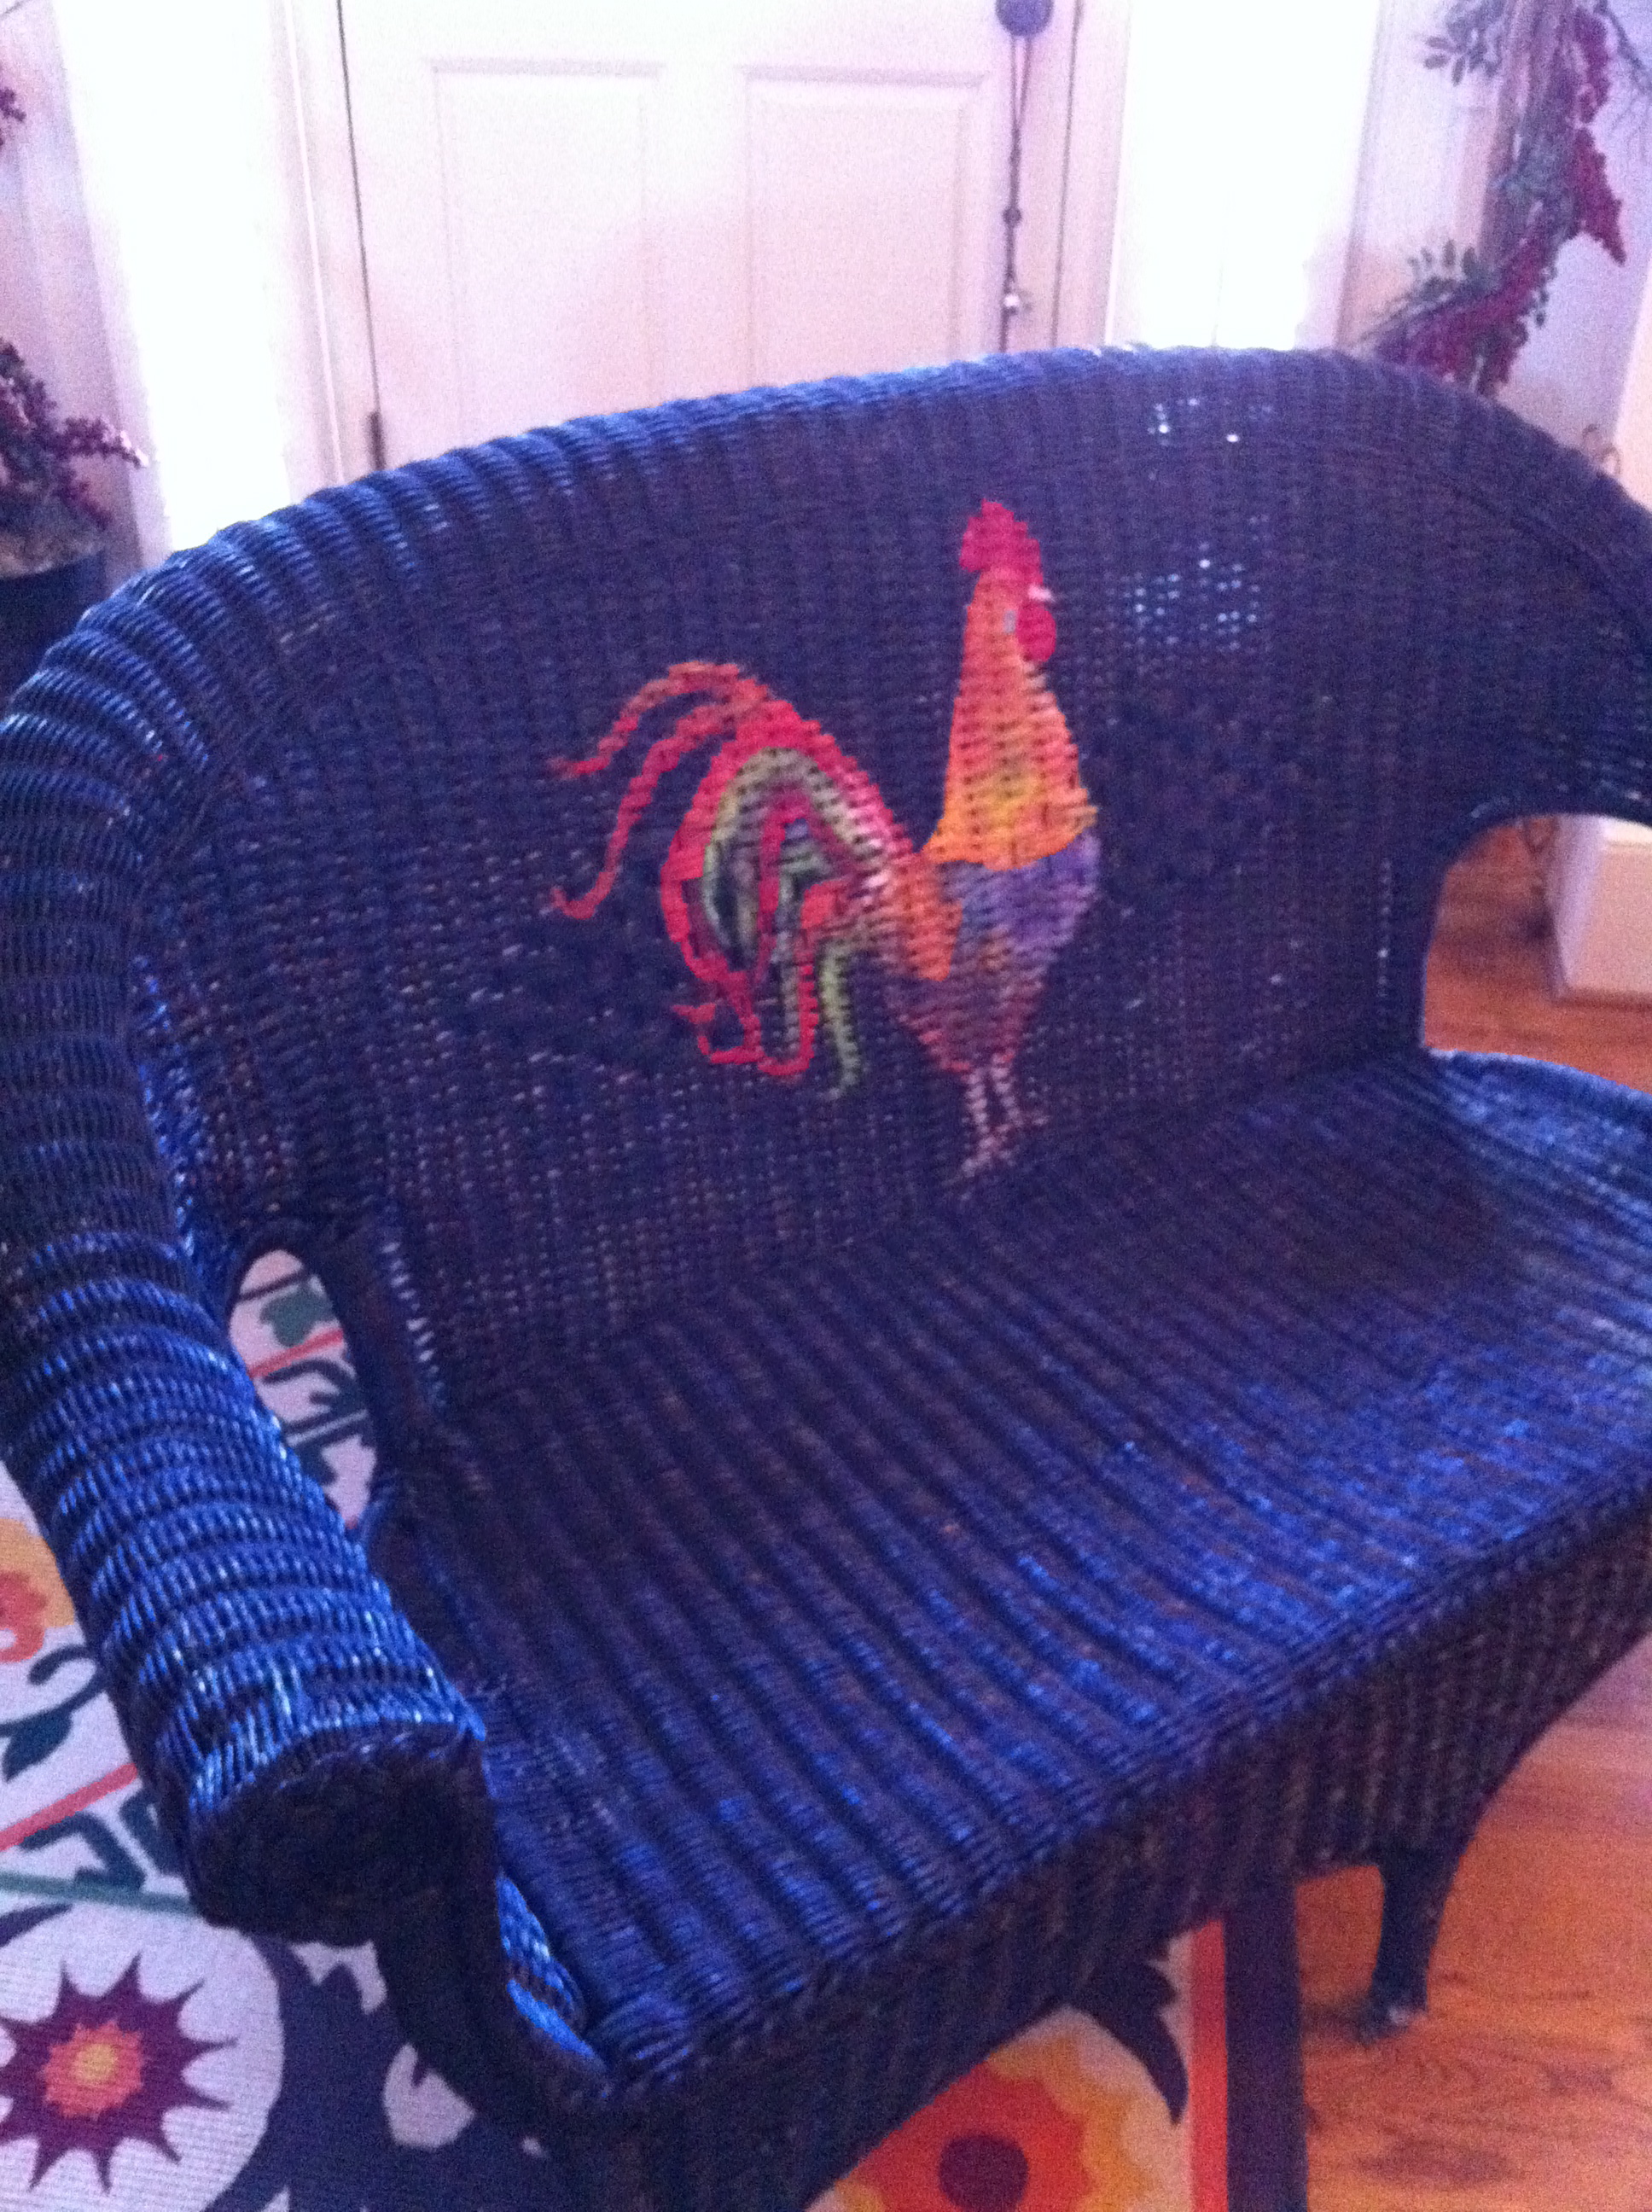
My neighbor asked me to paint a rooster on an old wicker sofa he had spray painted black. I came up with this…